

Version5.0.0 beta
The Main Menu
Overview
Press [MENU] to open the menu. The menu is the PAGE SELECTION screen: the pads choose a page of the current preset, and the buttons lead to the other windows of the controller.
To leave the menu without changing anything, press [MENU] again. In the menu it is labelled BACK.
The menu gives access to:
- Preset selection
- Page selection within the current preset
- Snapshots associated with the current preset
- Captures (recorded MIDI data) for the current preset
- The Preset Menu of the current preset
The Settings window is not in the menu. Hold [MENU] for one second to open it; see Settings.
Preset selection
Presets are stored in slots on the controller. The Mini has five banks of eight slots each, 40 slots in all. Each slot is empty or holds one preset.
Press [MENU], then PRESETS.
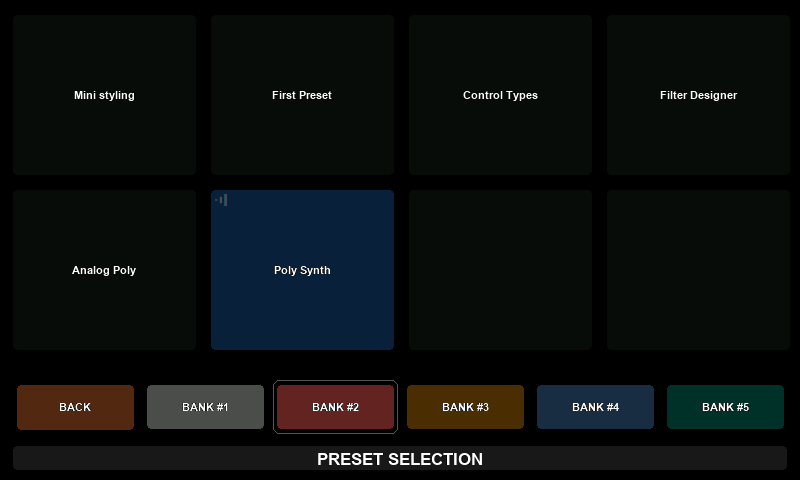
The eight pads show the slots of one bank, arranged like the knobs, with the names of the presets in them.
- Press a knob to load the preset in that slot. The window closes and the preset's page is shown.
- The current preset, the one you are working with, is highlighted in blue. It is highlighted only when its bank is shown. The window opens on the bank you looked at last.
- A small icon in the top-left corner of a pad marks a preset that is running. A pin icon in the top-right corner marks a pinned preset, which keeps running in the background.
The buttons choose the bank:
| Button | Label |
|---|---|
[MENU] | BACK – closes the window |
[CONTEXT] | BANK #1 |
[BUTTON 1] | BANK #2 |
[BUTTON 2] | BANK #3 |
[BUTTON 3] | BANK #4 |
[BUTTON 4] | BANK #5 |
The button of the bank on screen has a light outline. The banks have a colour each, and you can give them names and colours of your own in the Electra One app; see Preset Banks. The names then appear on the buttons.
BACK returns to the preset page, not to the menu. This is true for every window opened from the menu.
Putting a new preset into a slot, and what happens to the files of the preset that was there, is described in Changing and Loading presets.
Page selection
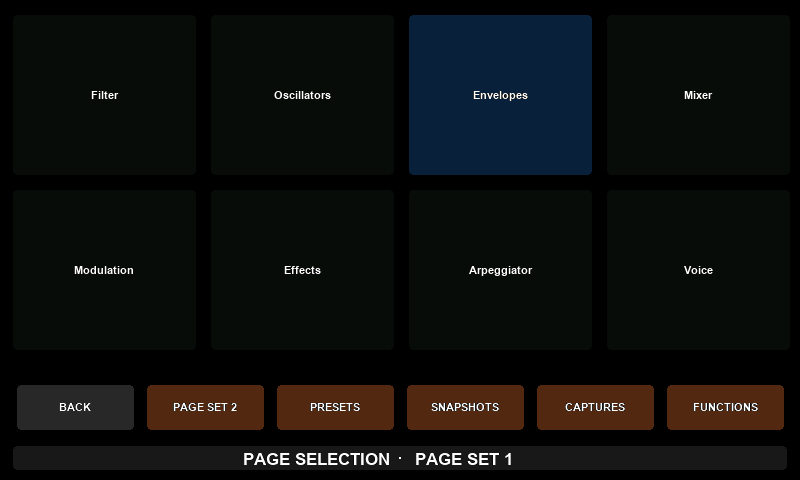
The eight pads show the pages of the current page set, arranged like the knobs. The pad of the current page is highlighted in blue. When you touch a knob, its pad lights up, so you can check your choice before pressing.
- Press a knob to show that page. The menu closes.
- A pad without a name has no page, or its page has no controls or is hidden by the preset. Pressing its knob closes the menu, and the current page stays on the screen.
The buttons, from the left:
| Button | Label | What it does |
|---|---|---|
[MENU] | BACK | closes the menu |
[CONTEXT] | PAGE SET 2 / PAGE SET 1 | shows the other page set |
[BUTTON 1] | PRESETS | opens preset selection |
[BUTTON 2] | SNAPSHOTS | opens the Snapshots window |
[BUTTON 3] | CAPTURES | opens the Captures window |
[BUTTON 4] | FUNCTIONS | opens the Preset Menu |
Page sets
A Mini preset has up to 16 pages, but the menu has only eight pads. Pages 1 to 8 form page set 1, pages 9 to 16 page set 2. The bottom bar shows which set you are looking at, and [CONTEXT] is labelled with the set it switches to.
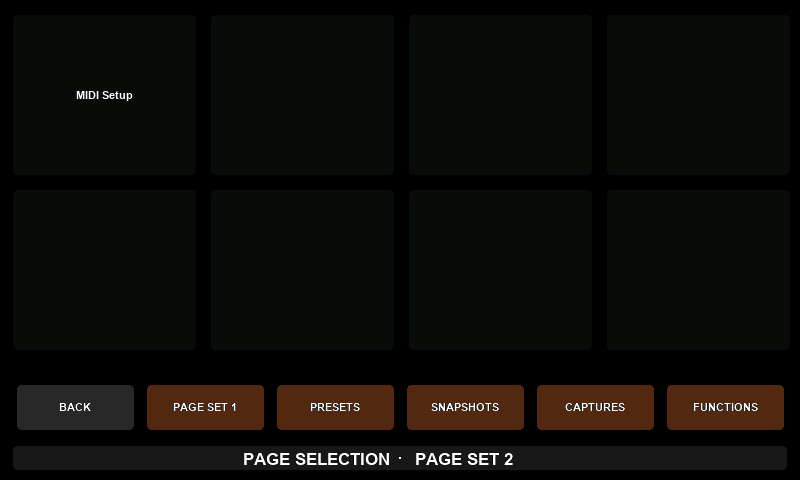
When you open the menu, it shows the set of the current page, or the set you switched to the last time you had the menu open.
Snapshots
A snapshot stores the values of all controls of a preset, so you can return to a sound with one press. This section describes the Snapshots window of Electra One Mini. What snapshots are, how morphing and randomization work and how snapshots are managed in the Electra One app is described in Snapshots in the User Guide.
Snapshots belong to the preset they were saved with. Each preset has 8 banks of 8 slots, room for 64 snapshots.
The Snapshots window
Press [MENU], then SNAPSHOTS. You can also assign Open snapshots to a button; it is on [BUTTON 4] of the Controller context by default.
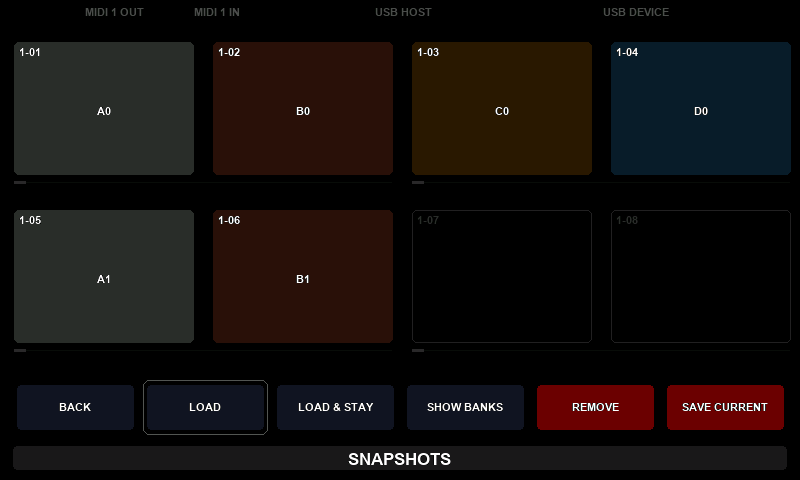
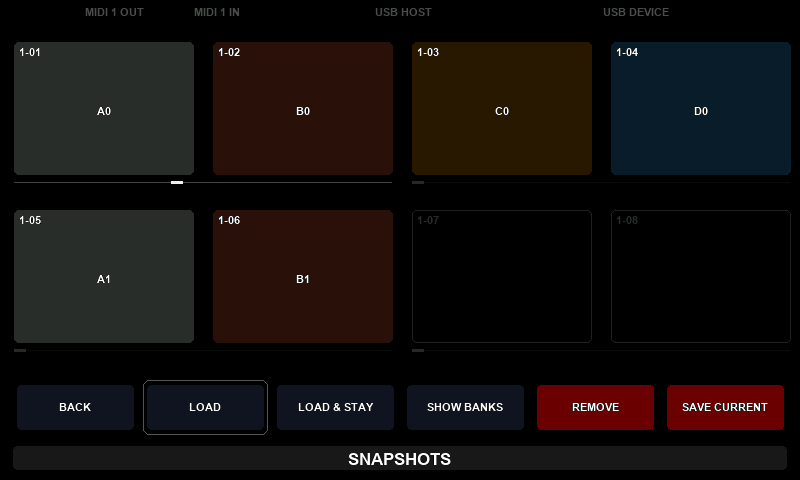
The eight pads are the slots of one bank, arranged like the knobs. Each pad shows its bank and position in the top-left corner, for example 1-05 for the fifth slot of bank 1. A slot with a snapshot is filled with the snapshot's colour and shows its name; an empty slot is only outlined.
Under each pair of slots is a thin line: the morph slider of that pair. See Morphing.
The buttons, from the left:
| Button | Label | What it does |
|---|---|---|
[MENU] | BACK | closes the window |
[CONTEXT] | LOAD | mode: pressing a knob loads the snapshot and closes the window |
[BUTTON 1] | LOAD & STAY | mode: pressing a knob loads the snapshot, and the window stays open |
[BUTTON 2] | SHOW BANKS | opens the bank selection |
[BUTTON 3] | REMOVE | mode: pressing a knob deletes the snapshot |
[BUTTON 4] | SAVE CURRENT | mode: pressing a knob saves the current values into the slot |
LOAD, LOAD & STAY, REMOVE and SAVE CURRENT are modes: the selected mode has a light outline and decides what pressing a knob does. The window always opens in LOAD mode.
Saving a snapshot
- Set the controls to the sound you want to keep.
- Open the Snapshots window and press
SAVE CURRENT. - Press the knob of a slot.
The current values are saved into the slot at once. If the slot already holds a snapshot, it is replaced without asking.
A new snapshot is named after its position in the grid: the letter is the column and the number is the row, so the top row is A0 to D0 and the bottom row A1 to D1. Its colour also follows the column. You can rename and recolour snapshots in the Electra One app, in the Snapshots tab of the preset.
A snapshot keeps the values of the controls that send MIDI. Controls that send nothing are not included.
Loading a snapshot
- Open the Snapshots window. It opens in
LOADmode. - Press the knob of the snapshot.
The controls take the values of the snapshot and send them to your instruments. In LOAD mode the window closes. In LOAD & STAY mode it stays open, so you can try one snapshot after another.
Pressing the knob of an empty slot changes no values. In LOAD mode the window closes all the same.
Removing a snapshot
Press REMOVE, then the knob of the snapshot. The snapshot is deleted at once, without asking.
Banks
Press SHOW BANKS to choose another bank.
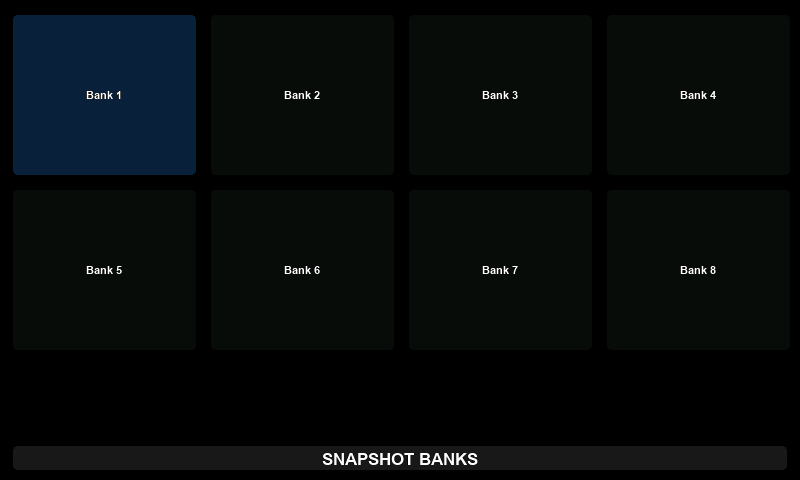
The eight pads are the eight banks. Press a knob to show that bank; you return to the Snapshots window in LOAD mode. Press any button to return without changing the bank.
Banks are named Bank 1 to Bank 8 until you give them names in the Electra One app.
Morphing
The eight slots form four pairs: slots 1 and 2, 3 and 4, 5 and 6, and 7 and 8. Each pair has the knobs of its two slots:
- The left knob of a pair morphs: it blends the values of the two snapshots. Turned fully one way you hear the left snapshot, fully the other way the right snapshot, and in between a mix of the two.
- The right knob of a pair randomizes: each control gets a random value between its values in the two snapshots. The further you turn, the wider the range.
When you touch a knob of a pair, the slider under the pair lights up, and it shows the position of the morph.
Both slots of the pair need a snapshot; otherwise turning the knobs does nothing. Pressing the knobs still works as the mode says, so a morph can be saved: press SAVE CURRENT and press the knob of a free slot.
How morphing and randomization treat each control is explained, with diagrams, in Morphing and Randomization.
The snapshot tool bar
The snapshot tool bar saves variations of a sound one after another, and lets you compare them with the sound you started from.
- Open the Snapshots window and press
SAVE CURRENT. - Hold the knob of a slot for one second. A snapshot already in it is replaced.
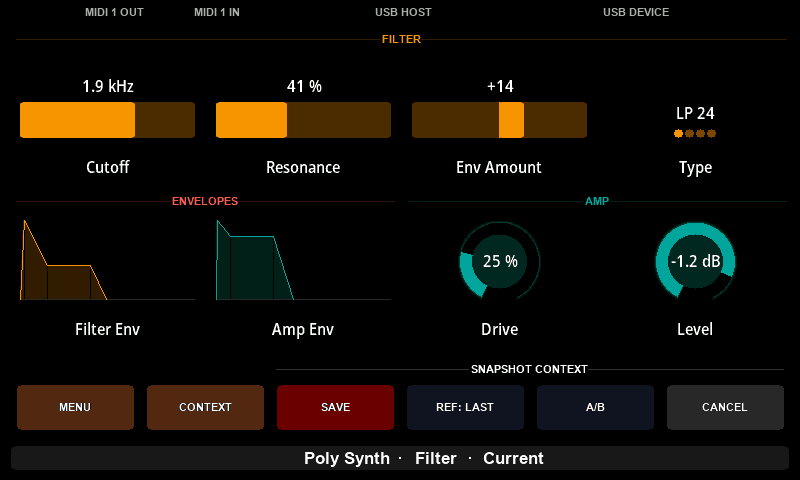
The current sound is saved into that slot, the window closes, and the four buttons become the SNAPSHOT CONTEXT:
| Button | Label | What it does |
|---|---|---|
[BUTTON 1] | SAVE | saves the current sound into the next slot of the bank, replacing a snapshot that is there. After the last slot of the bank, the label is RETAKE: pressing it saves nothing, and the next SAVE writes the first slot after the one you held again. |
[BUTTON 2] | REF: LAST / REF: FIRST | chooses what A/B plays: the variation you saved last, or the slot you held |
[BUTTON 3] | A/B | switches between the reference and your current sound. Press it to hear the reference, and again to return to your sound as you left it. |
[BUTTON 4] | CANCEL | ends the session. The saved snapshots stay, and the controls keep the values they have. |
If you hold the last slot of a bank, the session uses the slots before it, from the first slot of the bank.
Your current sound is whatever you are working on, saved or not. If you turn a knob while A/B plays the reference, the changed sound becomes your current sound, and the next A/B keeps it and plays the reference again.
The bottom bar shows what you are hearing after the preset and page names: A0 First or D3 Last while A/B plays the reference, and Current otherwise. Each save is confirmed there for about two seconds, for example Snapshot D0 saved.
SAVE saves whatever you hear, so pressed while A/B plays the reference, it saves the reference with any changes you made to it. CANCEL leaves the values as they are: press A/B again before CANCEL to return to your sound. Loading another preset, or opening the Snapshots window again, also ends the session.
While the tool bar is active, the knobs work as usual, so you can shape the sound and save it with SAVE every time you like what you hear. [CONTEXT] hides and shows the tool bar, so you can reach the preset's controls on the buttons in between.
Snapshots from MIDI
Snapshots can also be loaded and morphed by MIDI messages from another controller or a DAW. See Recalling snapshots and Morphing and randomizing snapshots.
Captures
A capture is a recording of MIDI messages: the notes you play on a keyboard, a filter sweep you make on the knobs, a pattern from a sequencer or a patch dump from an instrument. Electra One Mini records it with its timing and plays it back. This section describes the Captures window of the Mini. What captures are used for, how playback stays in time and how captures are handled in the Electra One app is described in Captures in the User Guide.
Captures belong to the preset they were recorded with. Each preset has 8 banks of 8 slots, room for 64 captures.
The Captures window
Press [MENU], then CAPTURES. You can also assign Open captures to a button of the Controller context.
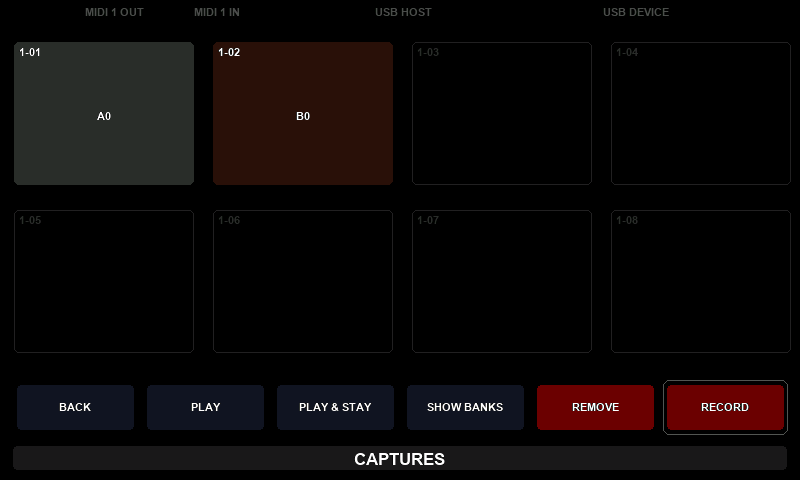
The eight pads are the slots of one bank, arranged like the knobs. A slot with a capture is filled with its colour and shows its name. A loop symbol in the top-right corner marks a capture that repeats.
The buttons, from the left:
| Button | Label | What it does |
|---|---|---|
[MENU] | BACK | closes the window |
[CONTEXT] | PLAY | mode: pressing a knob plays the capture and closes the window |
[BUTTON 1] | PLAY & STAY | mode: pressing a knob plays the capture, and the window stays open |
[BUTTON 2] | SHOW BANKS | opens the bank selection |
[BUTTON 3] | REMOVE | mode: pressing a knob deletes the capture |
[BUTTON 4] | RECORD | mode: pressing a knob records into the slot |
The selected mode has a light outline. The window opens in PLAY mode, or in RECORD mode while a slot of the bank shown is armed for recording.
SHOW BANKS works as in the Snapshots window: press the knob of a bank to show it, or any button to return. After choosing a bank, the window is back in PLAY mode.
Recording a capture
- Open the Captures window and press
RECORD. - Press the knob of a slot. The slot gets a yellow outline: it is armed.
- Play. The recording starts with the first MIDI message that arrives. MIDI clock alone does not start it.
- Press the same knob again, or press
RECORD, to stop. The capture is saved into the slot.
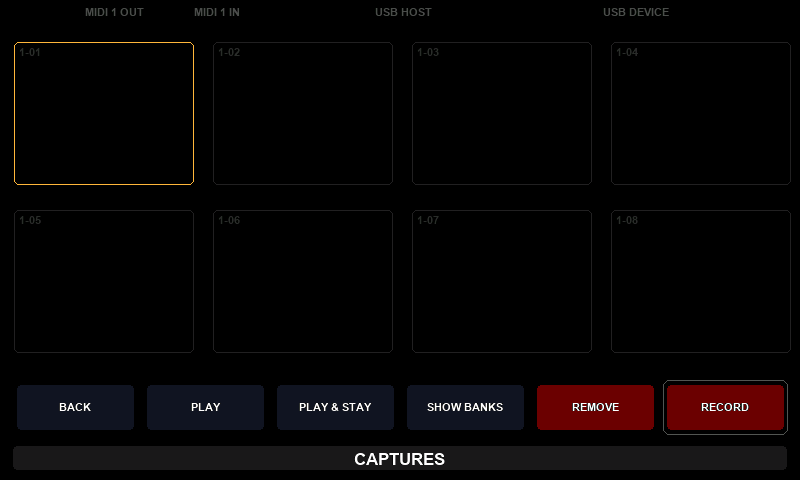
The window stays open while you record, and you can close it with BACK: the recording goes on. When you open the window again, it is in RECORD mode with the slot still armed, and pressing its knob stops the recording.
Pressing the knob of another slot while recording saves the recording and arms the new slot. A recording saved into a slot that holds a capture replaces it.
A new capture is named after its position, as snapshots are: A0 to D0 on the top row, A1 to D1 on the bottom row.
What is recorded
A capture records the messages that arrive at the Mini on its MIDI socket, its USB Host port and from the computer, and the messages the Mini sends itself when you turn its knobs and press its buttons. It keeps notes, controller changes, SysEx and, once the recording is running, MIDI clock.
It leaves out active sensing, the messages of the Electra One app on the CTRL port, and Electra One's own SysEx messages.
A recording can be about 64 KB of MIDI data. When the memory is full, the recording stops and is saved.
Recording with the capture tool bar
The capture tool bar lets you record while the preset page is on the screen, so you can record the moves you make on the controls.
- Open the Captures window and press
RECORD. - Hold the knob of a slot for one second.
The window closes, and the four buttons become the CAPTURE CONTEXT. Nothing is recorded yet: MIDI that arrives before you press RECORD is discarded.
| Button | Label | What it does |
|---|---|---|
[BUTTON 1] | RECORD | starts recording at once. While it records, the label shows the time, such as REC 0:05. Press it again to stop: the capture is saved, the tool bar closes, and the bottom bar shows Capture A0 saved for about two seconds. |
[BUTTON 2] | INTERNAL | records the messages the Mini sends itself: your knob moves and button presses. Lit when on. |
[BUTTON 3] | EXTERNAL | records the messages that arrive at the Mini. Lit when on. |
[BUTTON 4] | CANCEL | stops without saving and closes the tool bar |
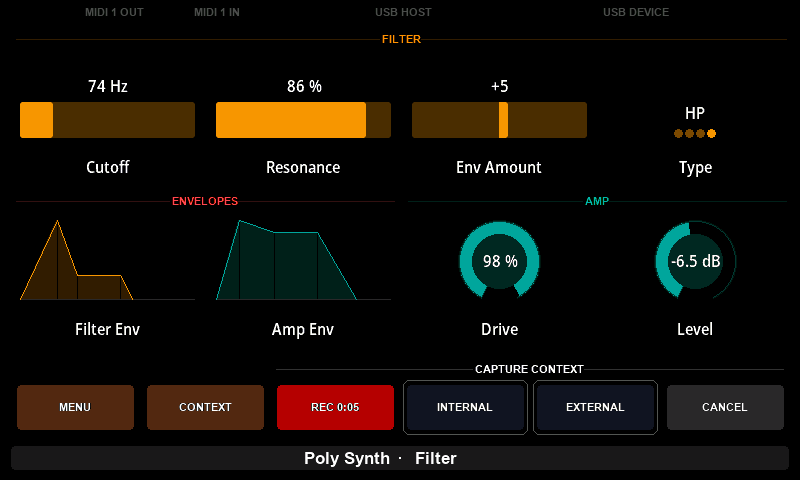
With the tool bar, the recording starts when you press RECORD, not with the first message. [CONTEXT] hides and shows the tool bar.
INTERNAL and EXTERNAL stay as you set them for later recordings, also those started by a knob press, until the controller restarts.
When you press RECORD while other captures are playing, the recording starts in time with them, ends on a whole number of their bars, and is saved as a loop.
Playing a capture
- Open the Captures window. It opens in
PLAYmode; pressPLAY & STAYif you want to start several captures. - Press the knob of a capture.
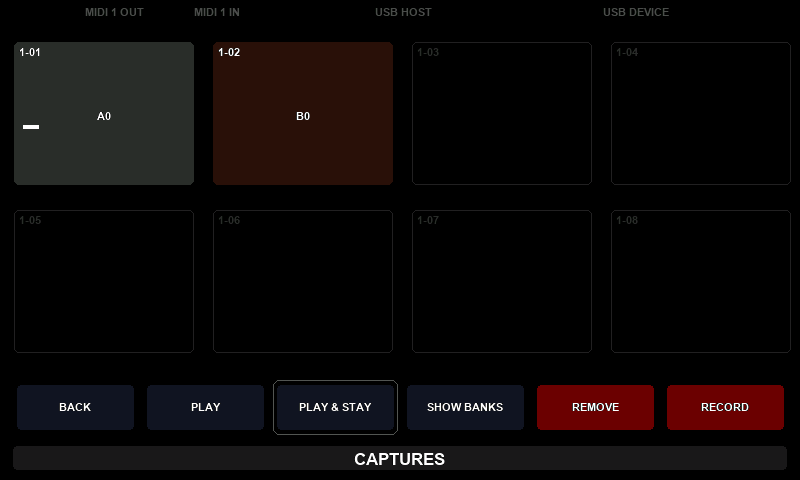
A white bar in the slot shows how far the capture has played.
- Pressing the knob of a playing capture that loops stops it.
- Pressing the knob of a playing capture that does not loop starts it again from the beginning. It stops by itself at its end.
Up to eight captures can play at the same time. A capture started while others are playing waits for the next bar of the capture that started first, so they stay in time. The Mini's Captures window has no button that stops all playback; stop looping captures with their knobs.
Whether a capture loops, the port it plays to and whether it follows MIDI clock are set in the Electra One app.
The messages of a capture also reach the preset, so the controls move with a recorded sweep. See Playback.
Removing a capture
Press REMOVE, then the knob of the capture. The capture is deleted at once, without asking.
Captures from MIDI
Captures can also be started by notes from another controller or a DAW. See Triggering captures.