

Version5.0.0 beta
The Overview
Electra One is built to give you fast, hands-on control over your MIDI gear, with an interface that’s both intuitive and powerful. It combines a touchscreen, 12 high-resolution touch-sensitive knobs, and a set of hardware buttons — all working together to help you adjust parameters, browse presets, manage settings, and access advanced features quickly.
The Electra One user interface revolves around four main elements:
- Color display – shows controls, presets, pages, menus, and configuration screens.
- Touchscreen – lets you interact directly with controls, switch pages, open menus, and adjust settings.
- Buttons – used to change sections, access features like snapshots and patch requests, and navigation or call wide variety of functions.
- Touch-sensitive knobs – provide precise parameter control and are also used to select items in lists, menus, and configuration screens.
Optionally, you can use external MIDI controllers to expand the number of available buttons and knobs. The chapter Settings explains how to set up and use that feature in detail.
In addition to its two standard MIDI IN and two MIDI OUT ports, Electra One also functions as both a USB host and a USB MIDI interface with MIDI routing capabilities, making it a powerful central hub for your entire music production setup.
Default configuration
We’ll begin with Electra One in its default configuration, which makes it easier to get familiar with how the device works. Later, you’ll learn how to customize the controller to suit your needs. The default setup defines the behavior of the hardware buttons and how screen touches are handled.
The chapters of this manual
| Chapter | What it covers |
|---|---|
| Overview | the panels, the display, connecting Electra One, working with controls, recovery |
| The Main Menu | preset and page selection, devices, snapshots, captures, the router, USB Host, reboot and sleep |
| Settings | the Settings window: interface, preset banks, remote knobs, MIDI control, buttons and system |
| Performance | the extra page a preset can have, with references and macros |
| Preset Menu | actions for the loaded preset: defaults, randomize, restart, pinning, user functions |
| DAWs & Integrations | scripts and plug-ins that connect Electra One to other software |
| The Bootloader | the low-level application that starts the controller and updates the firmware |
| Firmware update | updating the firmware |
Panel layout and connectors
Front panel
The front panel is where you interact with Electra One.
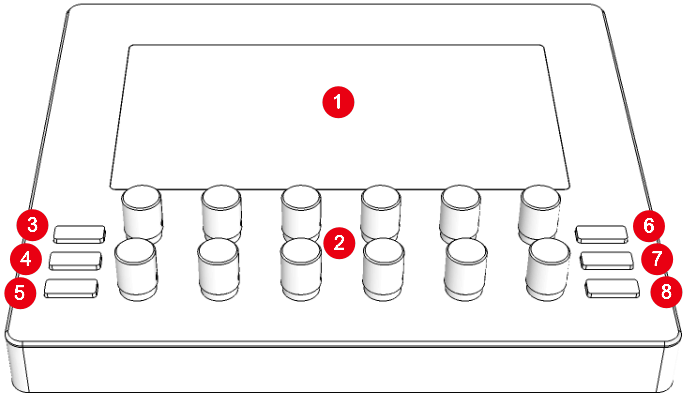
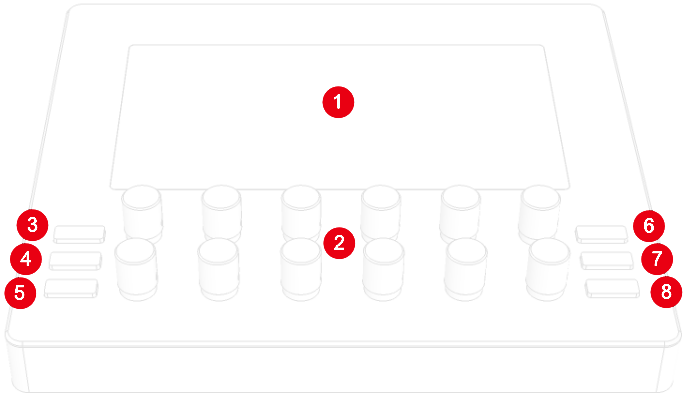
- Touch-sensitive display – the main screen for interacting with controls, menus, and system features
- Touch-sensitive 360-degree knobs - labeled
KNOB1(top-left) toKNOB12(bottom-right), used for adjusting parameter values [LEFT-TOP]button[LEFT-MIDDLE]button[LEFT-BOTTOM]button[RIGHT-TOP]button[RIGHT-MIDDLE]button[RIGHT-BOTTOM]button
In default configuration the buttons provide the following functions:
[SECTION 1]button – activates the top row of control assignments[SECTION 2]button – activates the middle row of control assignments[SECTION 3]button – activates the bottom row of control assignments[PATCH REQUEST]button – sends patch request messages to connected devices[SNAPSHOTS]button – opens the snapshot management screen[MENU]button – opens the system menu for configuration and advanced options
You can customize all button actions in the controller’s configuration settings to better fit your workflow.
Rear panel
The rear panel is where you connect Electra One to your computer and other MIDI gear. It also includes buttons for resetting the device and initiating a firmware update.
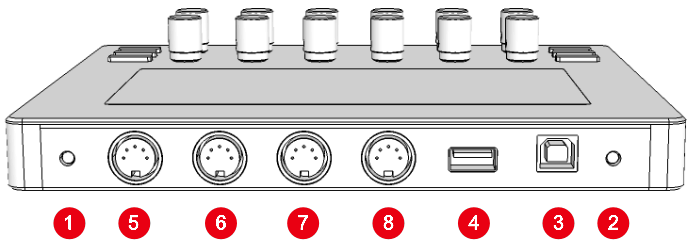
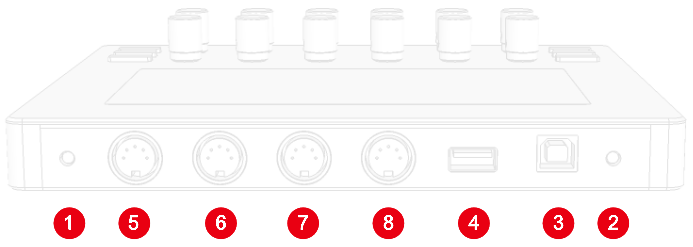
[UPDATE]button – puts the controller into firmware update mode[RESET]button – performs a hardware reset<USB DEVICE>port - connects Electra One to your computer as a USB MIDI interface<USB HOST>port – connects USB MIDI devices (e.g. synths, controllers) directly to Electra One<MIDI 2 IN>port – standard 5-pin DIN MIDI input (Port 2)<MIDI 2 OUT>port – standard 5-pin DIN MIDI output (Port 2)<MIDI 1 IN>port – standard 5-pin DIN MIDI input (Port 1)<MIDI 1 OUT>port – standard 5-pin DIN MIDI output (Port 1)
Ports <MIDI 1 OUT>, <MIDI 1 IN>, <MIDI 2 OUT>, <MIDI 2 IN> are often referred as to <MIDI IO>
Display layout
The display is where all the magic happens. It shows the controls assigned to your synthesizer parameters, based on the currently loaded preset.
In addition to control elements, the display also provides useful system information, such as:
- Port activity (MIDI data in/out).
- The currently selected preset, page, and active control set.
- Current mode (e.g. Alt mode, MIDI learn, etc.)
Controls are typically arranged in a 6 × 6 grid, giving you access to up to 36 controls per page. However, more advanced presets may override this layout to suit specific use cases.
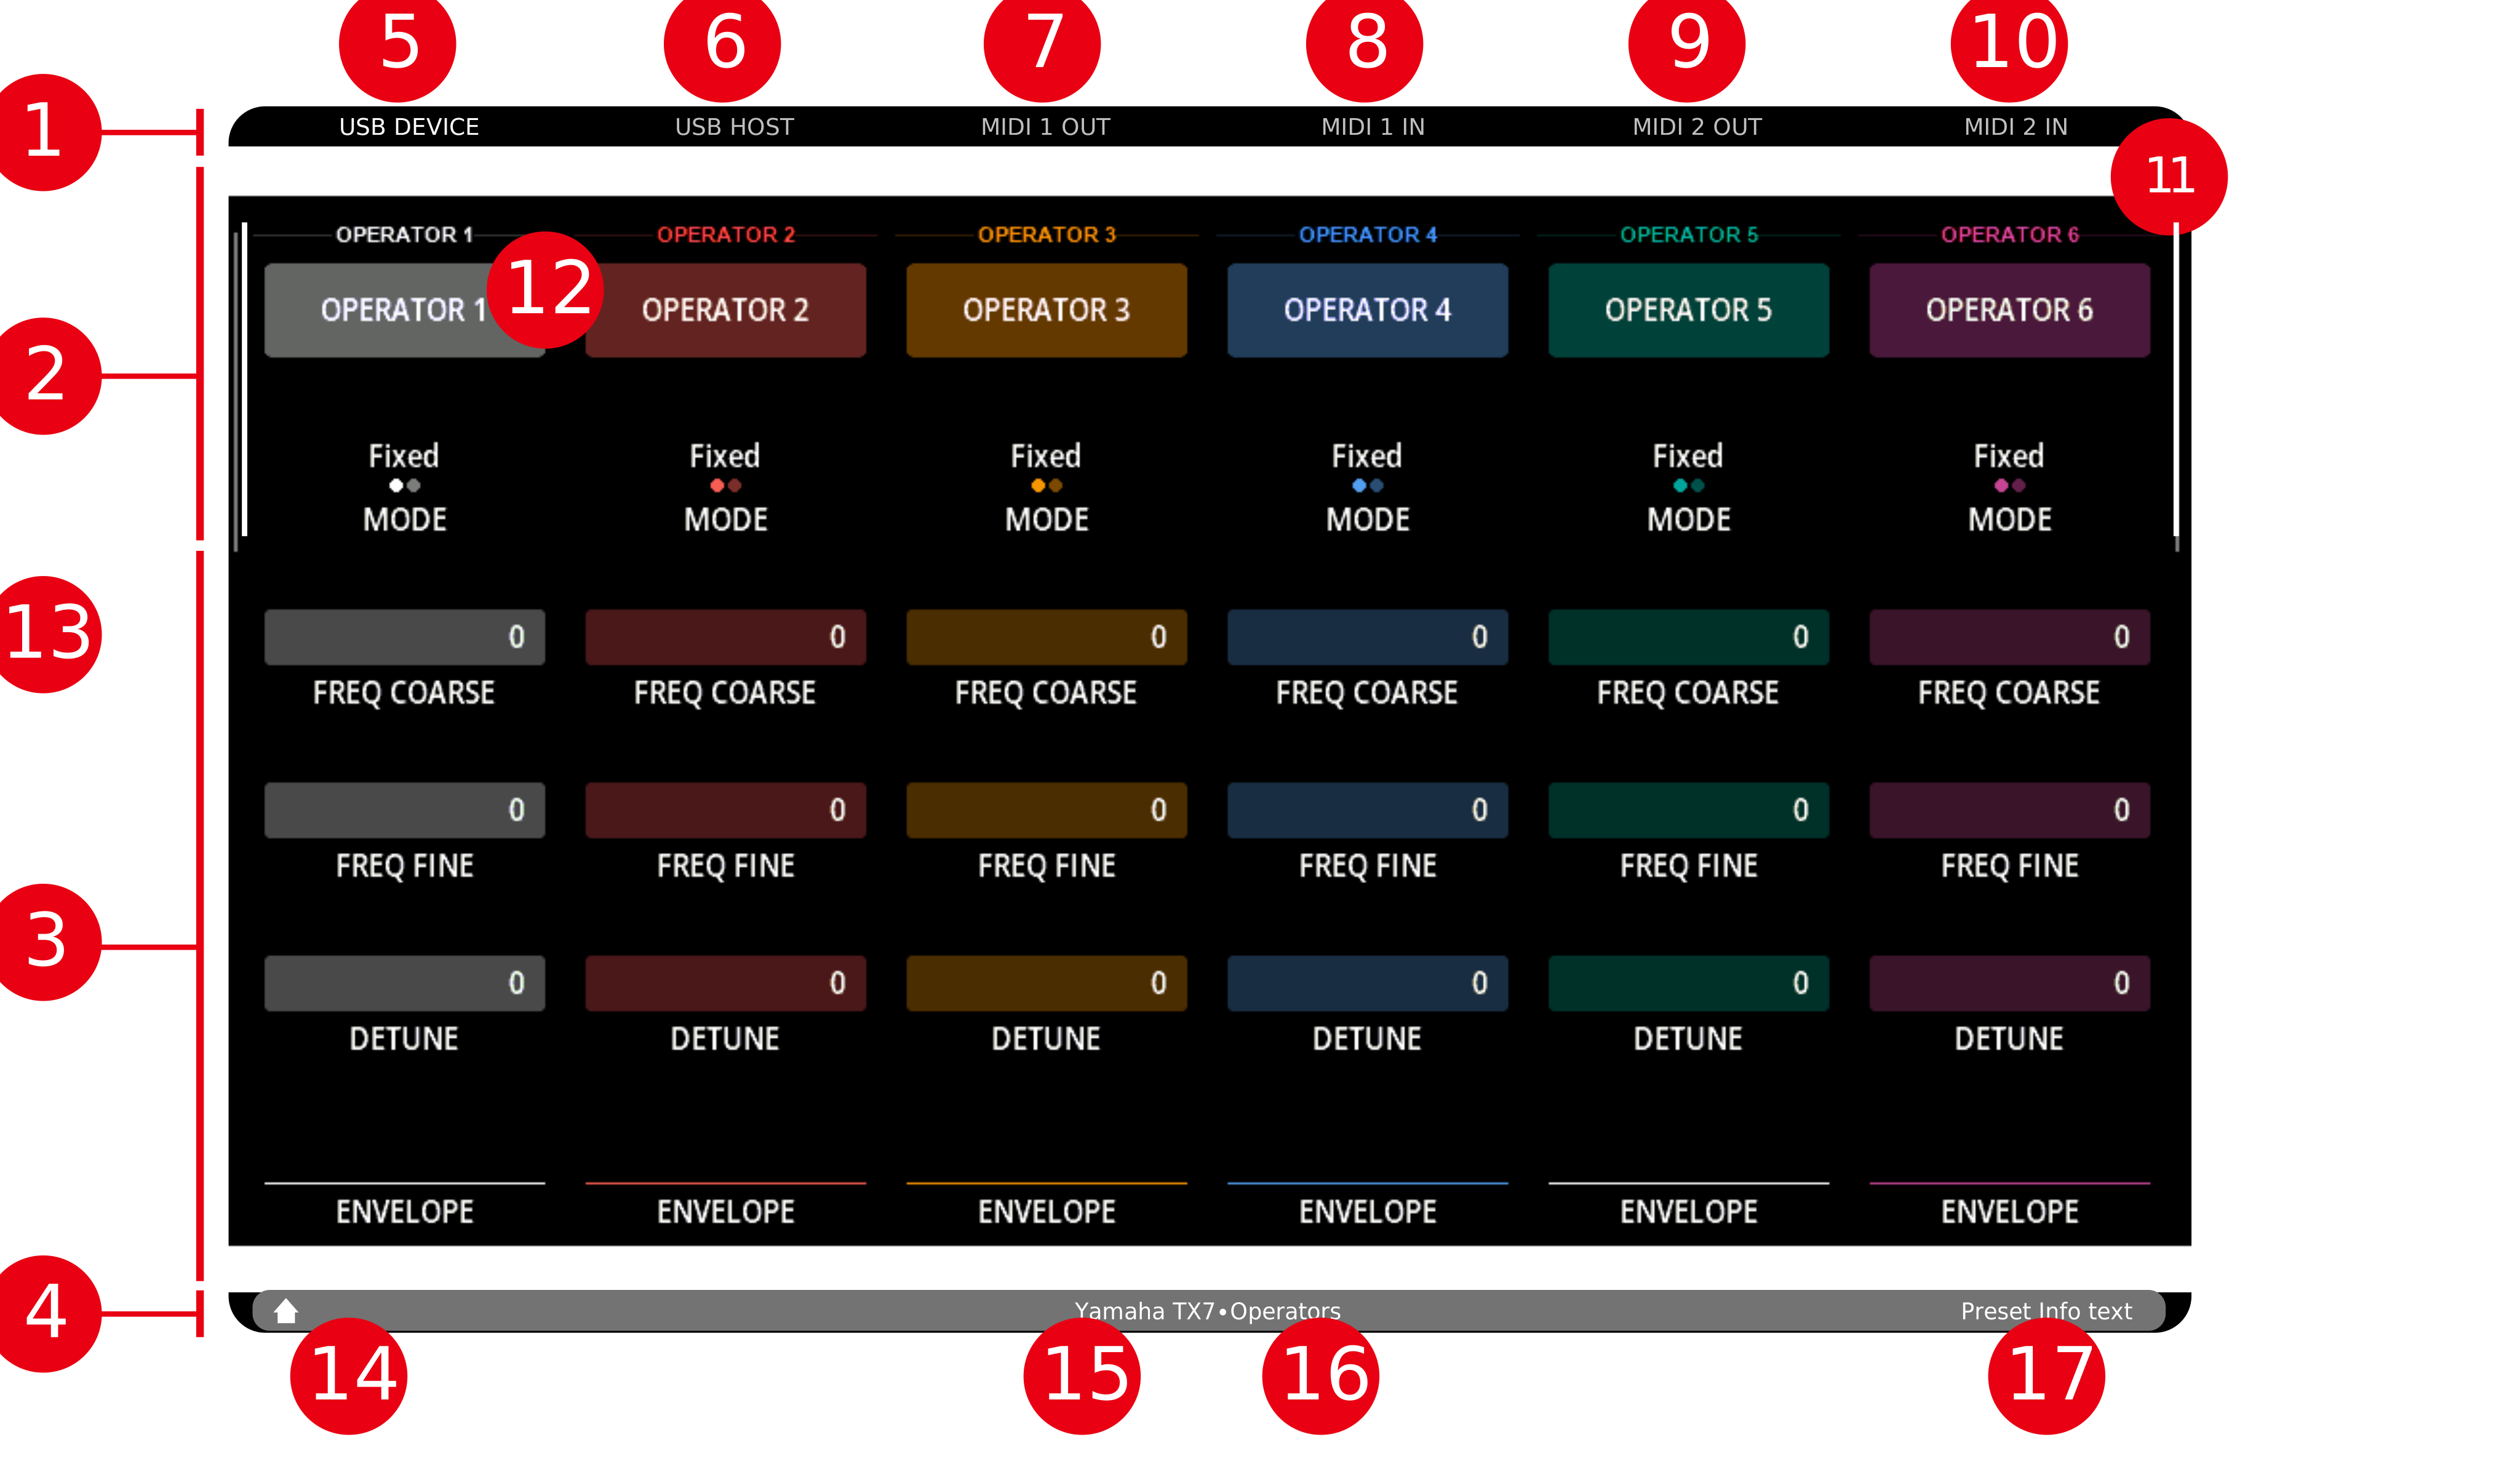
- Status bar with MIDI port activity indicators
- Active section of controls
- Inactive sections of controls
- Bottom bar with the preset name and current page name
- Indicator of activity on
<USB DEVICE>port - Devices connected to
<USB HOST>port and indicator of activity - Indicator of activity on
<MIDI 1 OUT>port - Indicator of activity on
<MIDI 1 IN>port - Indicator of activity on
<MIDI 2 OUT>port - Indicator of activity on
<MIDI 2 IN>port - Group of Controls
- List Control
- Fader Control
- Mode indicators
- Preset name
- Current page name
- Optional info text defined by the preset
The Status bar
The status bar is located at the top of the display and provides real-time information about all MIDI ports: the USB Device port, connected USB Host devices, and MIDI IO ports.

The layout of the status bar mirrors the physical location of the ports on the back of the controller, making it easy to understand what's happening at a glance. MIDI activity is shown by flashing indicators on the corresponding port labels.
USB Device port
The leftmost item on the status bar shows the status and MIDI activity of the <USB DEVICE> port — that is, the communication between the controller and the computer.

USB Host devices
USB Host devices displays information about MIDI USB devices connected to Electra’s USB Host port. The MIDI USB devices are identified by their “Product name”. It means that when a USB device is connected to the <USB HOST> port, its name is shown.

Up to two USB MIDI devices can be connected using a standard USB hub. When two devices are connected, the label will read "2 HOST DEVICES".
MIDI IO ports
These indicators represent the two MIDI IN and OUT DIN-5 ports on the rear panel (referred to as <MIDI IO>). The labels flash when MIDI data is being received or transmitted through these ports.

MIDI clock
A small triangle beside a port label shows where MIDI clock is travelling.
 | Pointing down - MIDI clock is arriving on this port, and it is the clock the controller follows. |
 | Pointing up - MIDI clock is leaving through this port. |
The triangle beats with the tempo: it switches between grey and dark grey on every beat, so at 120 BPM it changes twice a second.
Clock leaving a port is marked whatever sends it - the router forwarding clock from another port, a preset's Lua script, or the controller's own clock. With a sequencer connected to the USB Host port and the router forwarding it to the USB Device port, the USB Host label points down and the USB Device label points up.
The USB ports carry MIDI both ways, so their labels can show either triangle. When clock both arrives on and leaves through the same USB port, the label shows the clock arriving. The triangle on a port that was sending goes out about half a second after the clock stops; the one on a port that was receiving, a couple of seconds after.
A thin amber line under the status bar means that the Lua debugger of the Preset Editor is attached. It turns red while the script is stopped at a breakpoint.
Active Control Set
Electra’s display can show up to 36 controls on a single page, but there are only twelve physical knobs. To make all controls easily accessible, the screen is divided into three sets — each containing up to twelve controls.
Only one set can be active at a time. The controls in the active control set are mapped to the twelve physical knobs, meaning that turning a knob will adjust the corresponding control’s value.
In default configuration, the active control set is selected using the three buttons on the left side of the controller:

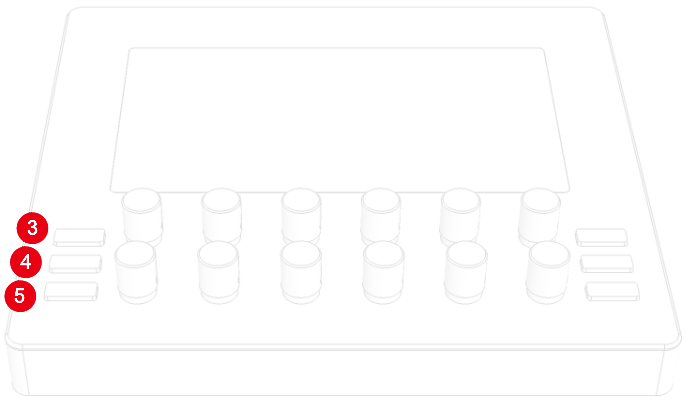
- Button 3, referred to as
[SECTION 1], activates the top set. - Button 4, referred to as
[SECTION 2], activates the middle set. - Button 5, referred to as
[SECTION 3], activates the bottom set.
The active control set is indicated by white bars along the left and right edges of the screen. These visual indicators help you stay oriented and clearly show which set of controls is currently linked to the knobs. If Dim inactive control sets is switched on in the settings, the bars are not drawn and the other two control sets are dimmed instead.
You can also switch the active control set by simply tapping a control on the touchscreen. The set containing the tapped control will become active. This feature is part of the default configuration and provides a quick, intuitive way to work with the controls.
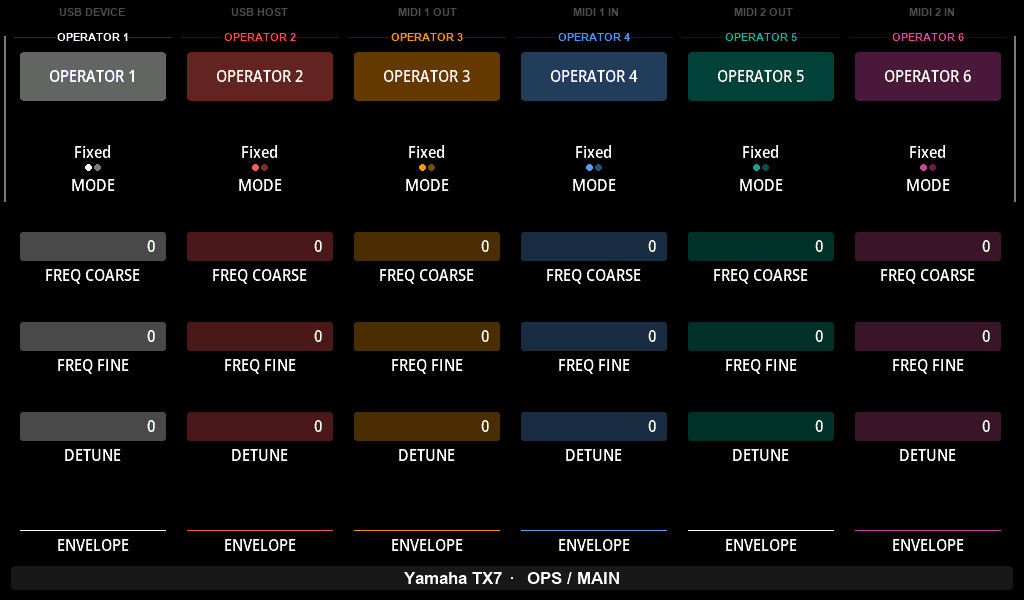
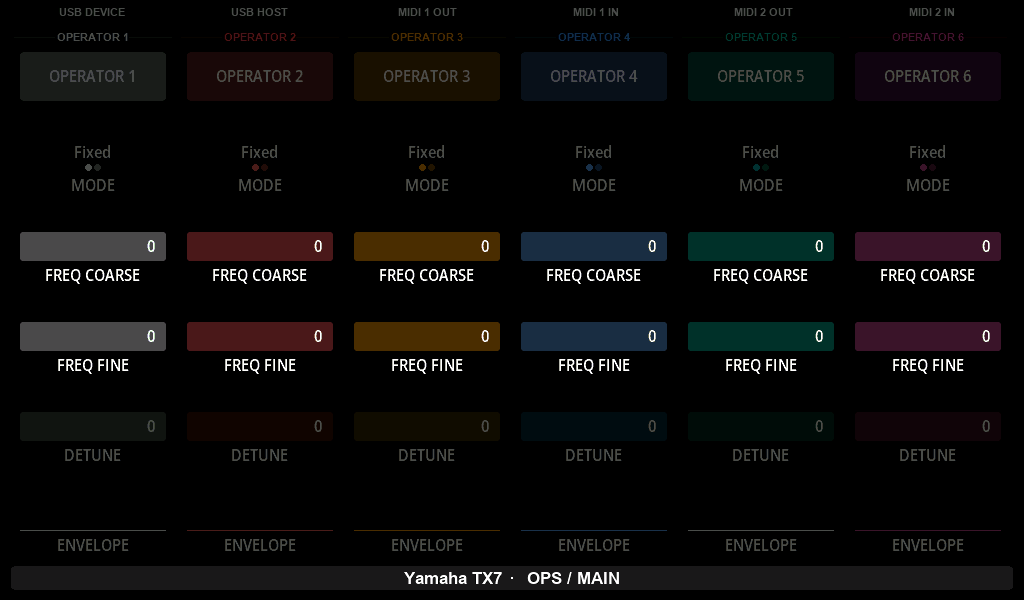
The method for switching the active control set can be fully customized in the Electra’s configuration.
The Bottom bar
The Bottom Bar helps you stay oriented by showing where you are, what you're working with, and which mode the controller is currently in.
When the controller runs into a problem it wants you to know about, the Bottom bar turns red and shows a short description in place of its usual content. This happens when the SD card is missing or cannot be read (nothing loads or saves until it is replaced), when the current preset's Lua script fails to load, or when a preset's Lua script has had its timer or its scheduled functions stopped for it. The message stays until the problem is gone; for a card problem that means a reboot with a working card.

Mode indicators
On the left of the Bottom bar, small icons show the modes that are switched on. When no mode is on, nothing is shown there.
| Icon | Mode | Switched on by |
|---|---|---|
| Alt mark | Alt mode | a button or a MIDI Control message carrying the Toggle alt mode action |
| Knob | Low knob sensitivity | a button or a MIDI Control message carrying the Toggle sensitivity action |
| MIDI learn | MIDI learn | the Preset Editor |
| Debugger | the Lua debugger is attached | the debugger of the Preset Editor |
| Timer | a preset's Lua timer is running | the preset itself |
| Camera | a screenshot is being saved | a screenshot request |
The Alt mark comes first, the other icons follow in the order of the table. Assigning actions such as Toggle alt mode to a button or to a MIDI Control message is described in Settings.

The page button row
The pages of the current preset can be brought onto the screen as a row of buttons, so that you can switch pages by tapping them.
Swipe down on the middle of the display. A row of page buttons slides in over the Status bar, and the Bottom bar becomes a little smaller to make room for the controls. While the row is on the screen the Status bar is not visible, so MIDI activity is not indicated.
Tap one of the page buttons to jump to that page. Swipe up to send the row away and bring the Status bar back.
Only the pages that have controls on them and are not hidden get a button.
The same downward swipe on the other parts of the display opens the two menus: on the right side the main Menu, on the left side the Preset Menu.
Connecting Electra
The next sections will show you how to connect Electra One to your setup. While there are many different ways to use it, the three examples below offer a solid starting point.
In many cases, adding Electra One to your rig may inspire you to rethink how your gear is connected, and possibly make your whole setup simpler and more efficient.
A basic setup
To begin with, the following setup is ideal:

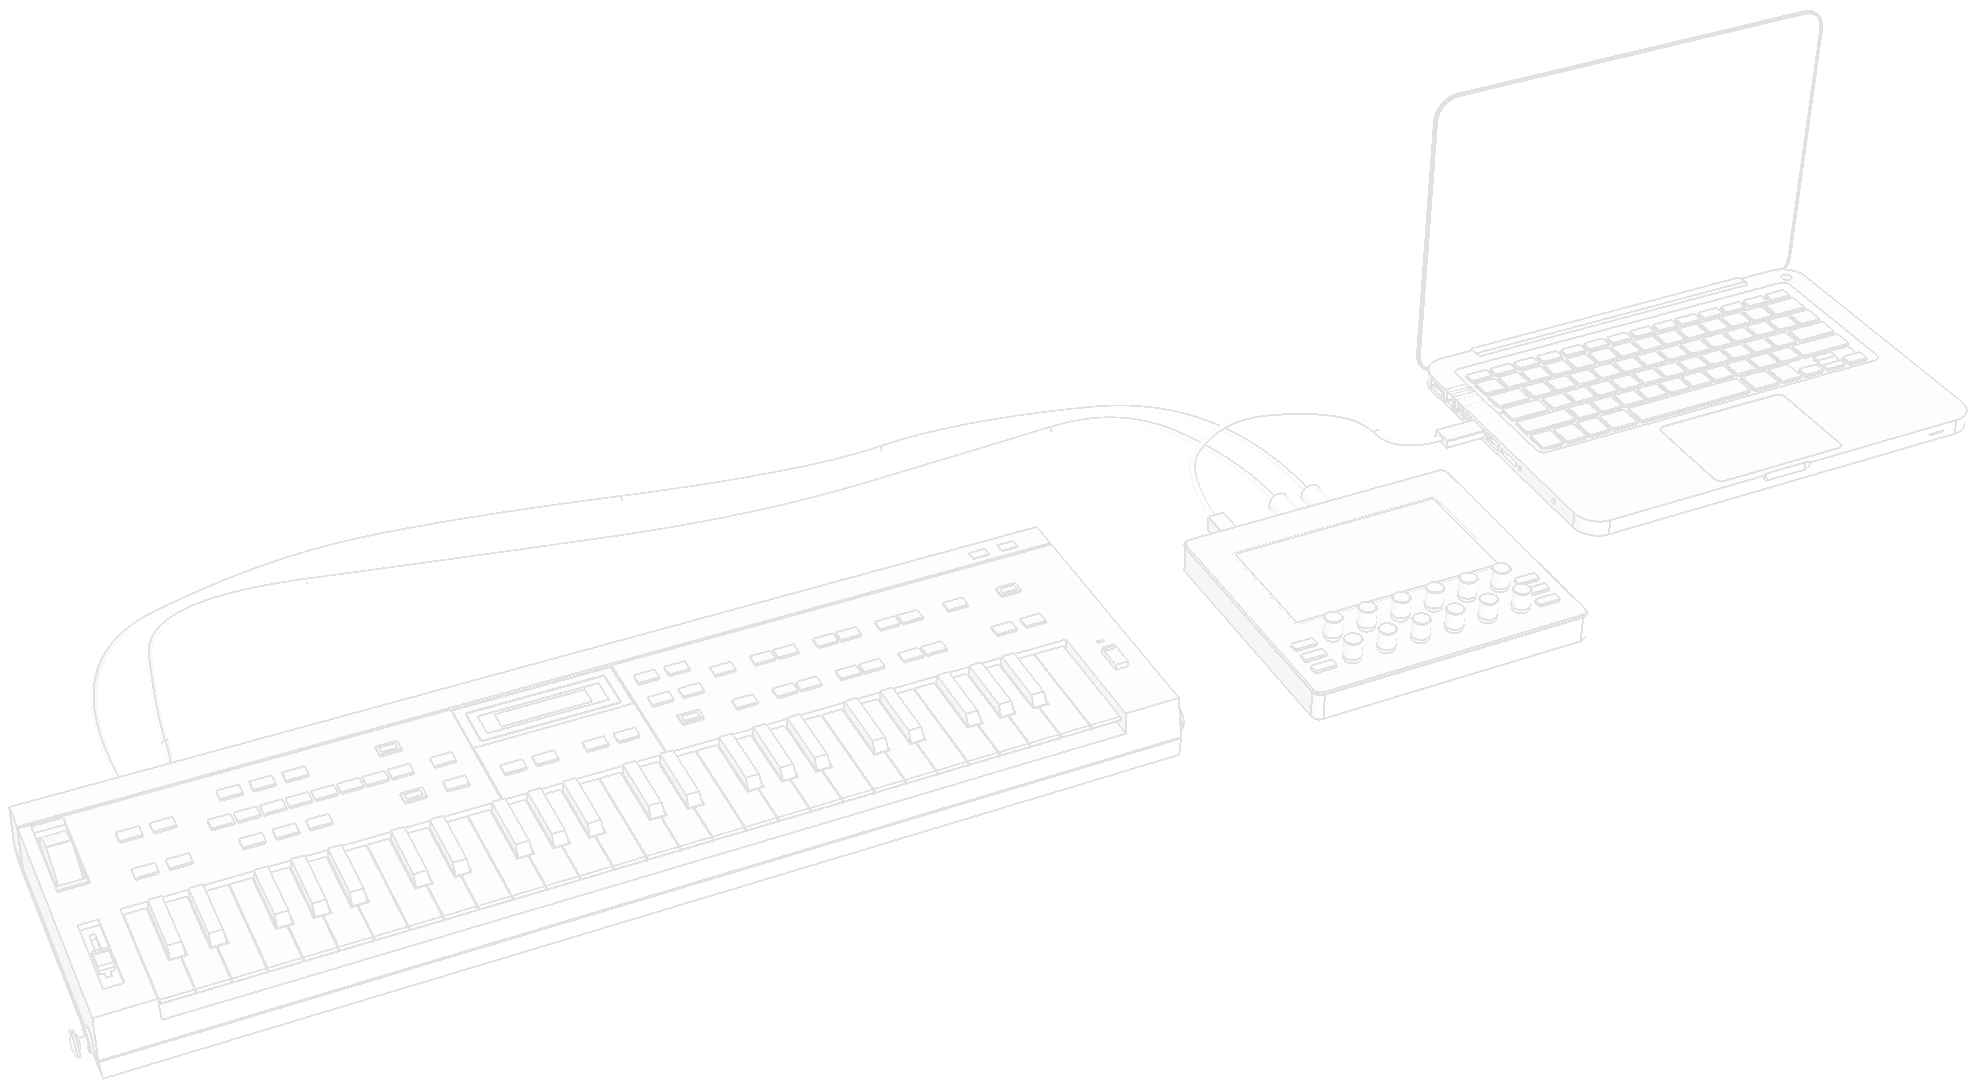
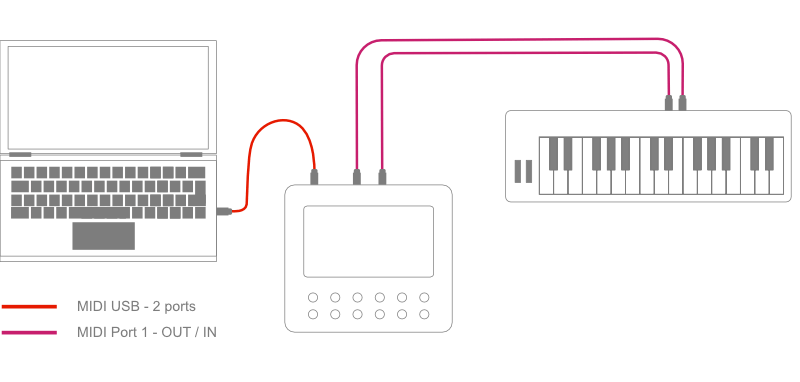
In this setup, Electra can control sound parameters of the synthesizer connected to <MIDI IO> port. You will see Electra' USB Device ports on the connected computers, we refer to them as <USB DEVICE>. These ports can be used to send and receive MIDI messages to and from the synthesizer. It means Electra acts here as a MIDI controller as well as a MIDI USB interface.
In this configuration, Electra acts both as a standalone MIDI controller and a USB MIDI interface, seamlessly bridging your hardware and software. The USB connection to your computer can also be used to access the Electra One web editor for editing presets and managing your controller.
Electra One MIDI controller has three USB device ports. On MacOS they are:
Electra Port 1Electra Port 2Electra CTRL
On Windows, you will most likely see:
Electra ControllerMIDIIN2 (Electra Controller)MIDIIN3 (Electra Controller)
By default, any MIDI message sent from your computer to USB Device Electra Port 1 OUT is forwarded to Electra’s <MIDI 1 OUT> port. Similarly, any message received on <MIDI 1 IN> is forwarded to USB Device Electra Port 1 IN on the computer. Port 2 behaves the same way.
The routing of MIDI messages between Electra’s ports and interfaces can be fully customized using Electra One’s internal MIDI router.
Electra CTRL is dedicated to communication between Electra and Electra Editor.
TIP
If you do not see Electra CTRL, it might be called MIDIIN2 / MIDIOUT2. Some versions of operating systems do not read the port name correctly. Please review The Connection Troubleshooting Guide.
A complex setup
To illustrate Electra's capabilities let's take a look at a more complex setup:

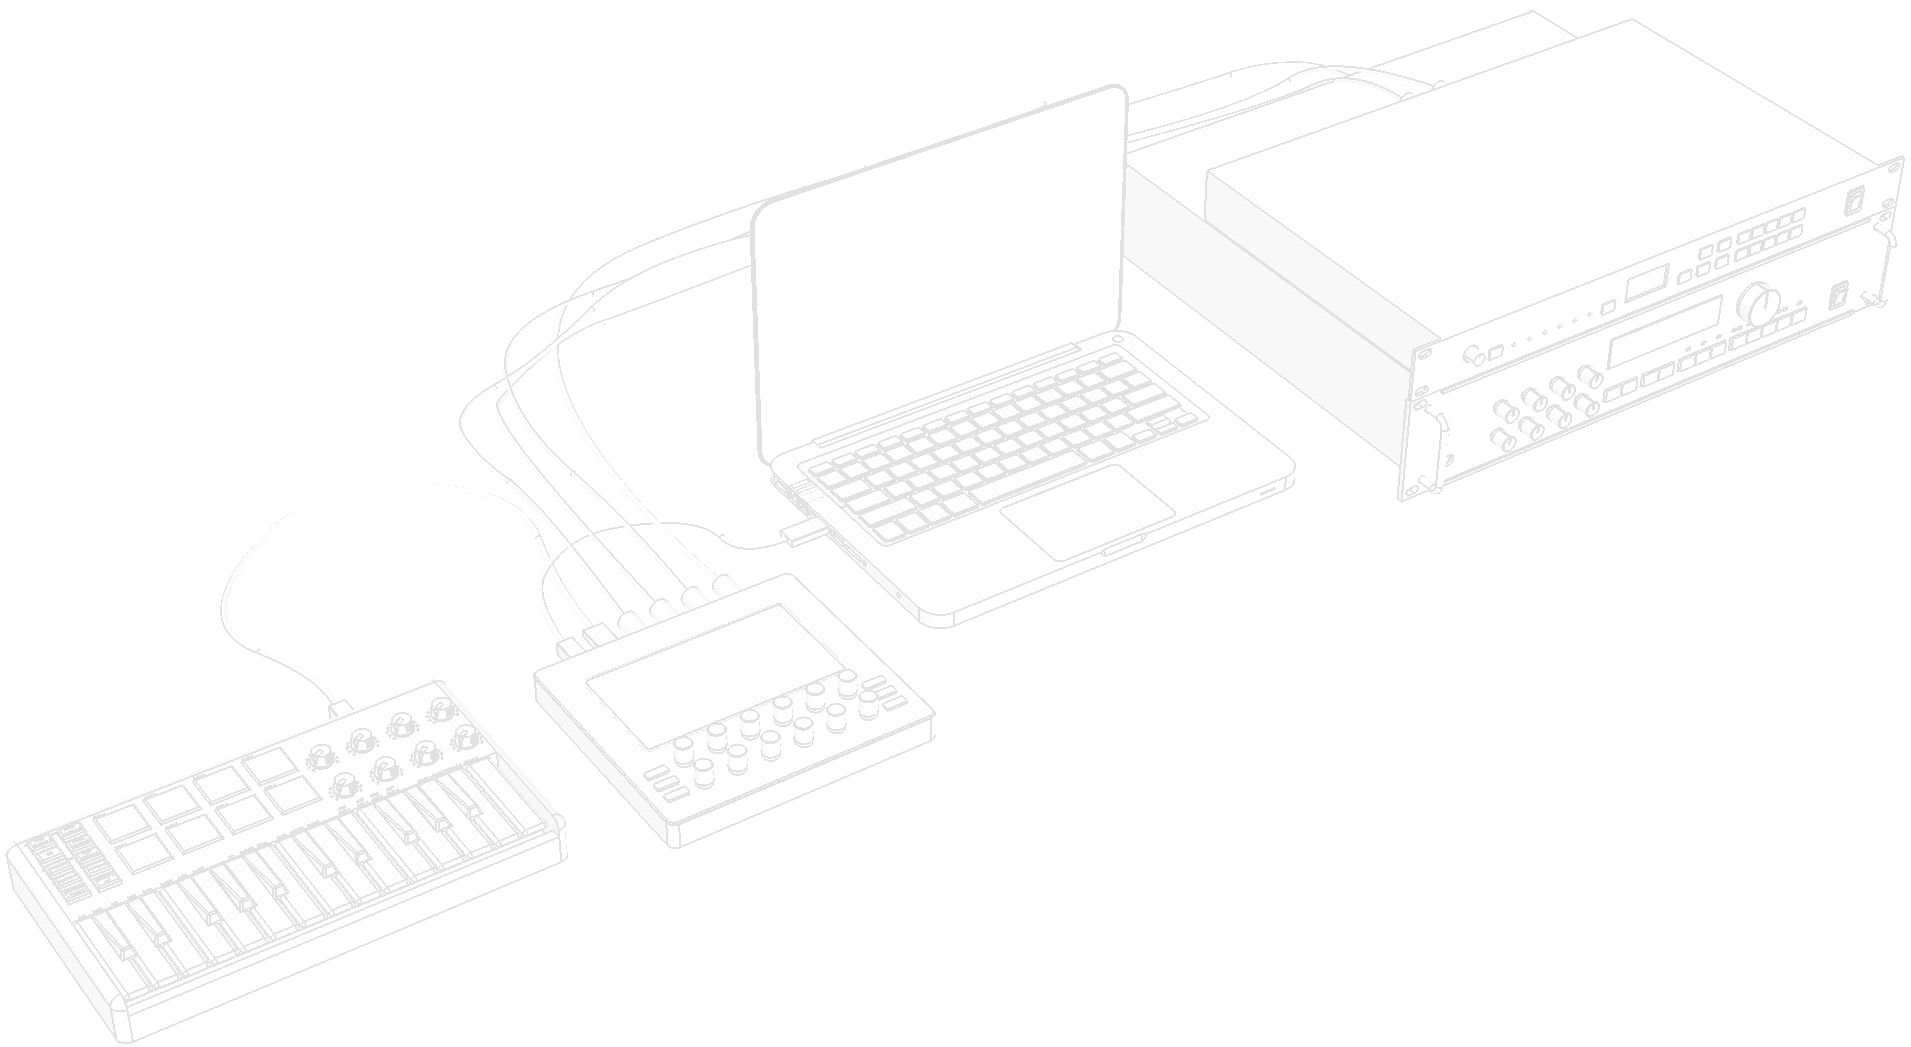
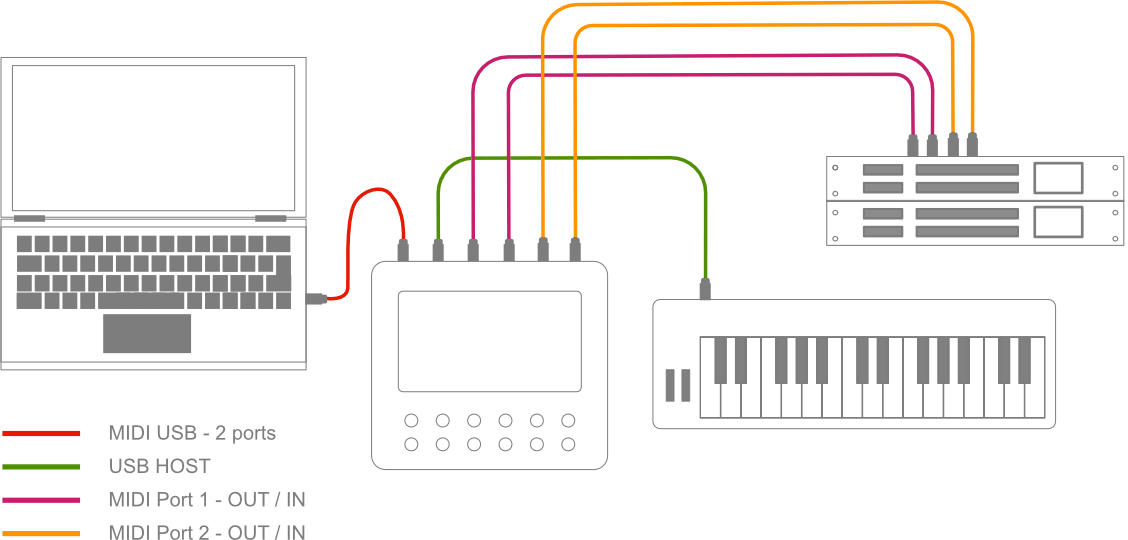
Here we connect more gear to the <MIDI IO> ports. Next to that, the Master keyboard is connected to Electra’s <USB HOST> port.
In this setup, you can have full bi-directional control over two hardware synth modules. The MIDI messages generated by the Master keyboard are automatically forwarded to both <MIDI IO> ports and to the <USB DEVICE> ports.
MIDI messages generated by turning the knobs are being merged to the flow of MIDI data according to Electra’s settings. These messages will be sent to both <USB DEVICE> port as well as to <MIDI IO> ports.
A MIDI router setup
Combining Electra One with a MIDI router, such as the iConnectivity series, Blokas MIDIHub, or Conductive Labs MRCC, creates a powerful and flexible MIDI system. This setup allows smooth control over multiple synthesizers and MIDI devices from a single controller.
A basic example of a MIDI router–based setup:
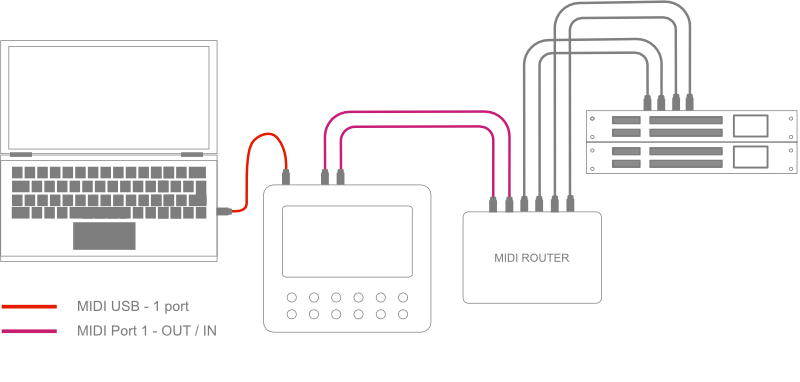
In the example above, the <MIDI IO> ports were used to connect the MIDI router. However, you can also connect a MIDI router to Electra One’s USB Host port, or connect Electra One’s USB Device port to the USB Host port of the router.
WARNING
If you connect Electra One to a USB Host port, make sure the host can supply 500mA of current. If it cannot, use a powered USB hub or a USB Y-cable to provide the additional power required.
Changing pages
Each Electra preset can include up to twelve pages of controls. While pages can be selected through the main Menu, this action is so commonly used that it’s typically assigned to a dedicated hardware button. As we are using the default configuration now, the Page selection window can be displayed by pressing the [RIGHT-BOTTOM] button (8).
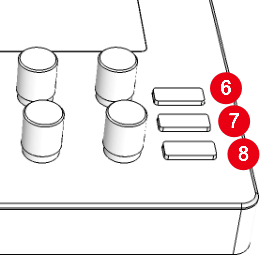
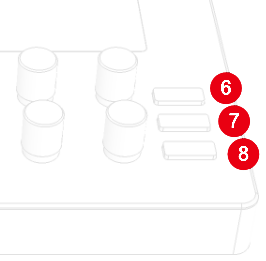
If you simply press the button. The Page selection window will be openned and will stay open until you switch to any of the pages or you press [RIGHT-BOTTOM] (8) again.
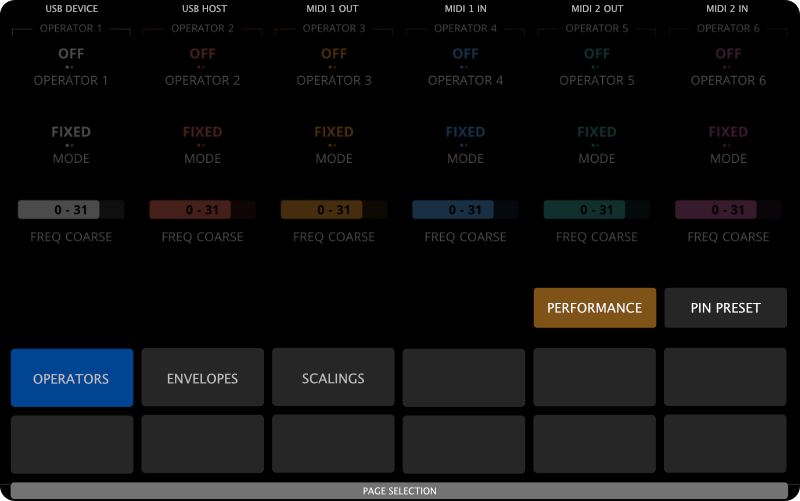
The currently selected page is highlighted (shown in blue). Page names are positioned on screen to align visually with the knobs, making it intuitive to select a page by either tapping the on-screen page button or touching the corresponding knob.
Tip: Press and hold the [RIGHT-BOTTOM] button to quickly preview all preset pages. While holding the button, simply touch any knob to view the page it belongs to.
There’s much more to tell about changing pages - you’ll find detailed information in the following chapters of this user guide.
Changing and Loading presets
When you have a Page selection window open, you can reach the Preset selection by pressing the [RIGHT-MIDDLE] button (7). Again, this is the default configuration set up. You can adjust this later on.
Once you’re on the Preset Selection screen, simply tap the preset you want to load. Alternatively, you can activate it by touching the corresponding knob.
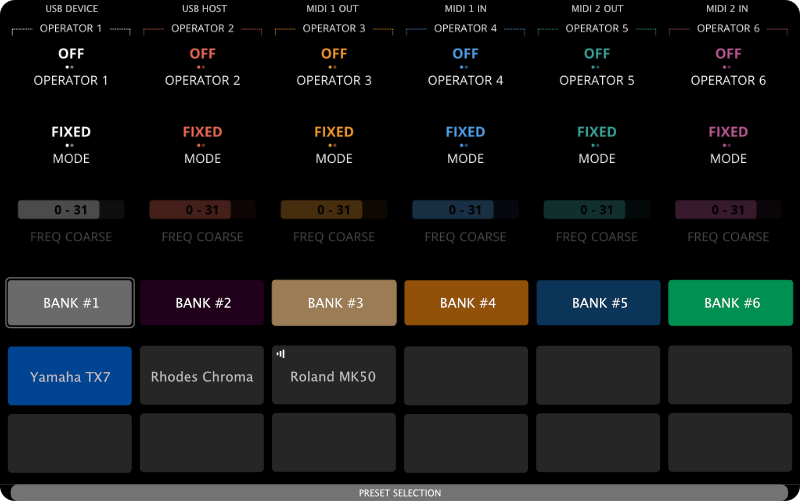
Note: The knob touch feature can be disabled in the controller’s settings if preferred.
The highlighted preset (shown in blue) is the active one — it’s the preset you’re currently working with, and the one sending and responding to MIDI data.
To load a new preset, first choose the preset slot where you want it to be stored. The slot can be either empty or already contain another preset. Once you've selected the slot, open the Electra One web application and use the [Send to Electra] button. The new preset will be uploaded to the selected slot and will be ready to use immediately
Overwriting presets
A preset stored in a preset slot on a controller may include additional settings and performance data. Examples of such files include performance pages, device overrides, and persisted Lua table data. If you overwrite a preset with a different one, these additional files will be removed from the preset slot along with the original preset.
However, if you upload a newer version of the same preset to the slot, only the preset and its Lua script will be updated, and the additional files will remain in place.
The preset's projectId attribute is used to determine whether it is the same preset.
Interacting with Controls
What a control is, and what it is made of, is described in Concept of Control. This section describes how you work with controls on the controller.
Active control
To make navigation easier, touching a knob highlights the corresponding control by underlining it on the screen. This lets you see which control is active — even if you don’t turn the knob. Multiple knobs can be active in the same time.
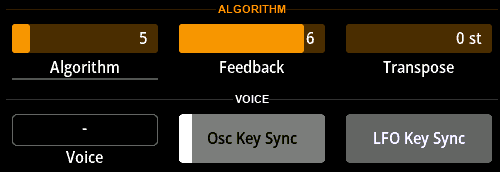
You can change a control’s value by turning the corresponding knob, or by swiping left or right on the control directly on the touchscreen.
Low knob sensitivity
Low knob sensitivity makes the knobs move values in finer steps, which helps when a control has a wide range. There is no default button for it on the mk2: assign the Toggle sensitivity action to a button or to a MIDI Control message in the Settings first. A button carrying that action works like a shift key: low sensitivity is on for as long as you hold the button and goes off when you let go. A MIDI Control message carrying it switches low sensitivity on and the next one switches it off. While it is on, the knob icon is shown on the Bottom bar.
Switching the Active Control set
A single tap on a Control will switch to the active control set the control belongs to, unless it is disabled by the configuration.
Control detail
Touching and holding a control opens the Control Detail window, displaying a full-size version of the control for more precise adjustments. You can also access the detail view by holding the corresponding knob and pressing the [LEFT-TOP] button.
Each type of control has its own dedicated detail window, tailored to provide enhanced interaction and fine value control.
A detail window fills the screen between the Status bar and the Bottom bar, on black, with no frame around it, and its close button is in the top-right corner of the screen. A list short enough to fit one column is the exception: it keeps its narrow window beside the control, with the page showing around it.
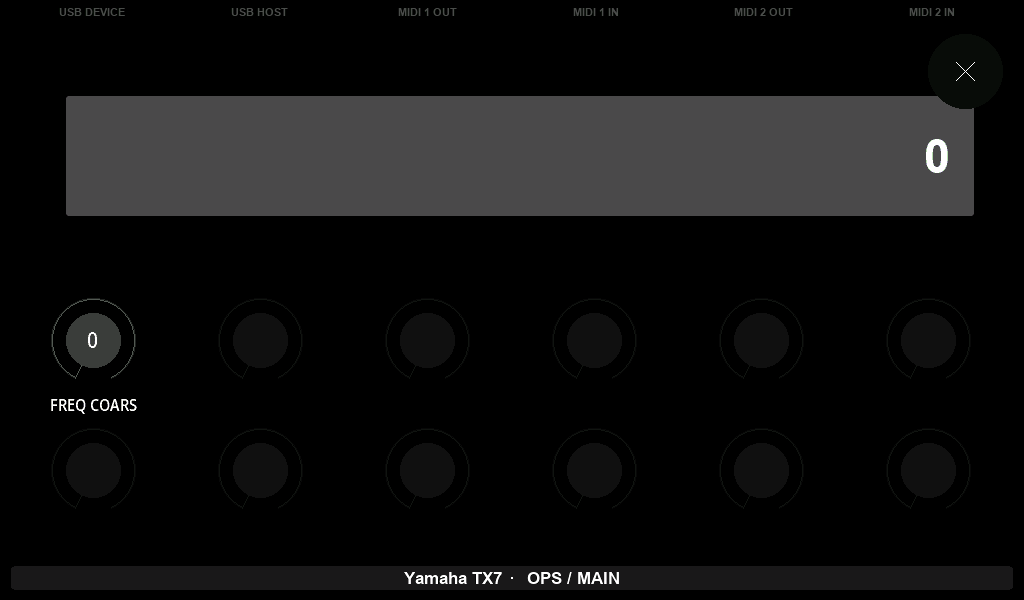
Fader detail
The fader detail view is designed to allow precise, full-range sweeps of the control value. The fader strip is wide and tall enough to provide comfortable space for your finger, making fine adjustments easy and accurate.
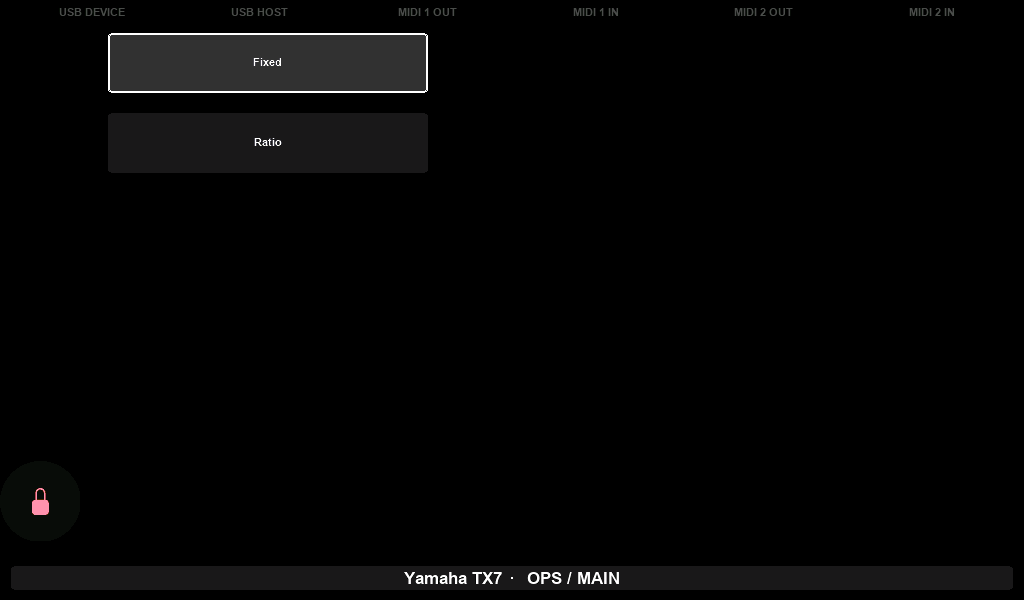
List detail
The list detail view presents a swipeable list of values, similar to a tablet interface. You can browse through the items by swiping up or down, and select a value by tapping it on the screen.
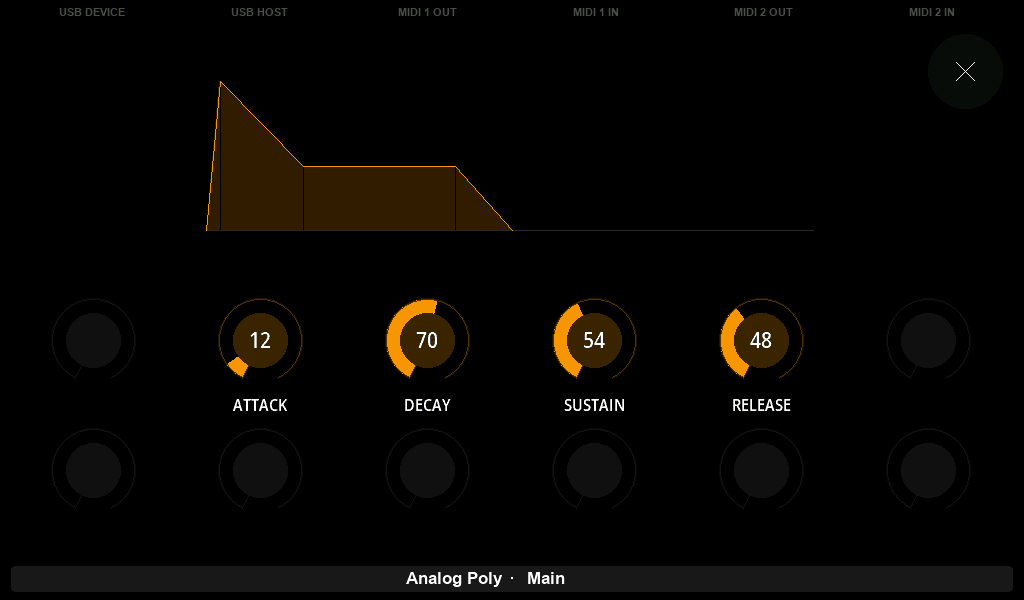
Envelope detail
The envelope detail view allows you to edit all envelope parameters in one place. When this view is active, Electra temporarily reassigns the knobs to control individual envelope values. These knob assignments are active only while the envelope detail window is open.
All twelve knobs are shown under the graph as they sit on the panel, in two rows of six. A knob that the envelope has no value for is drawn dark.
The same detail window is used for all the envelope shapes: AR, ADR, ADSR, ADSSR, AHDSR and the DX7 envelope.
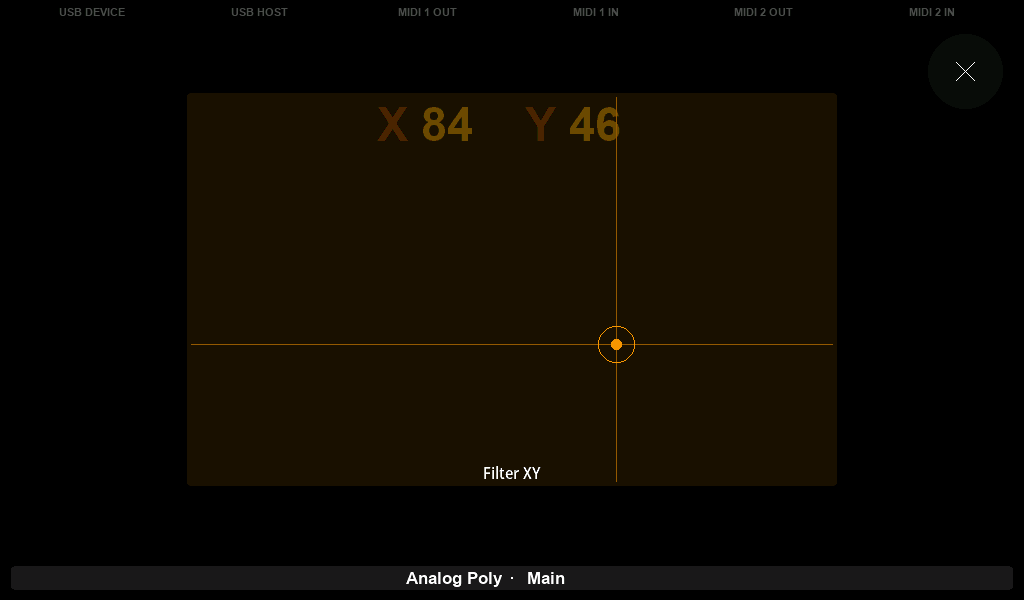
XY Pad detail
The XY pad detail view provides an interactive two-dimensional surface for controlling two parameters at once. Unlike other controls, the XY pad is operated entirely by touch—no knobs are used. You can move your finger across the pad to adjust both the X and Y values in real time.
The two values are printed across the top of the pad, as X 100 Y 110. The Y axis counts up from the bottom edge of the pad, so turning the Y knob clockwise moves the handle up.
Vertical fader group detail
A vertical fader group, such as a four-band envelope or a set of levels, opens a detail window with its bars side by side and the twelve knobs underneath, in the same arrangement as the envelope detail.
Text box detail
A text box opens an on-screen keyboard as its detail window. Tap the keys to type, CLEAR to empty the text and DONE to finish. It is the same keyboard the controller uses for renaming a preset bank.
Locking the detail window
The lock is on the list details. The fader, envelope, vertical fader group and XY pad details always stay open, and the button in the top-right corner of the screen closes them.
By default, a list detail window closes immediately after a value is changed or a selection is made. In some situations, this behavior may not be desirable. To keep the window open, you can lock it by tapping the lock icon:

When the lock icon is tapped, it becomes highlighted, indicating that the detail window is now locked. In this mode, you can make multiple changes without the window closing after each adjustment.

To close a locked detail window, simply tap the lock icon again or tap anywhere outside the detail window on the display.
Detail window knob assignment
The detail window retains the original knob assignment, allowing you to use the same knob to adjust the control’s value even while the detail view is open.
Resetting to the default value
Double-tapping a control resets its value to the default setting defined in the preset.
Changing active value of multi-value controls
Some controls, such as envelopes, contain multiple values. When a preset is loaded, one value is assigned to a knob by default—this default assignment is defined in the Preset Editor.
However, there are situations where you may want to adjust a different value without opening the envelope detail window. In these cases, you can use a quick gesture to change which value is assigned to the knob.
There are two ways to switch the active (knob-assigned) value:
Touch and hold the envelope's knob (the control name will become underlined), then tap the envelope control on the display. The knob assignment will cycle to the next available value, which will be highlighted.
Touch and hold the envelope's knob, then press:
[SECTION 2]to move to the next value within the envelope[SECTION 3]to move to the previous value
This allows quick switching between parameters like Attack, Decay, Sustain, and Release without entering the detail view.
Customizing Control Behavior
Both the long press to open the detail view and the double-tap to reset to the default value can be customized in the settings to suit your personal workflow.
Rear panel buttons
The [RESET] and [UPDATE] buttons are there to help you recover if something goes wrong. Since these situations are rare, the buttons are recessed and can be pressed using a pen or another thin object.
On newer Electra One units (2025 and later), the [UPDATE] button is no longer recessed — it sticks out slightly for easier access. In future firmware updates, this button may also support additional functions.
Reset button
The [RESET] button power-cycles the controller. Pressing it has the same effect as unplugging and reconnecting the USB cable.
Note: Resetting Electra will not delete any of your presets or saved settings. However, any unsaved values from the currently loaded preset will be lost.
It is always recommended to put Electra into Sleep Mode before resetting or disconnecting the USB cable.
Update button
[UPDATE] button is used to initiate a forced firmware update. Under normal circumstances, firmware updates can be initiated from the Electra One web application without pressing the [UPDATE] button. If, however, your firmware update fails or if you upload a corrupted firmware file to Electra and it becomes bricked, pressing the [UPDATE] will allow you to restore the controller to the working state.
Power On & Sleep Mode
Electra One powers on automatically when connected to any USB power source, whether it’s a computer or a USB power adapter.
To safely disconnect or reset the controller, it’s recommended to switch it to Sleep Mode first. This puts the controller into a low-power standby state and ensures a clean shutdown of the internal file system and database.
Swipe down on the screen to open the main menu, then tap the on-screen SLEEP button. Once in Sleep Mode, it is safe to disconnect the USB cable or reset the controller.
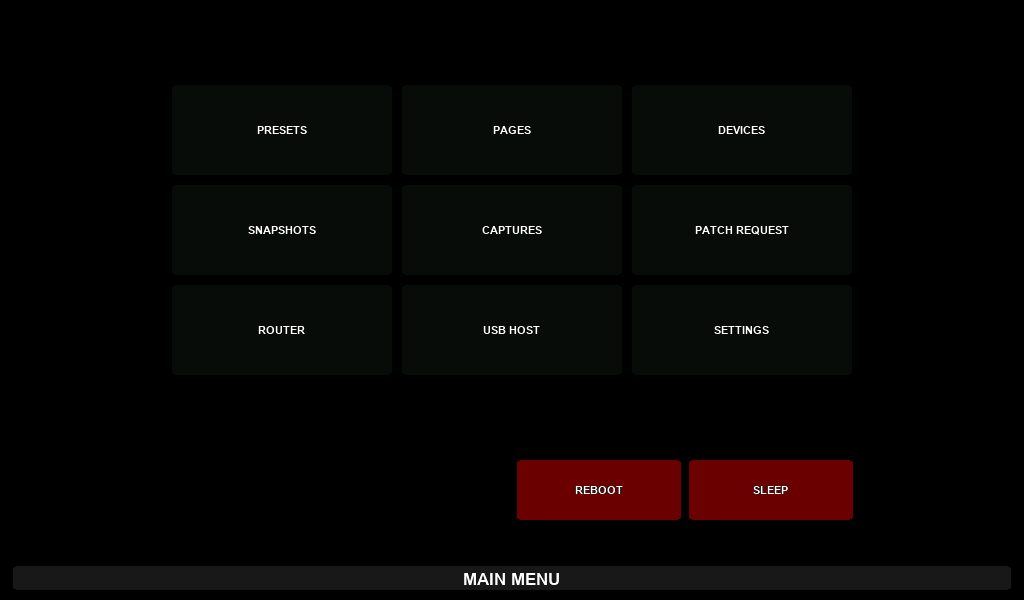
To wake the controller, press any button.
Alternatively, if you're using the default button assignments, you can put the controller into Sleep Mode by pressing and holding the [RIGHT-BOTTOM] button, then pressing [LEFT-BOTTOM] while still holding [RIGHT-BOTTOM].
Recovery
Starting without a preset
If a preset stops the controller from starting properly, for example because its Lua script blocks it, start the controller without loading presets:
- Unplug the controller.
- Hold
[LEFT-TOP]. - Plug the controller in, and keep holding
[LEFT-TOP]until the display shows a page.
The controller starts with an empty preset and does not start the pinned presets either. Your presets stay on the controller. Use the Electra One app to replace or delete the preset that caused the problem, then restart the controller. If you restart without doing so, the same preset and the saved pins are loaded again.
Stopping a runaway script
If a preset's Lua timer or scheduled function keeps the controller so busy that the display and the buttons no longer respond, you can stop them:
Hold all six buttons together for two seconds.
This stops the timers and scheduled functions of every running preset, pinned presets included. The Bottom bar turns red and says that the preset timers were stopped by the front panel. The rest of the presets keep working, so you can switch to another preset or fix the script in the Preset Editor. A timer runs again when the script starts it again, for example when the preset is loaded again.
The presses of the grip still count as ordinary button presses, so the actions of the six buttons run as well: in the default configuration a patch request is sent and the Snapshots and Page selection windows open. Close them afterwards.
The grip does not stop a script that is stuck in its own code rather than in a timer, such as an endless loop in onReady. Use Starting without a preset then.
If the controller does not respond at all, press the [RESET] button on the rear panel.