

Version5.0.0 beta
Making your First Preset
By now, your Electra One controller should be connected to the web application. Before moving on to the full User Guide, let's make your very first preset. It is a small one: a single knob called Cutoff that sends a MIDI Control Change message, with a VCF label above it, on a page called Filter.
The pictures show an Electra One Mini. The steps are the same on the Mk2; its screen simply has more room for controls.
The editor in Basic mode
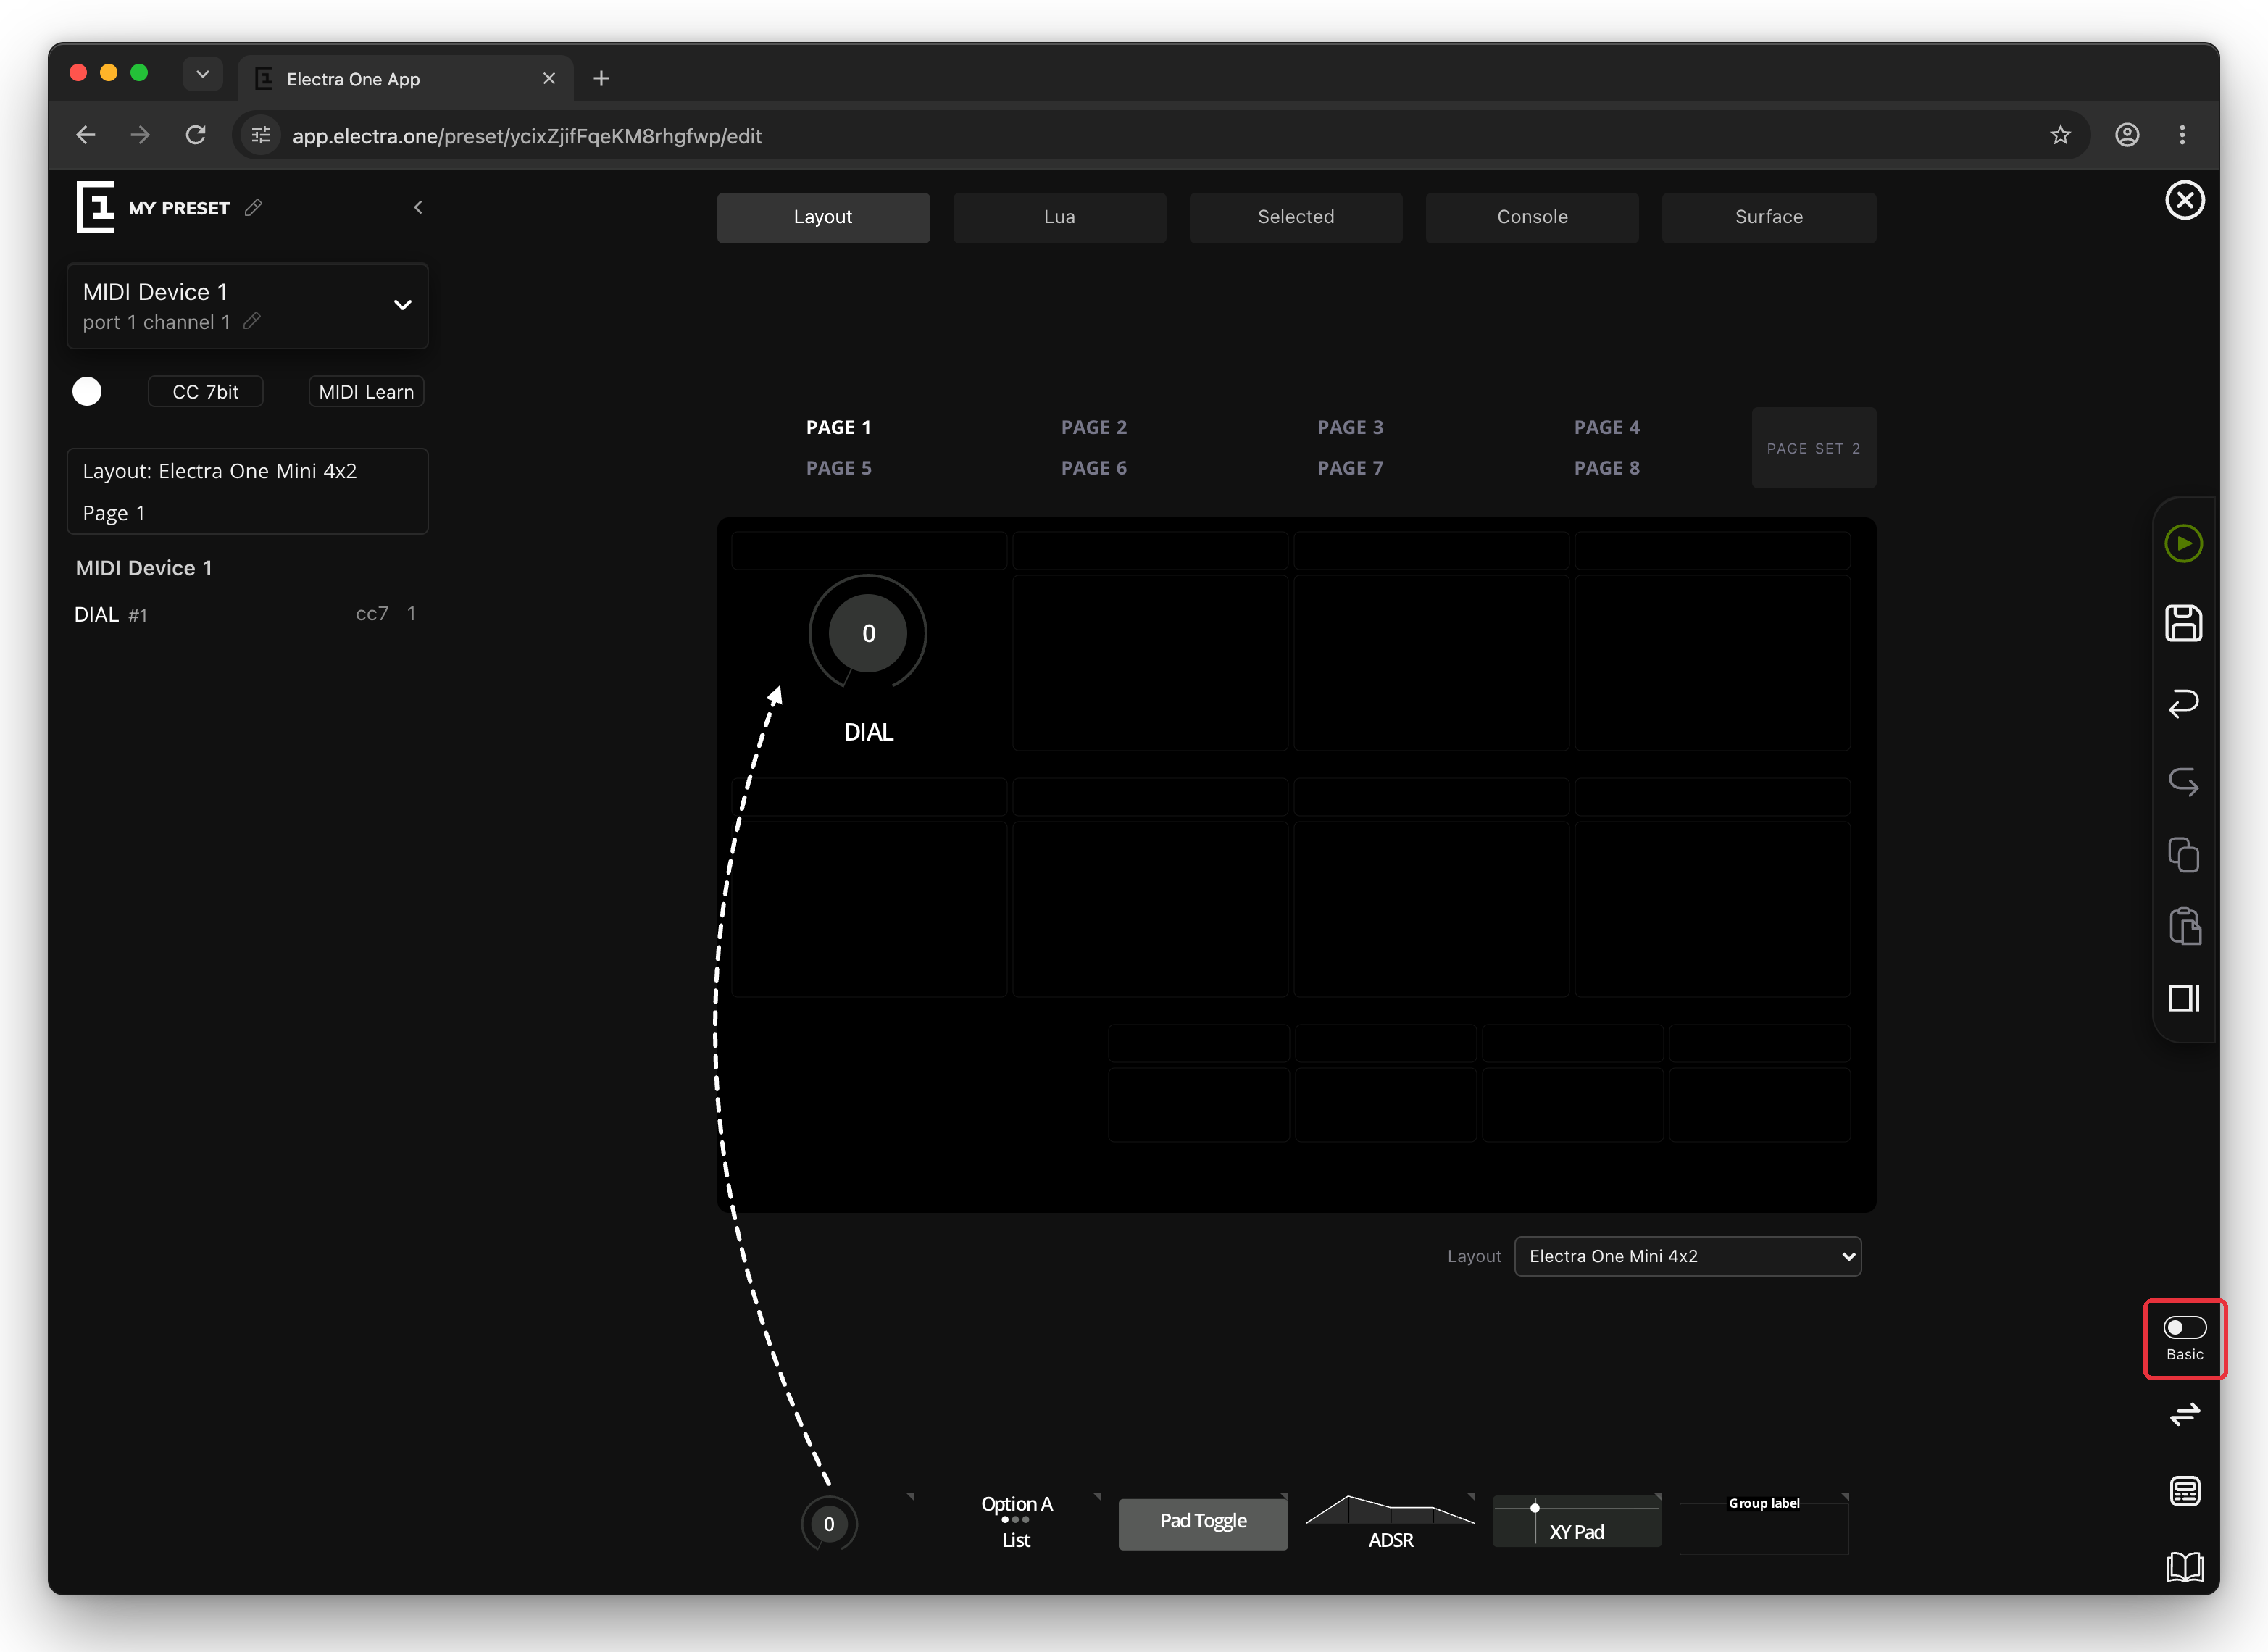
This chapter uses the preset editor in Basic mode. Basic mode shows only what you need to build your first presets and hides the advanced tools. You can see which mode you are in on the switch at the right edge of the editor. If it says Expert, click it to go back to Basic.
1. Create a new preset
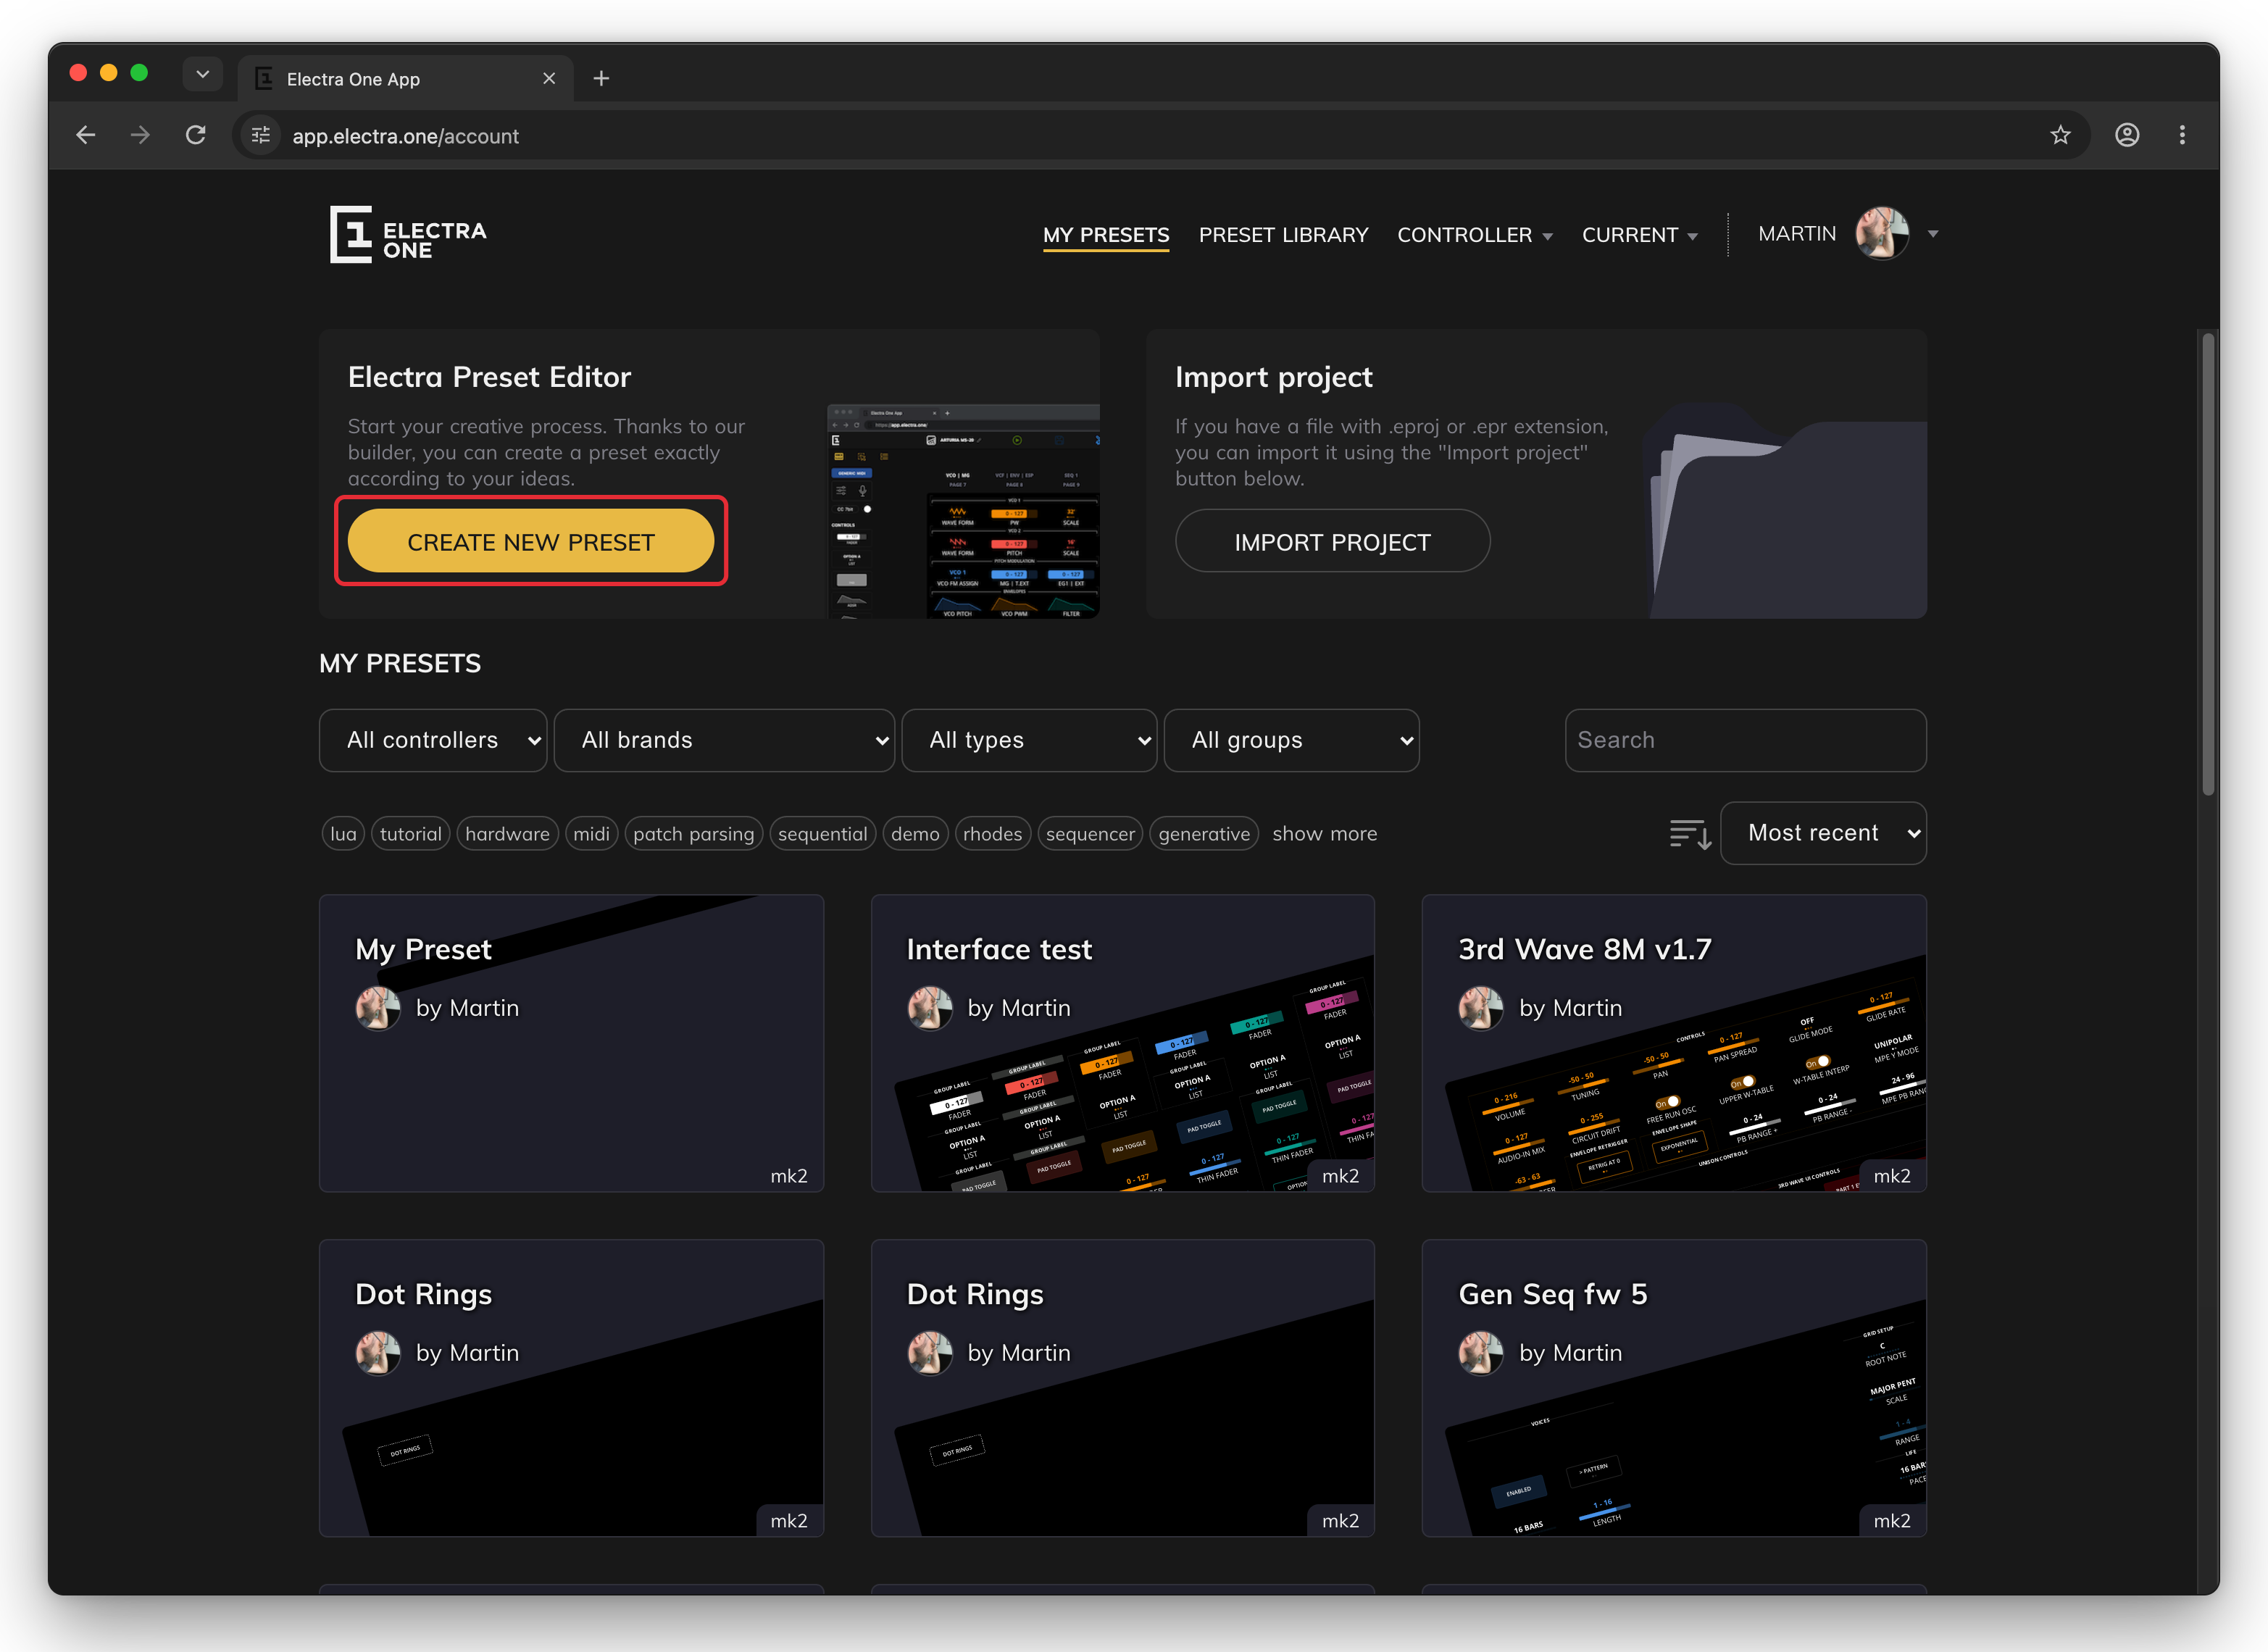
Go to MY PRESETS and click CREATE NEW PRESET. The preset editor opens with an empty preset.
The new preset is made for the Electra One model that is connected at that moment, so connect your controller first.
2. Add a control
A control is something you see on the controller's screen and change with a knob, such as a dial or a fader. It sends a MIDI message whenever you turn the knob.
The large black area in the middle of the editor is a picture of your controller's screen, divided into slots. The controls you can add are lined up below it. Drag the Dial, the first one on the left, and drop it on the top-left slot.
3. Name the control and pick a color
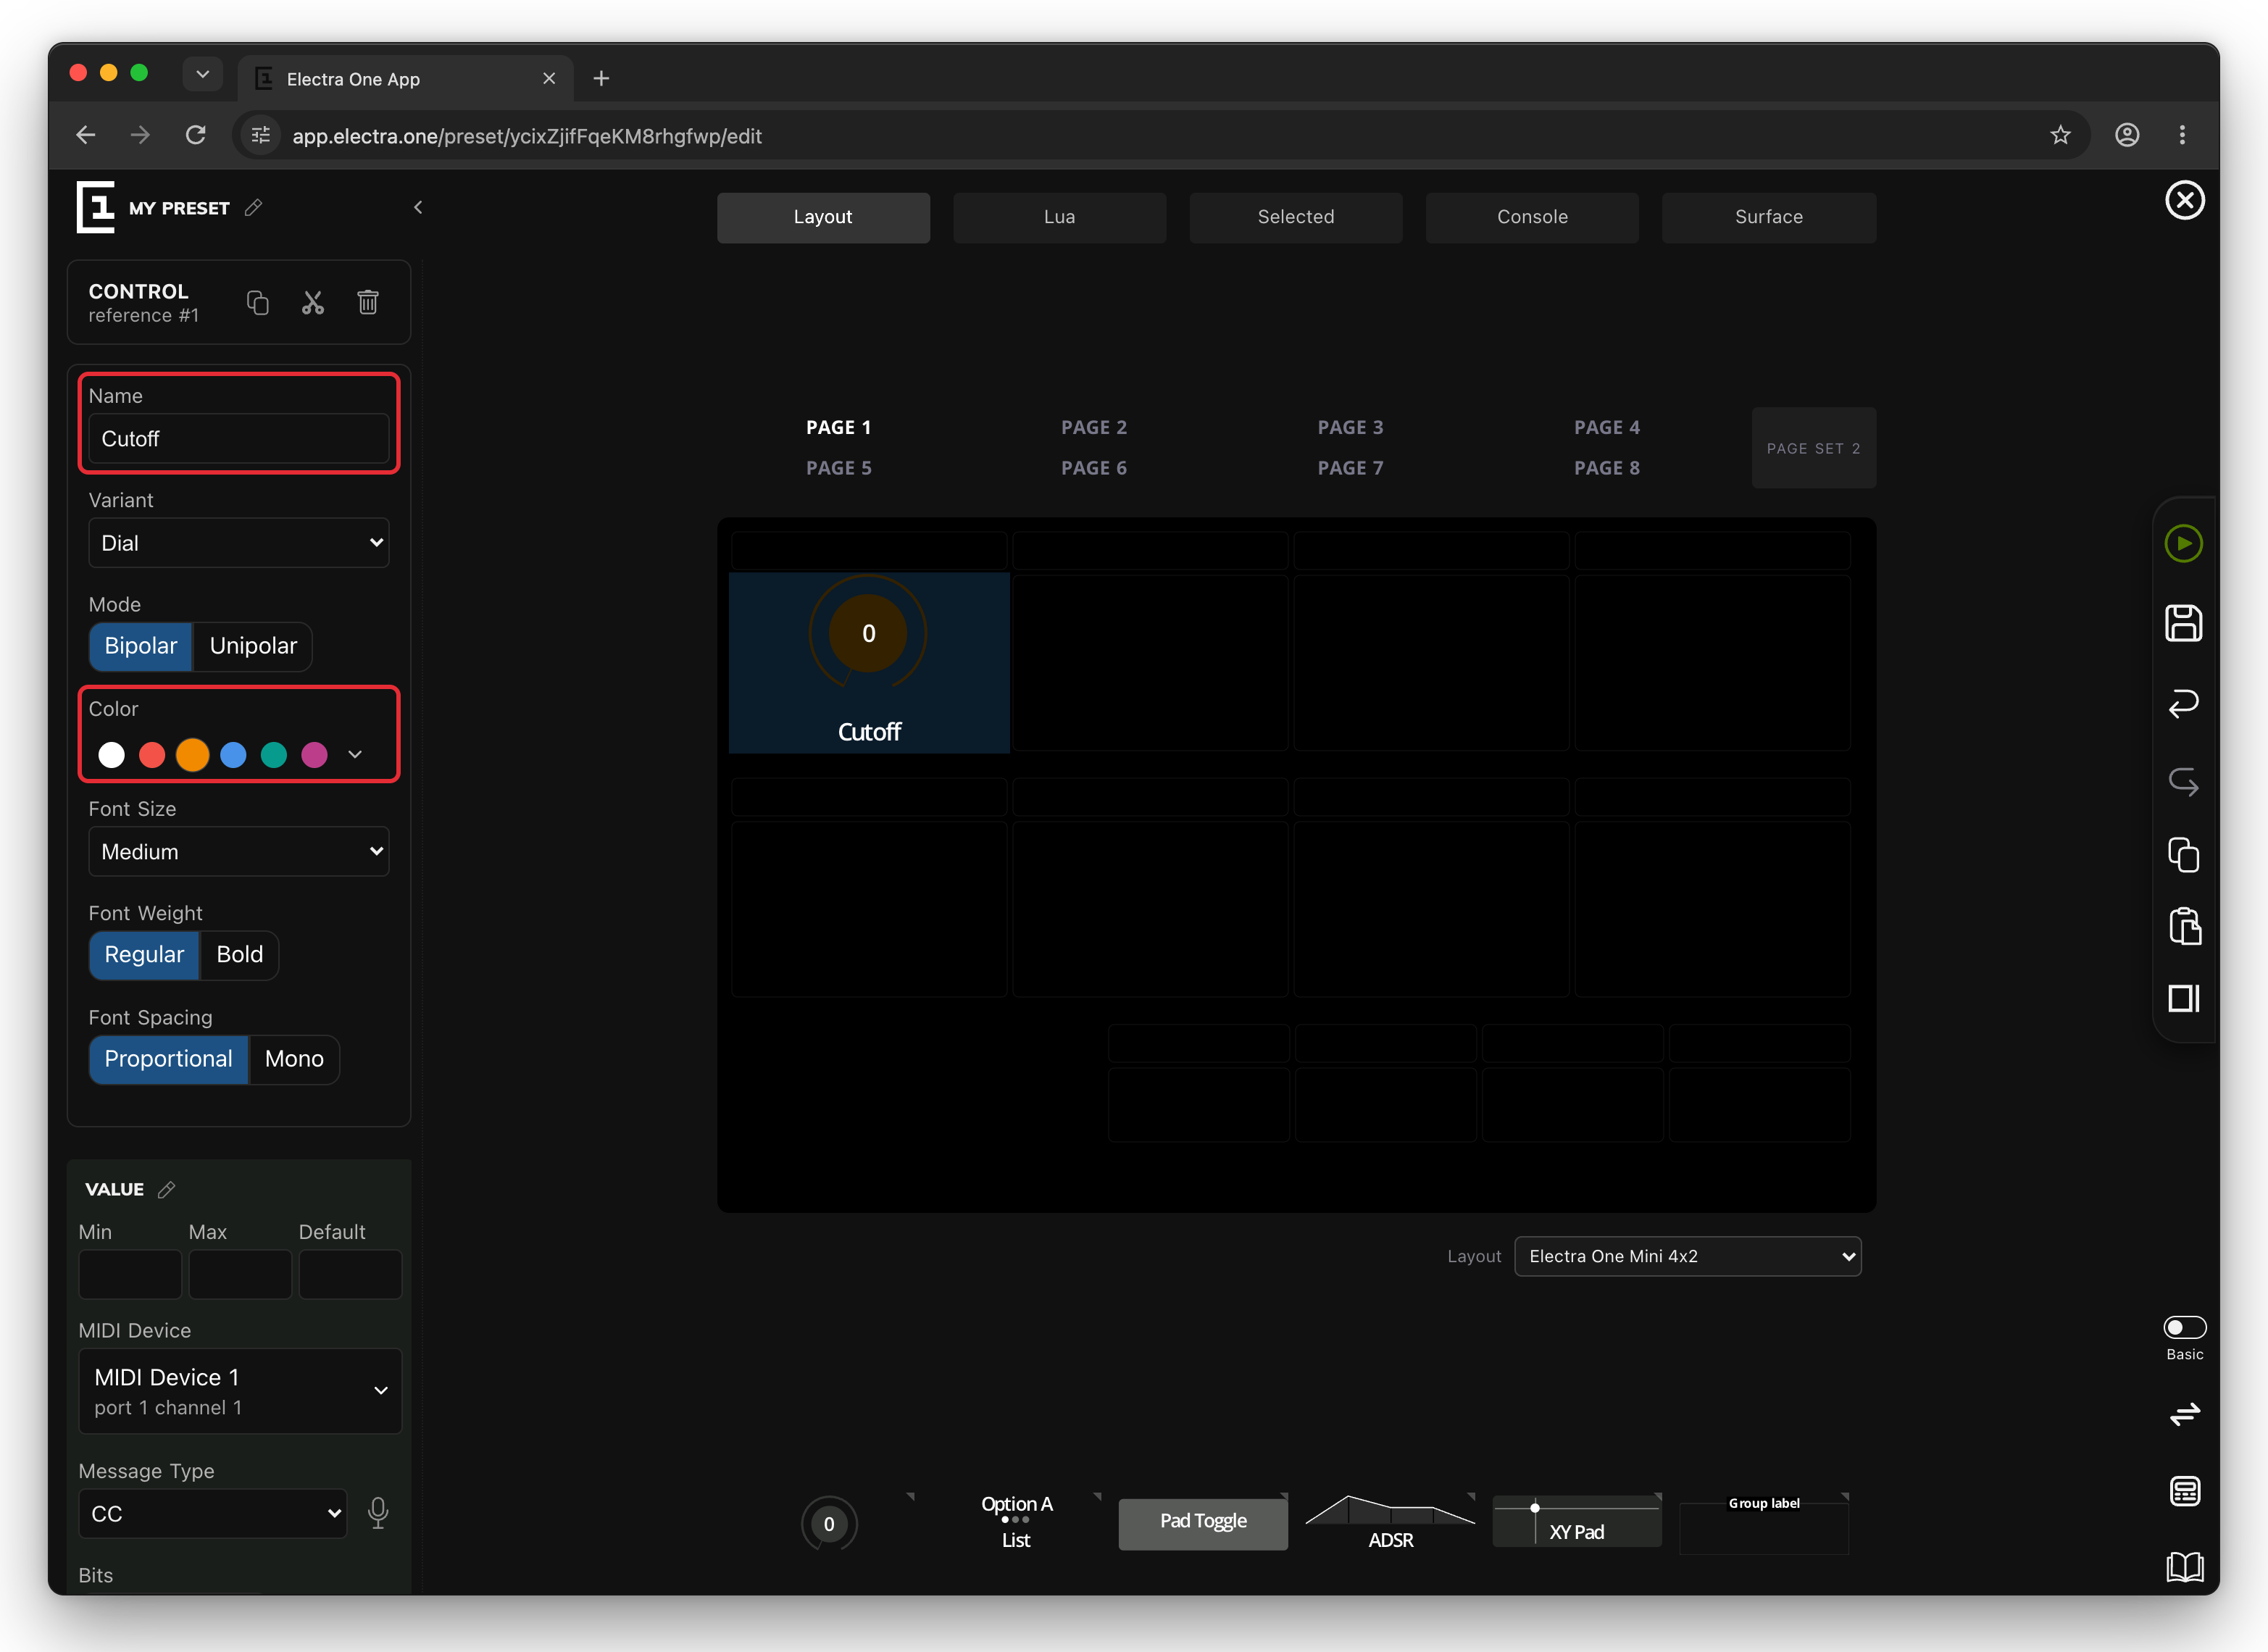
Click the new dial to select it. The sidebar on the left now shows its settings. Type Cutoff into Name and click the orange circle under Color.
Now scroll the sidebar down to the VALUE section. Message Type is already set to CC, which stands for Control Change, the most common way for a controller to change a setting on a synthesizer. The Parameter number says which setting it changes. Type 10 into Parameter.
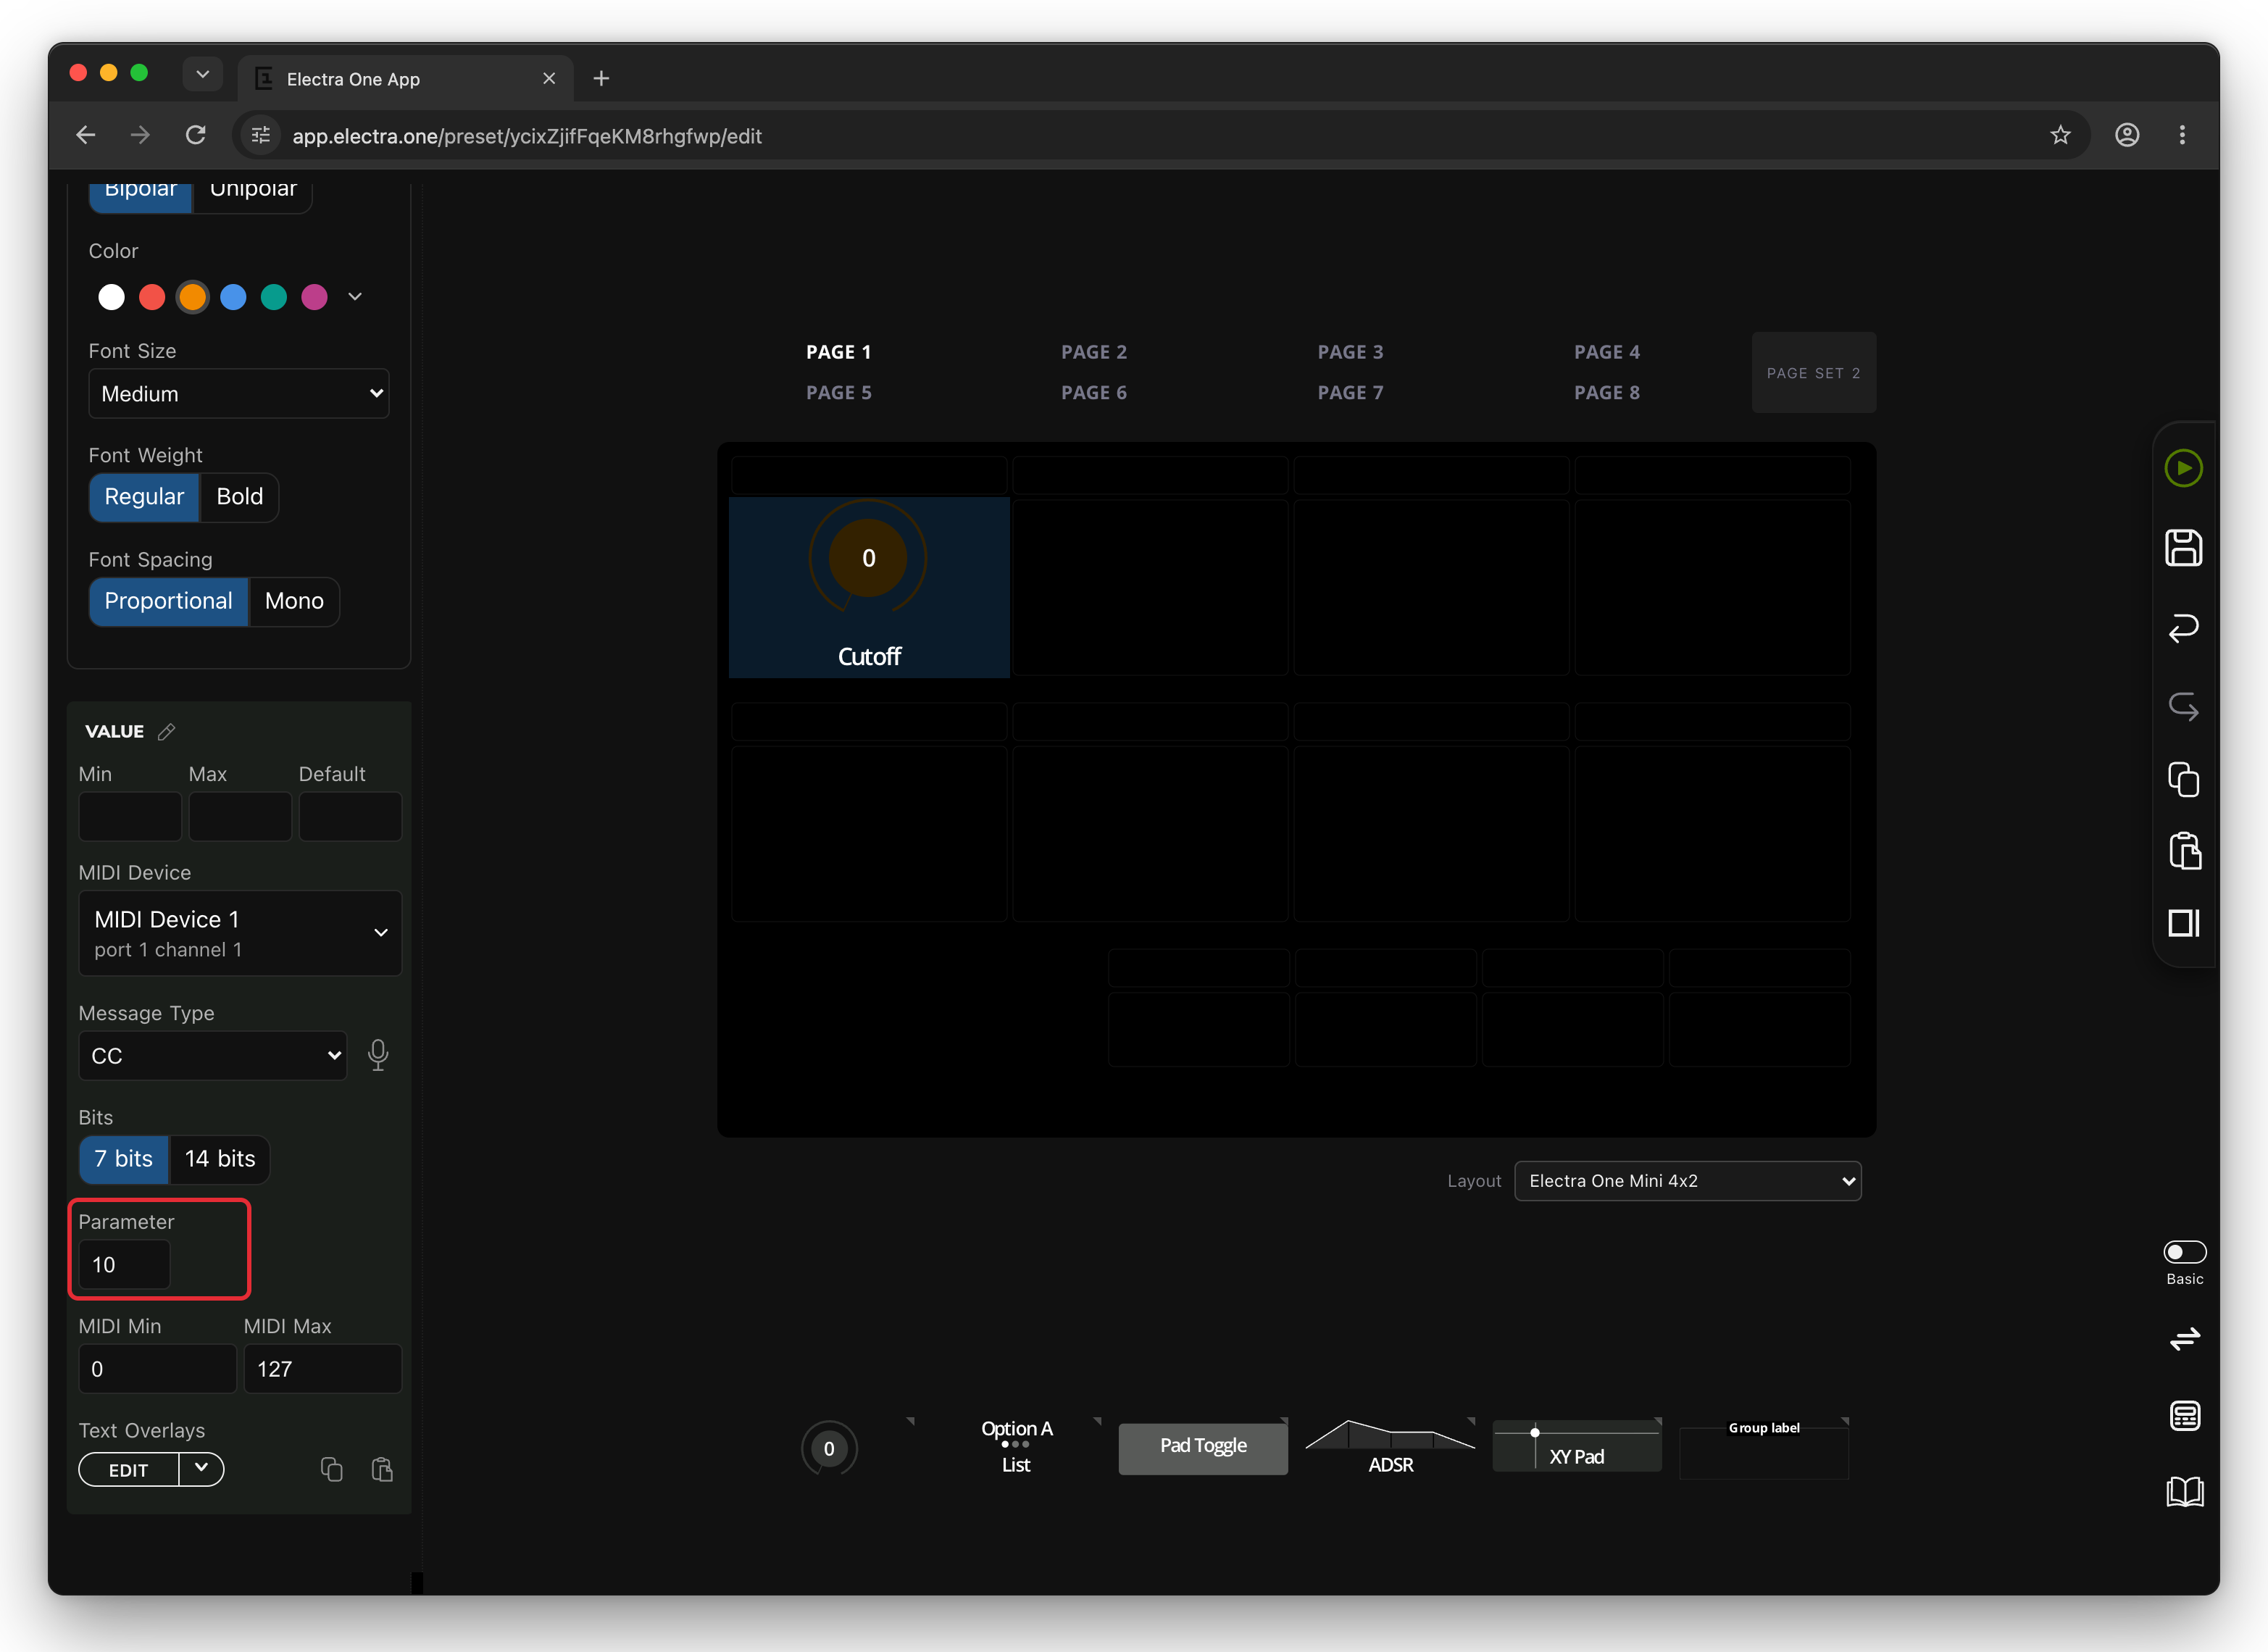
Which parameter number changes what depends on your synthesizer. Its manual usually has a table of the Control Change numbers it responds to.
4. Add a group label
A group label is a title that you place above one or more controls to keep the screen tidy and organized. Drag the Group label, the last one in the row, and drop it on the narrow slot right above Cutoff.
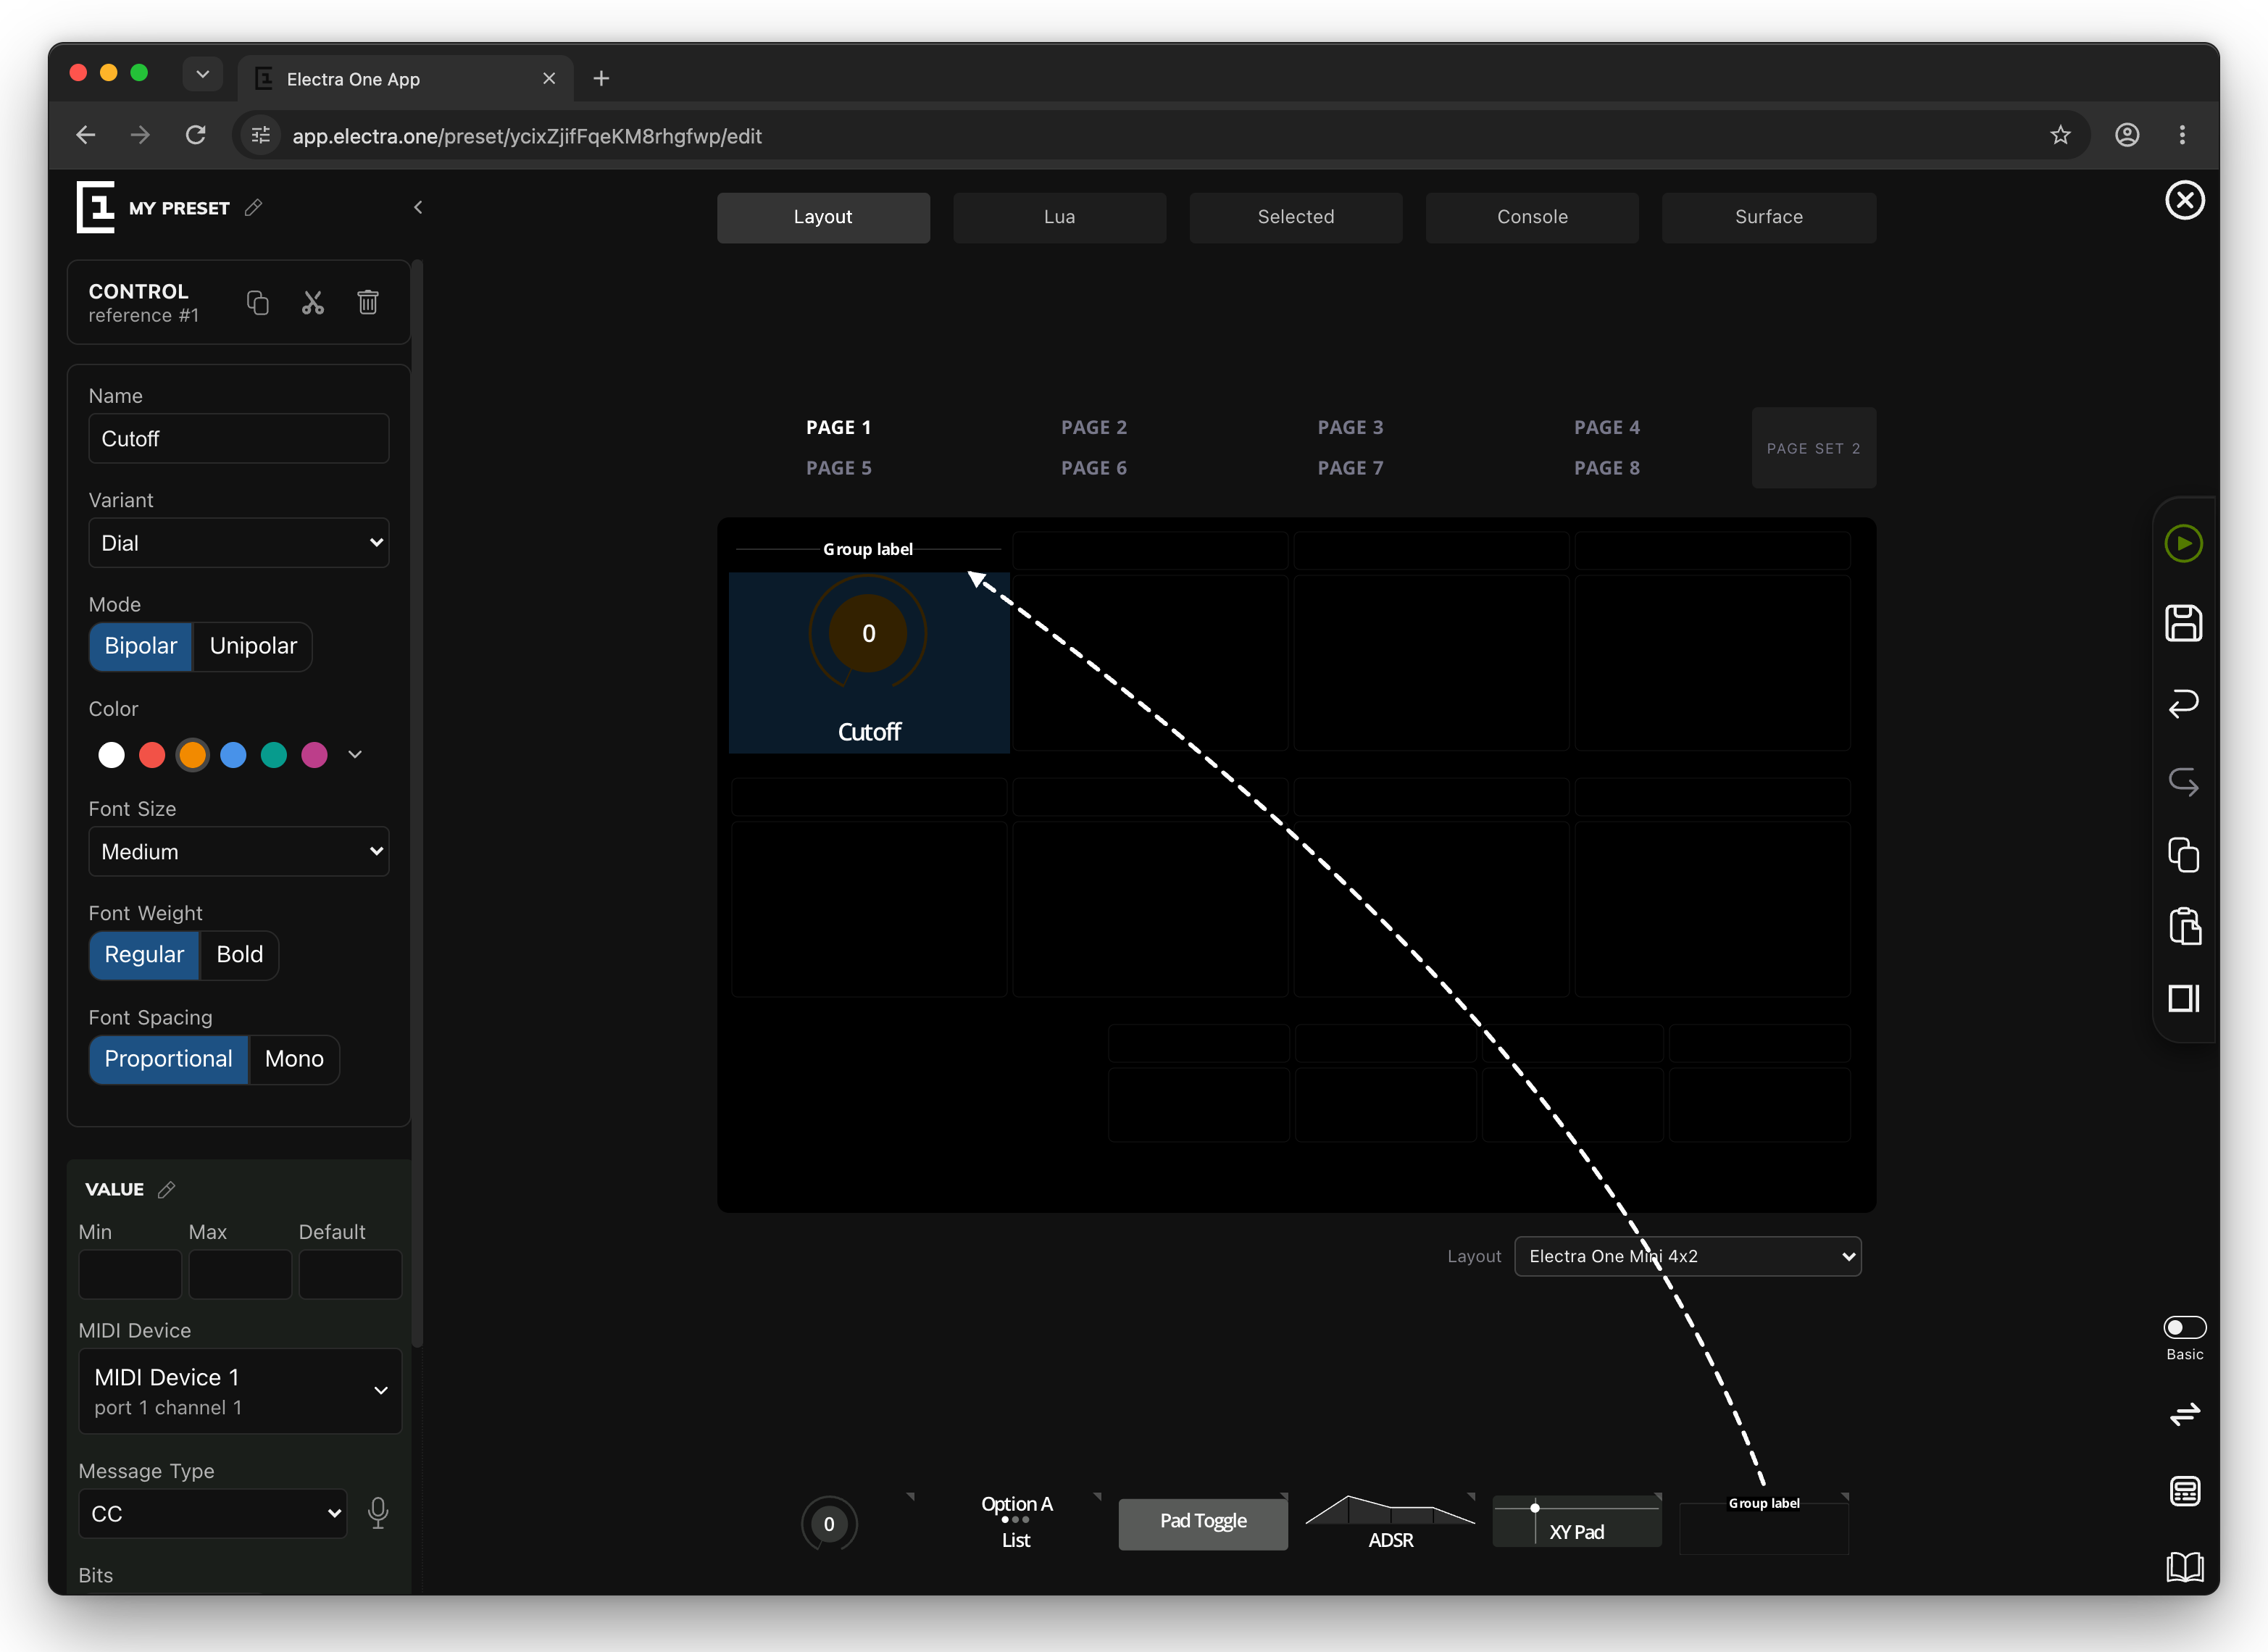
5. Name the group
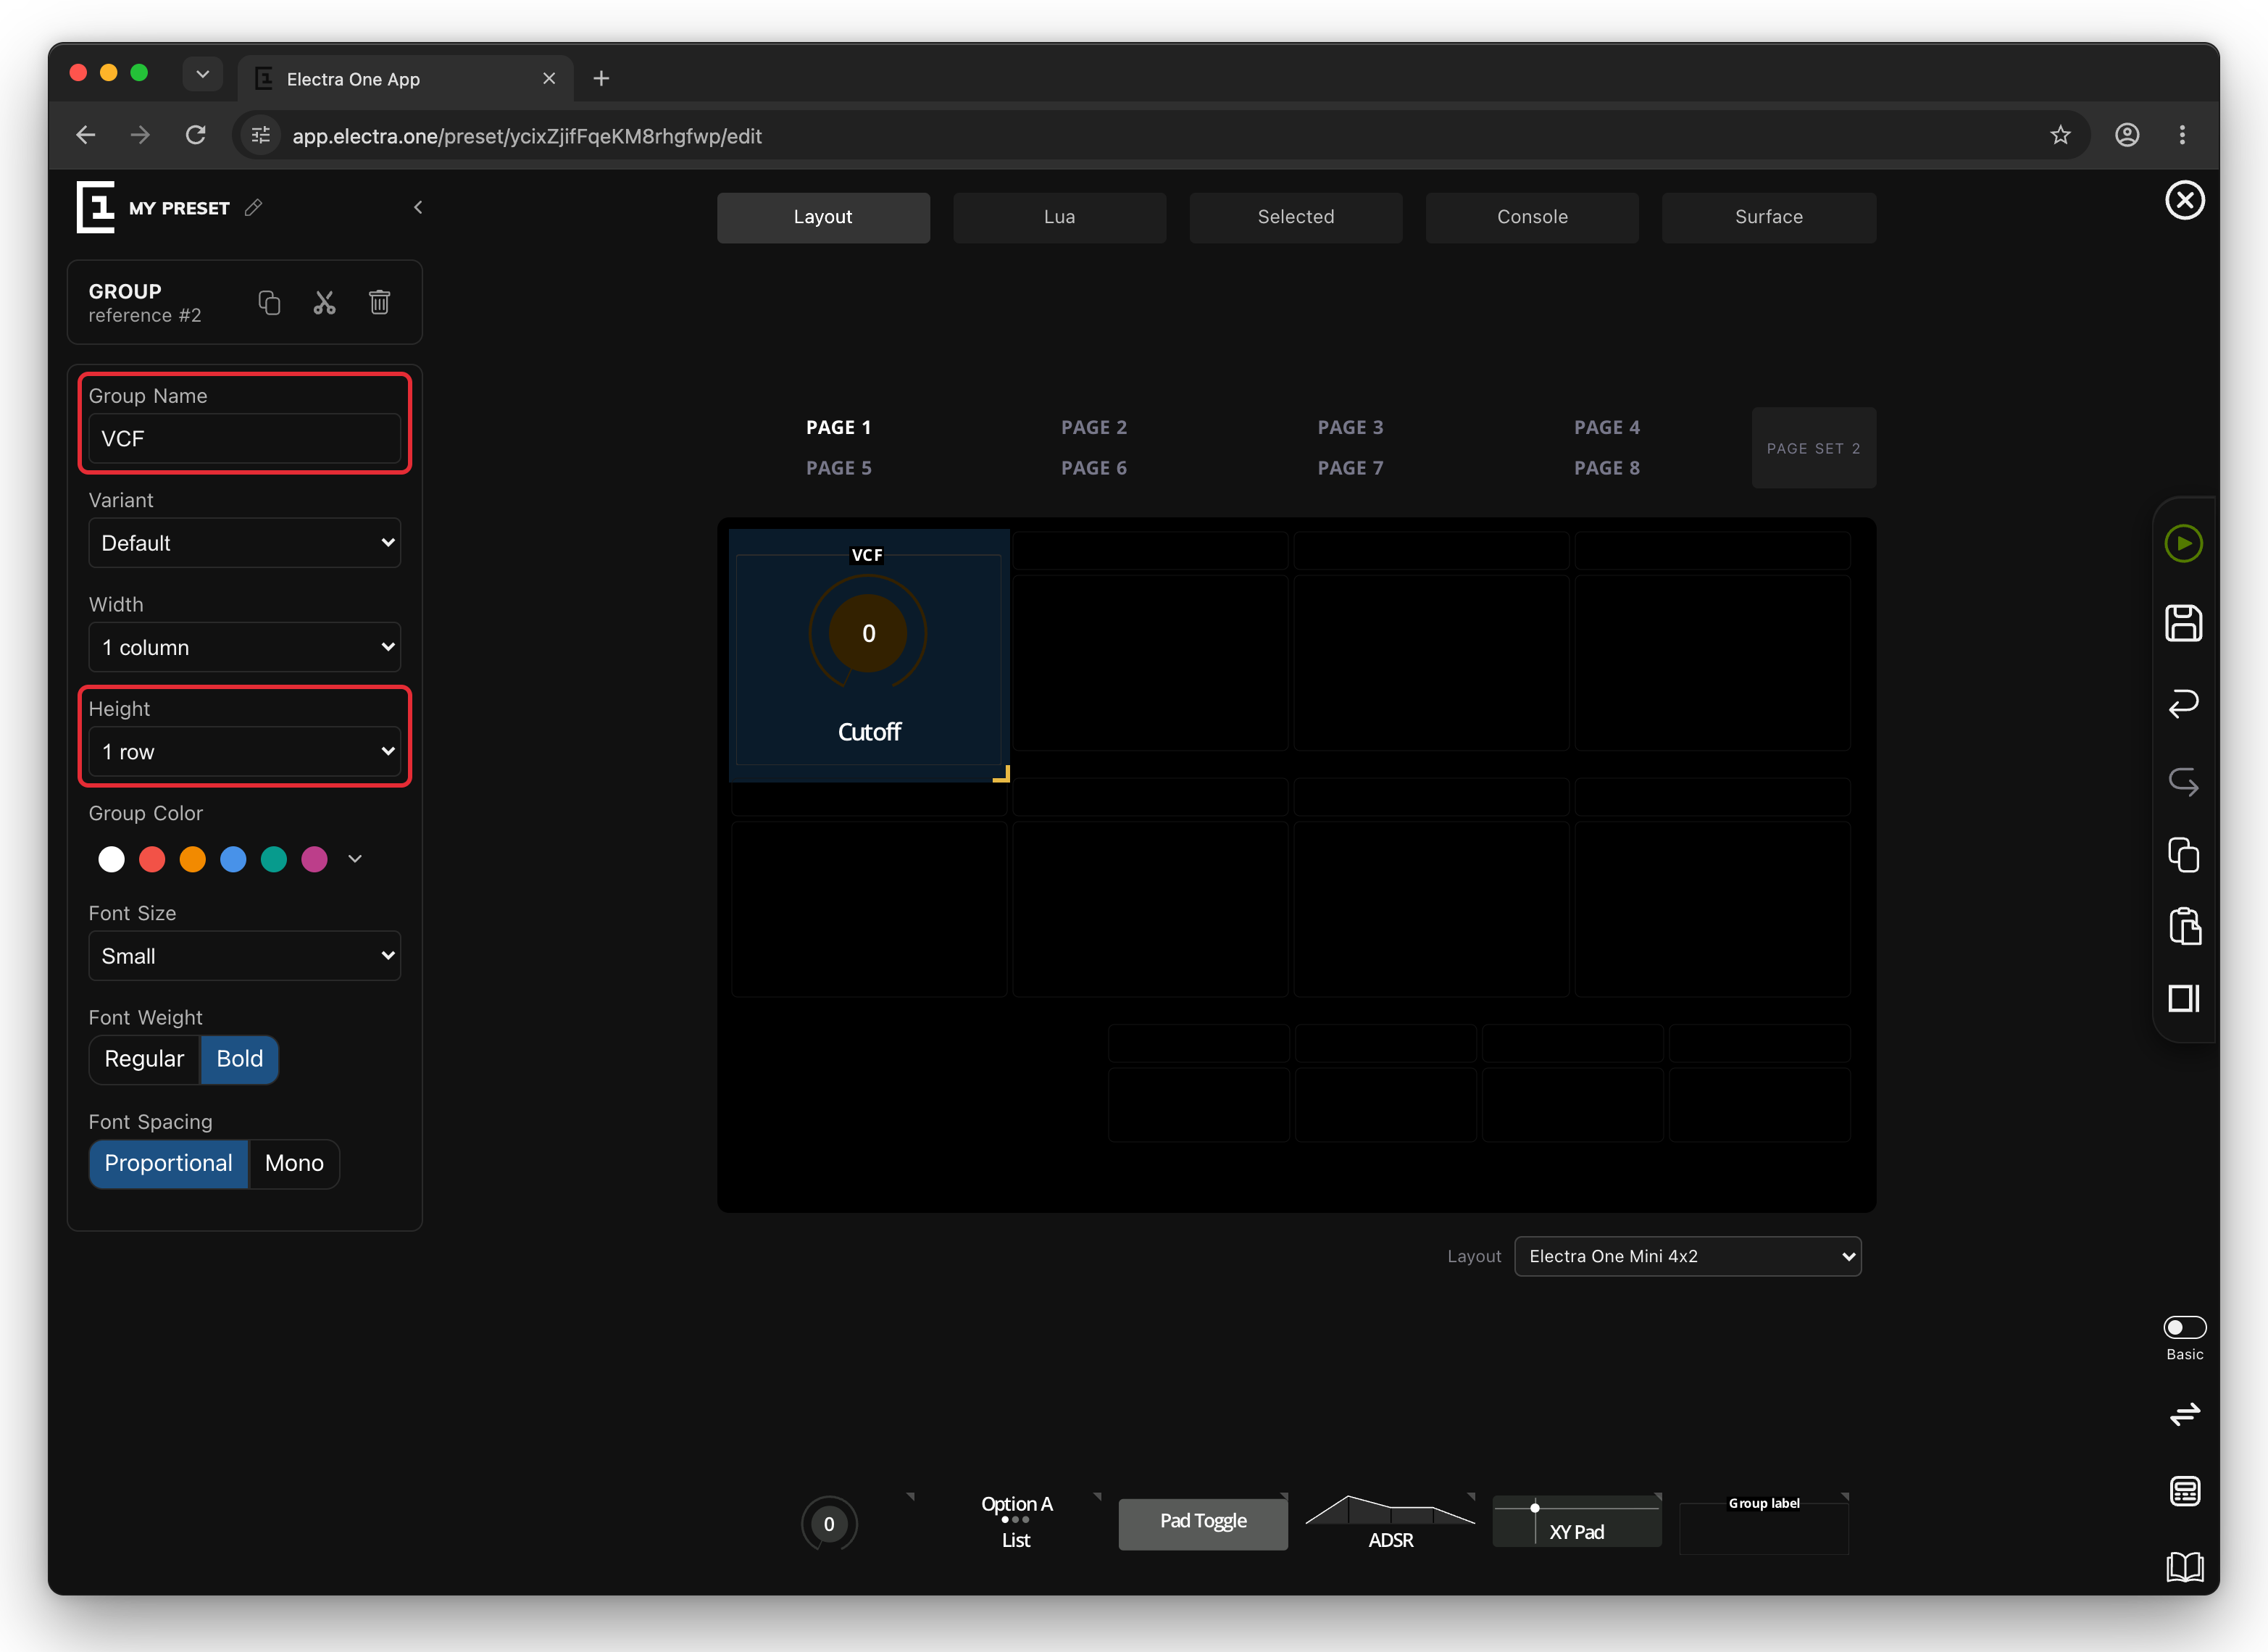
Click the group label to select it. In the sidebar, type VCF into Group Name. Then change Height from thin line to 1 row, so that the group draws a frame around the Cutoff dial below it.
6. Name the page
A preset can have many pages, and each page shows its own set of controls on the controller. A page name tells you where you are.
Move the mouse over the PAGE 1 button above the screen. A small pencil icon appears next to it. Click the pencil.
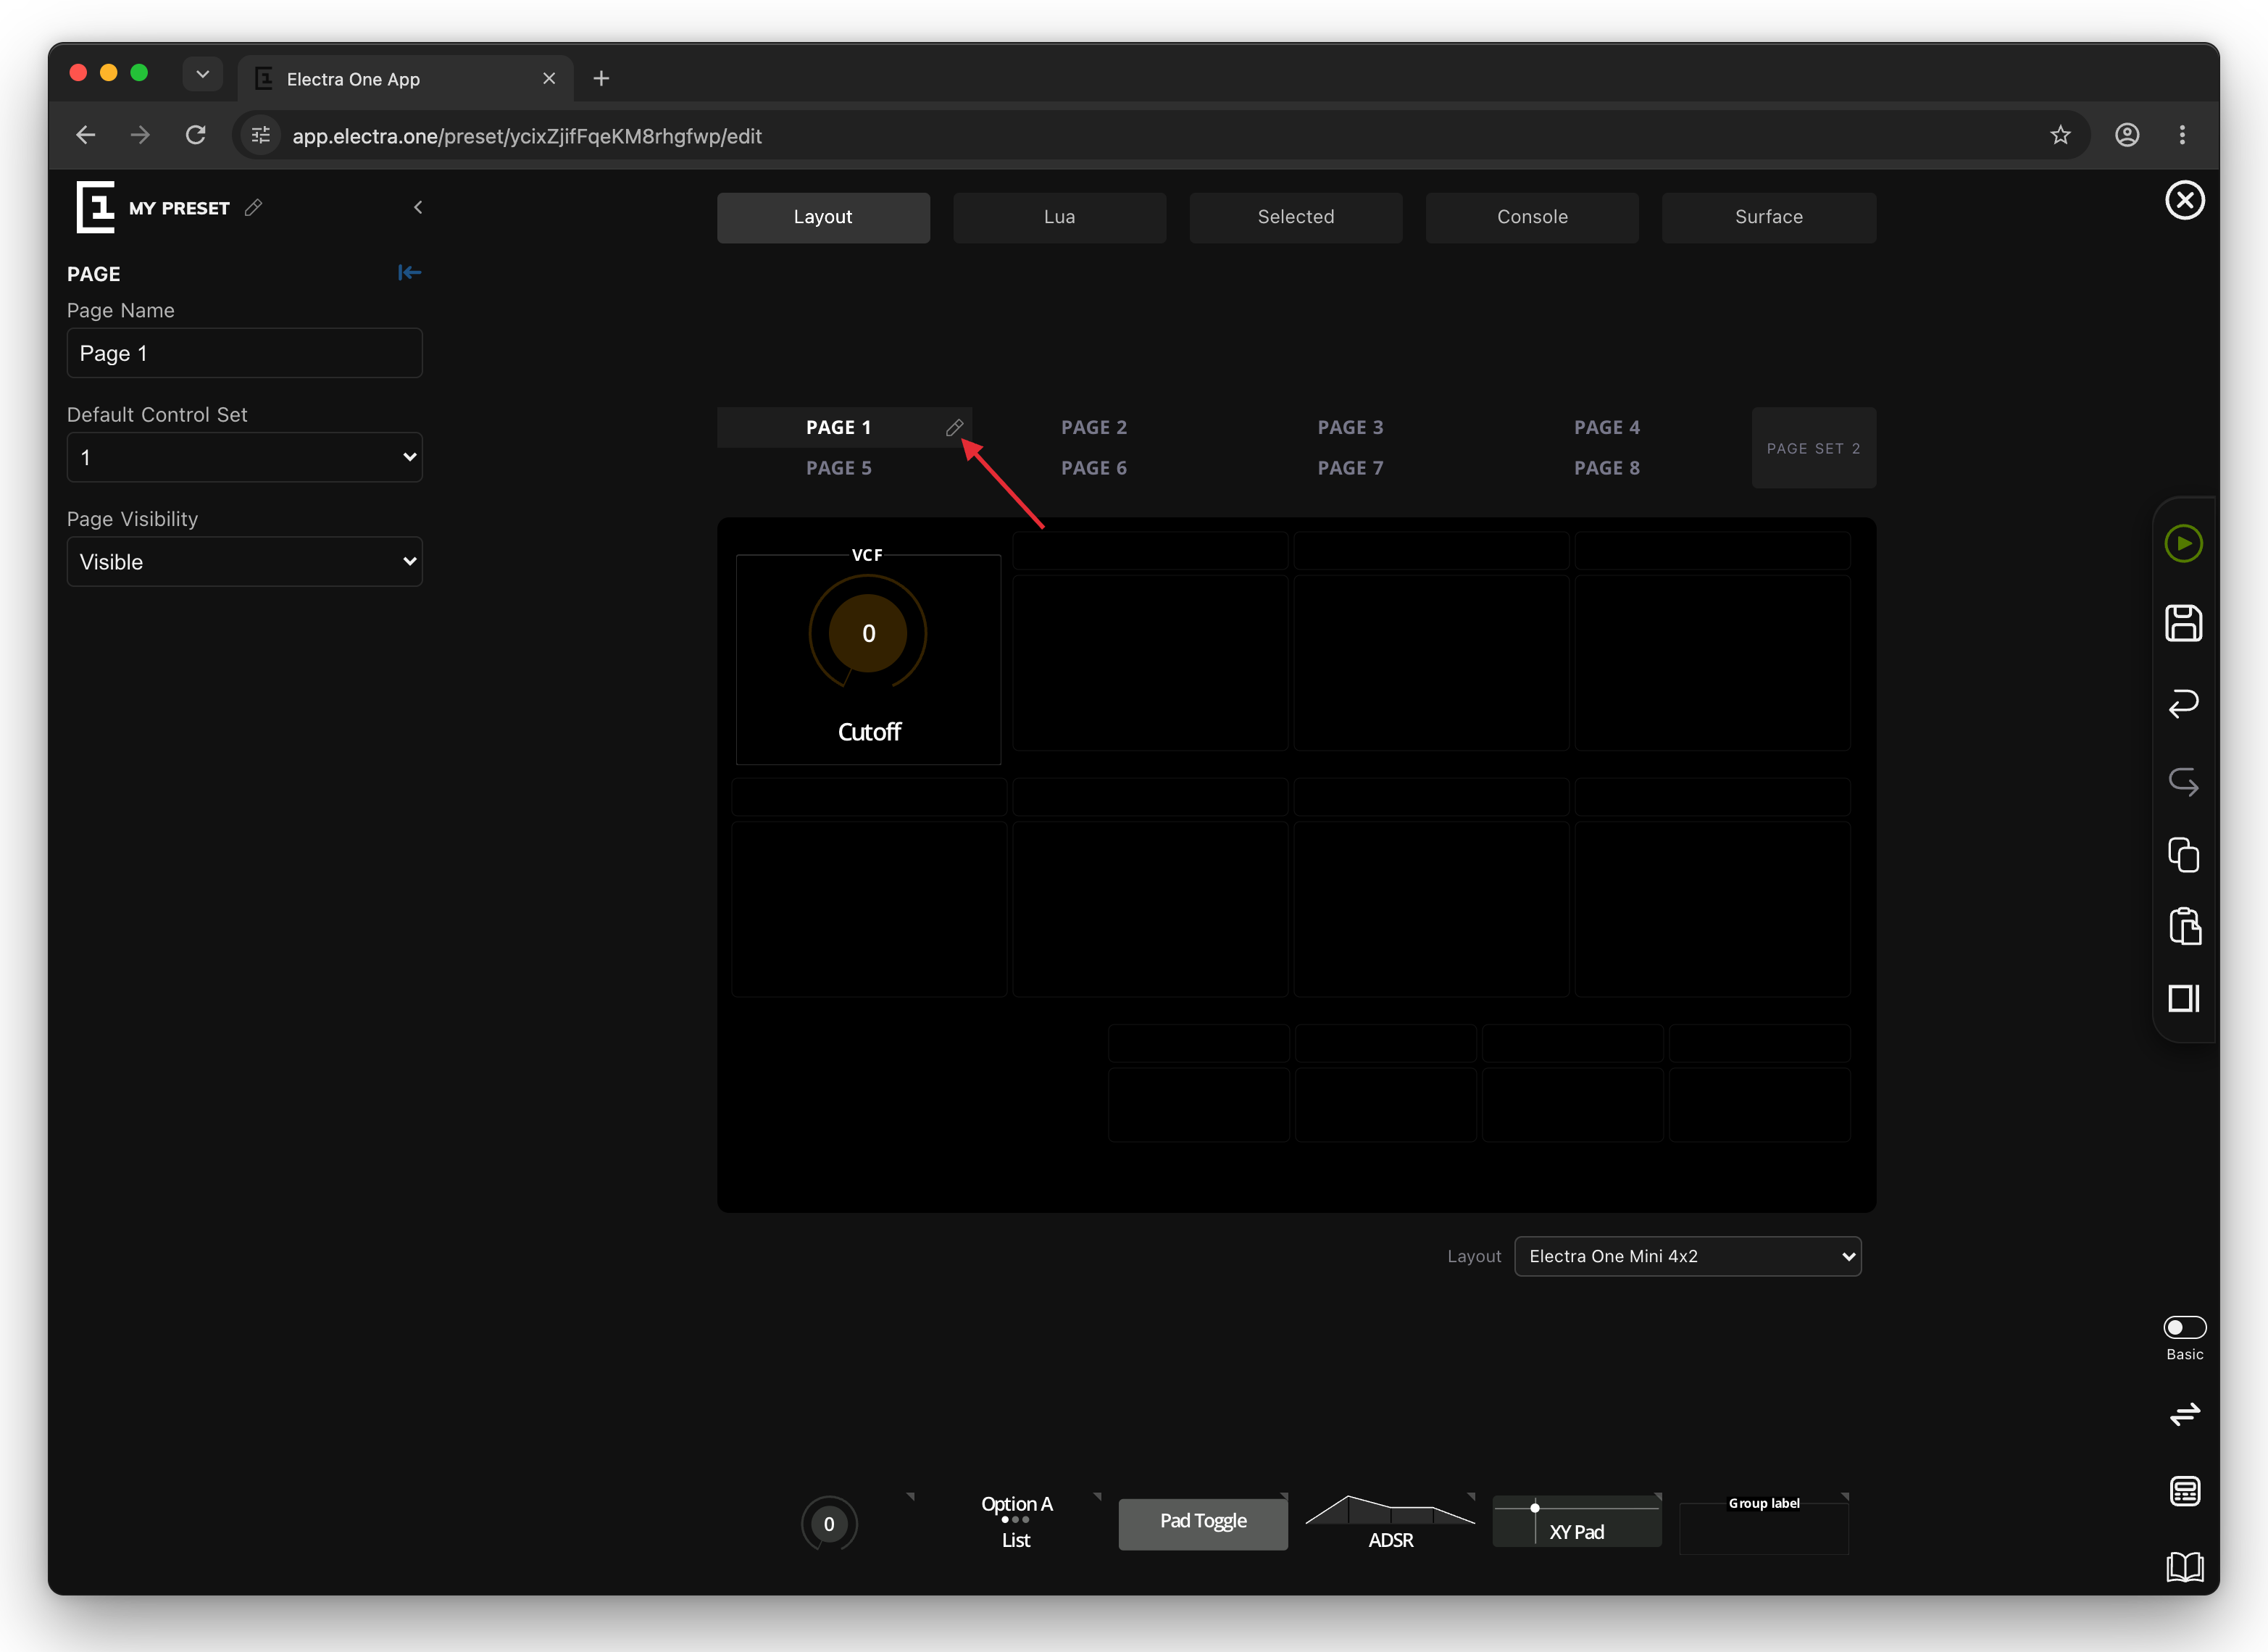
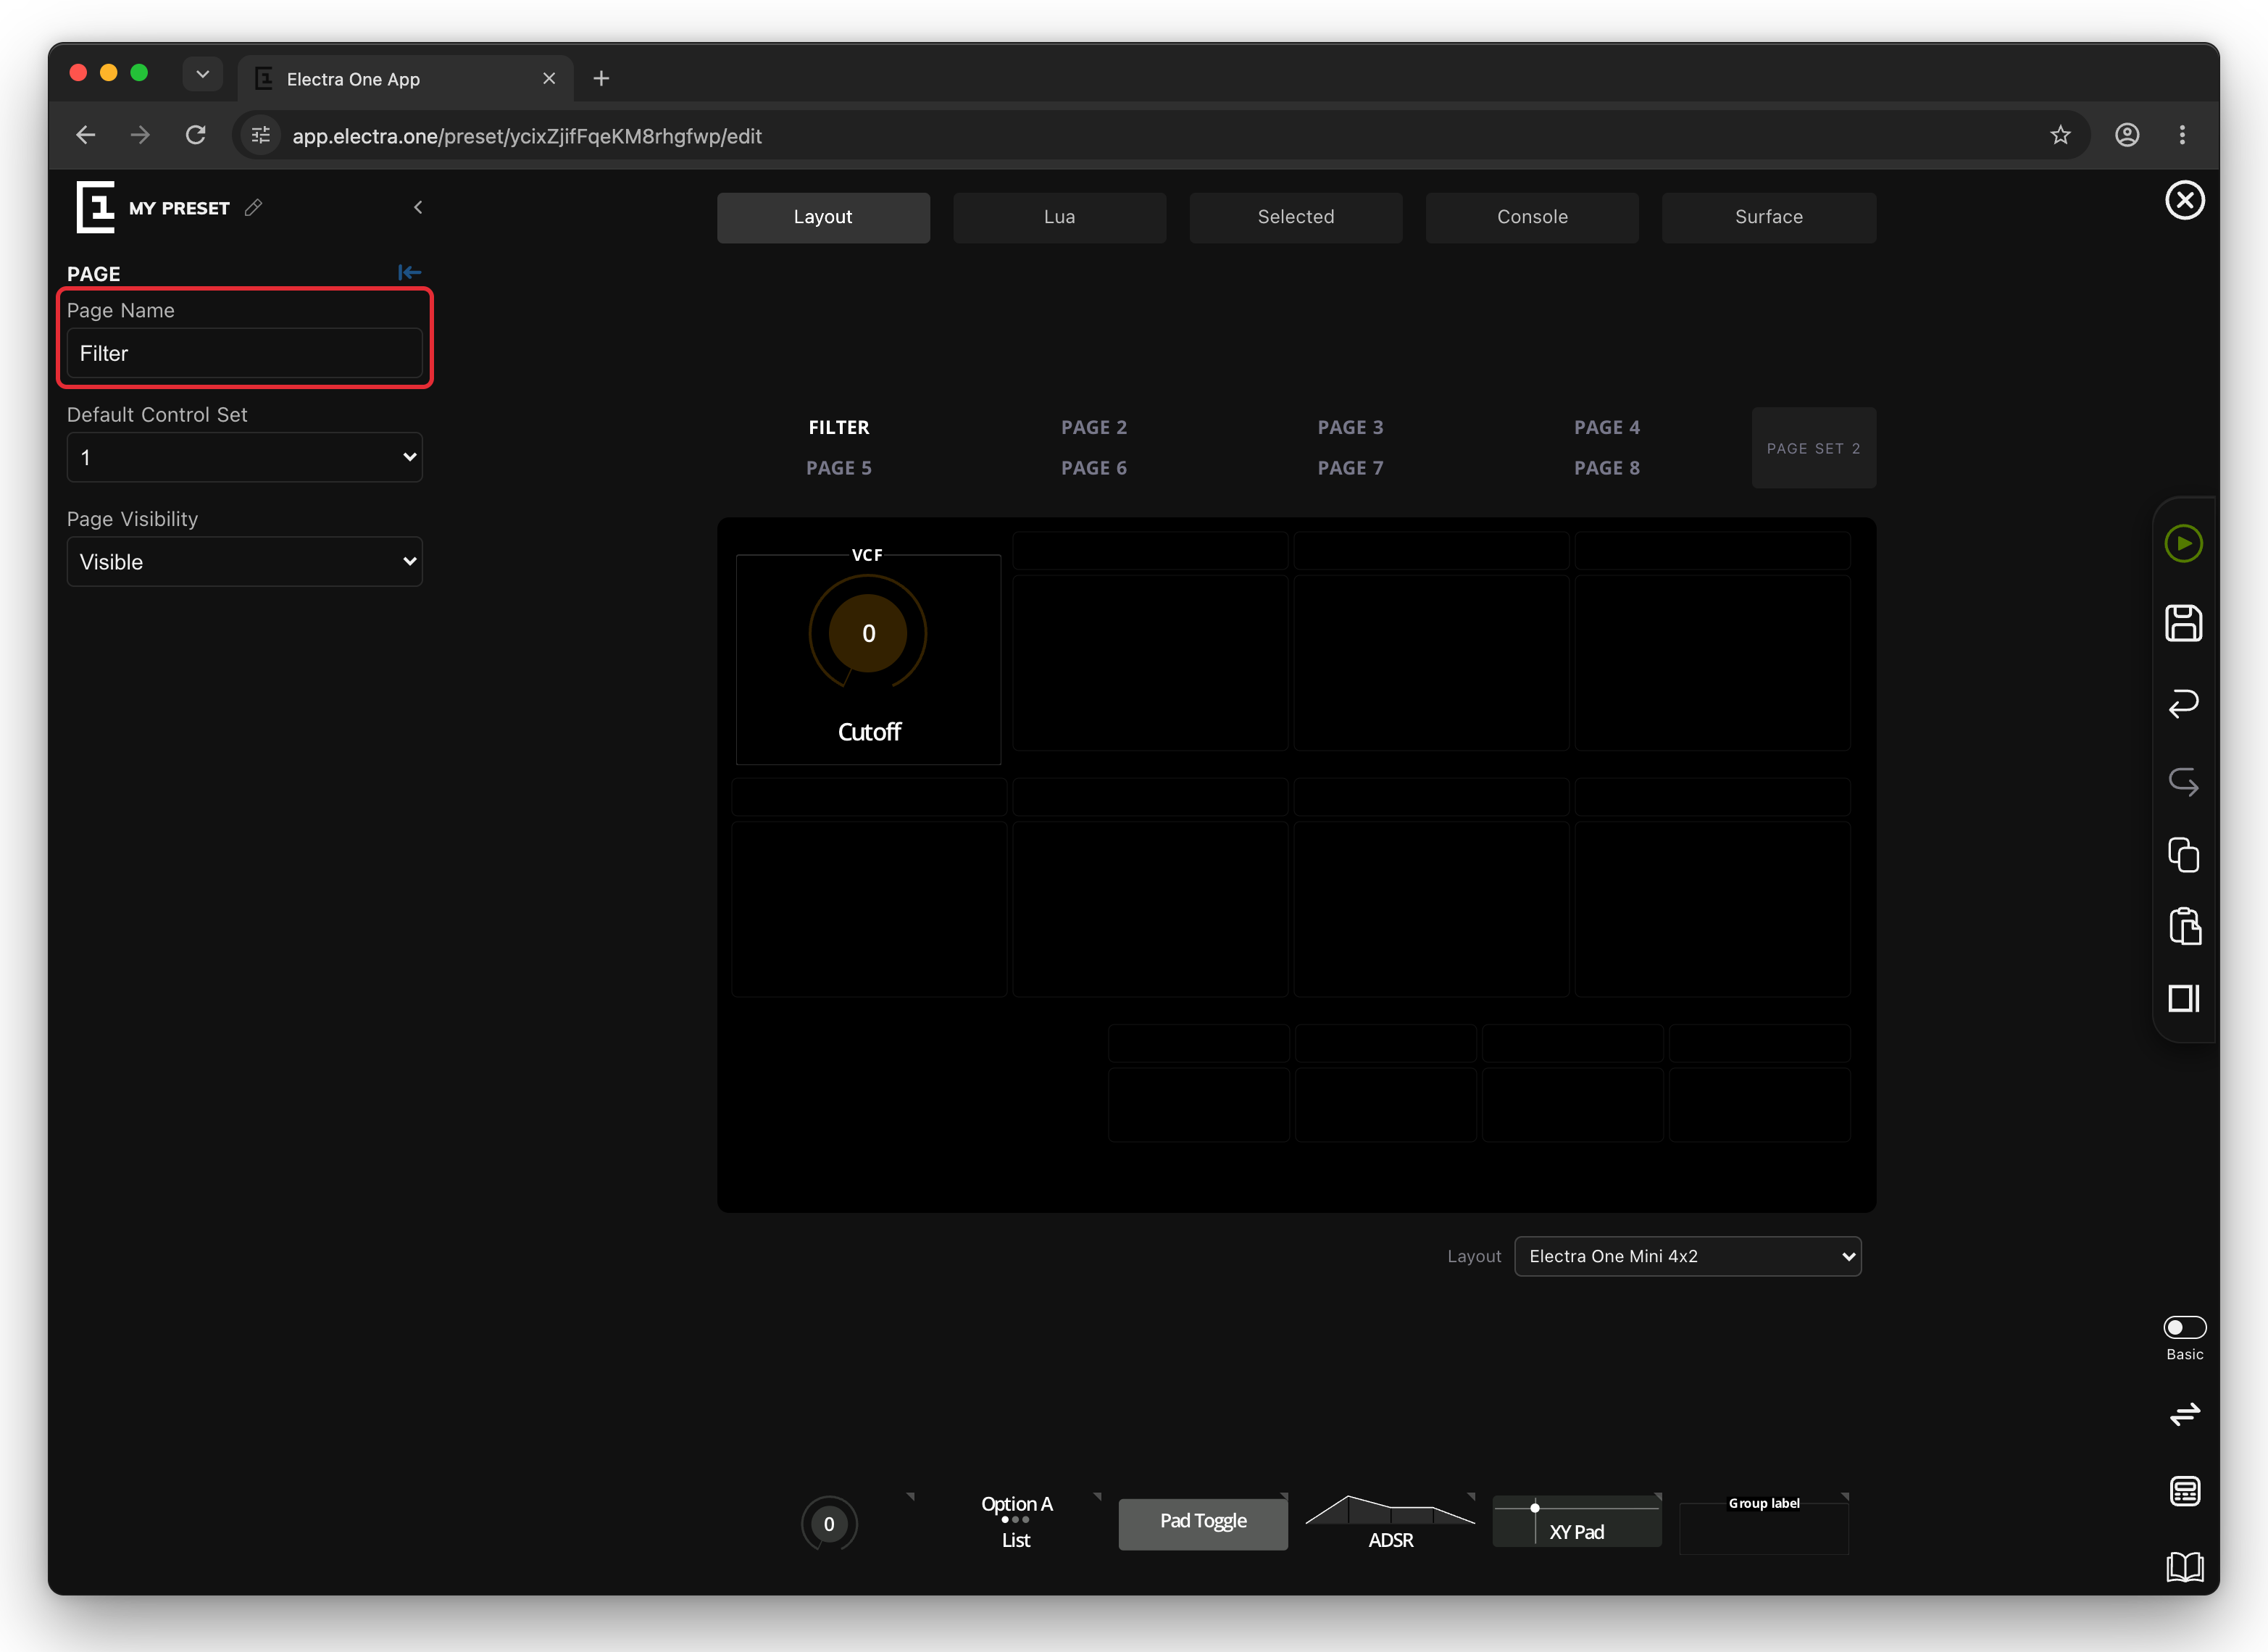
The sidebar now shows the page settings. Type Filter into Page Name.
7. Name the preset
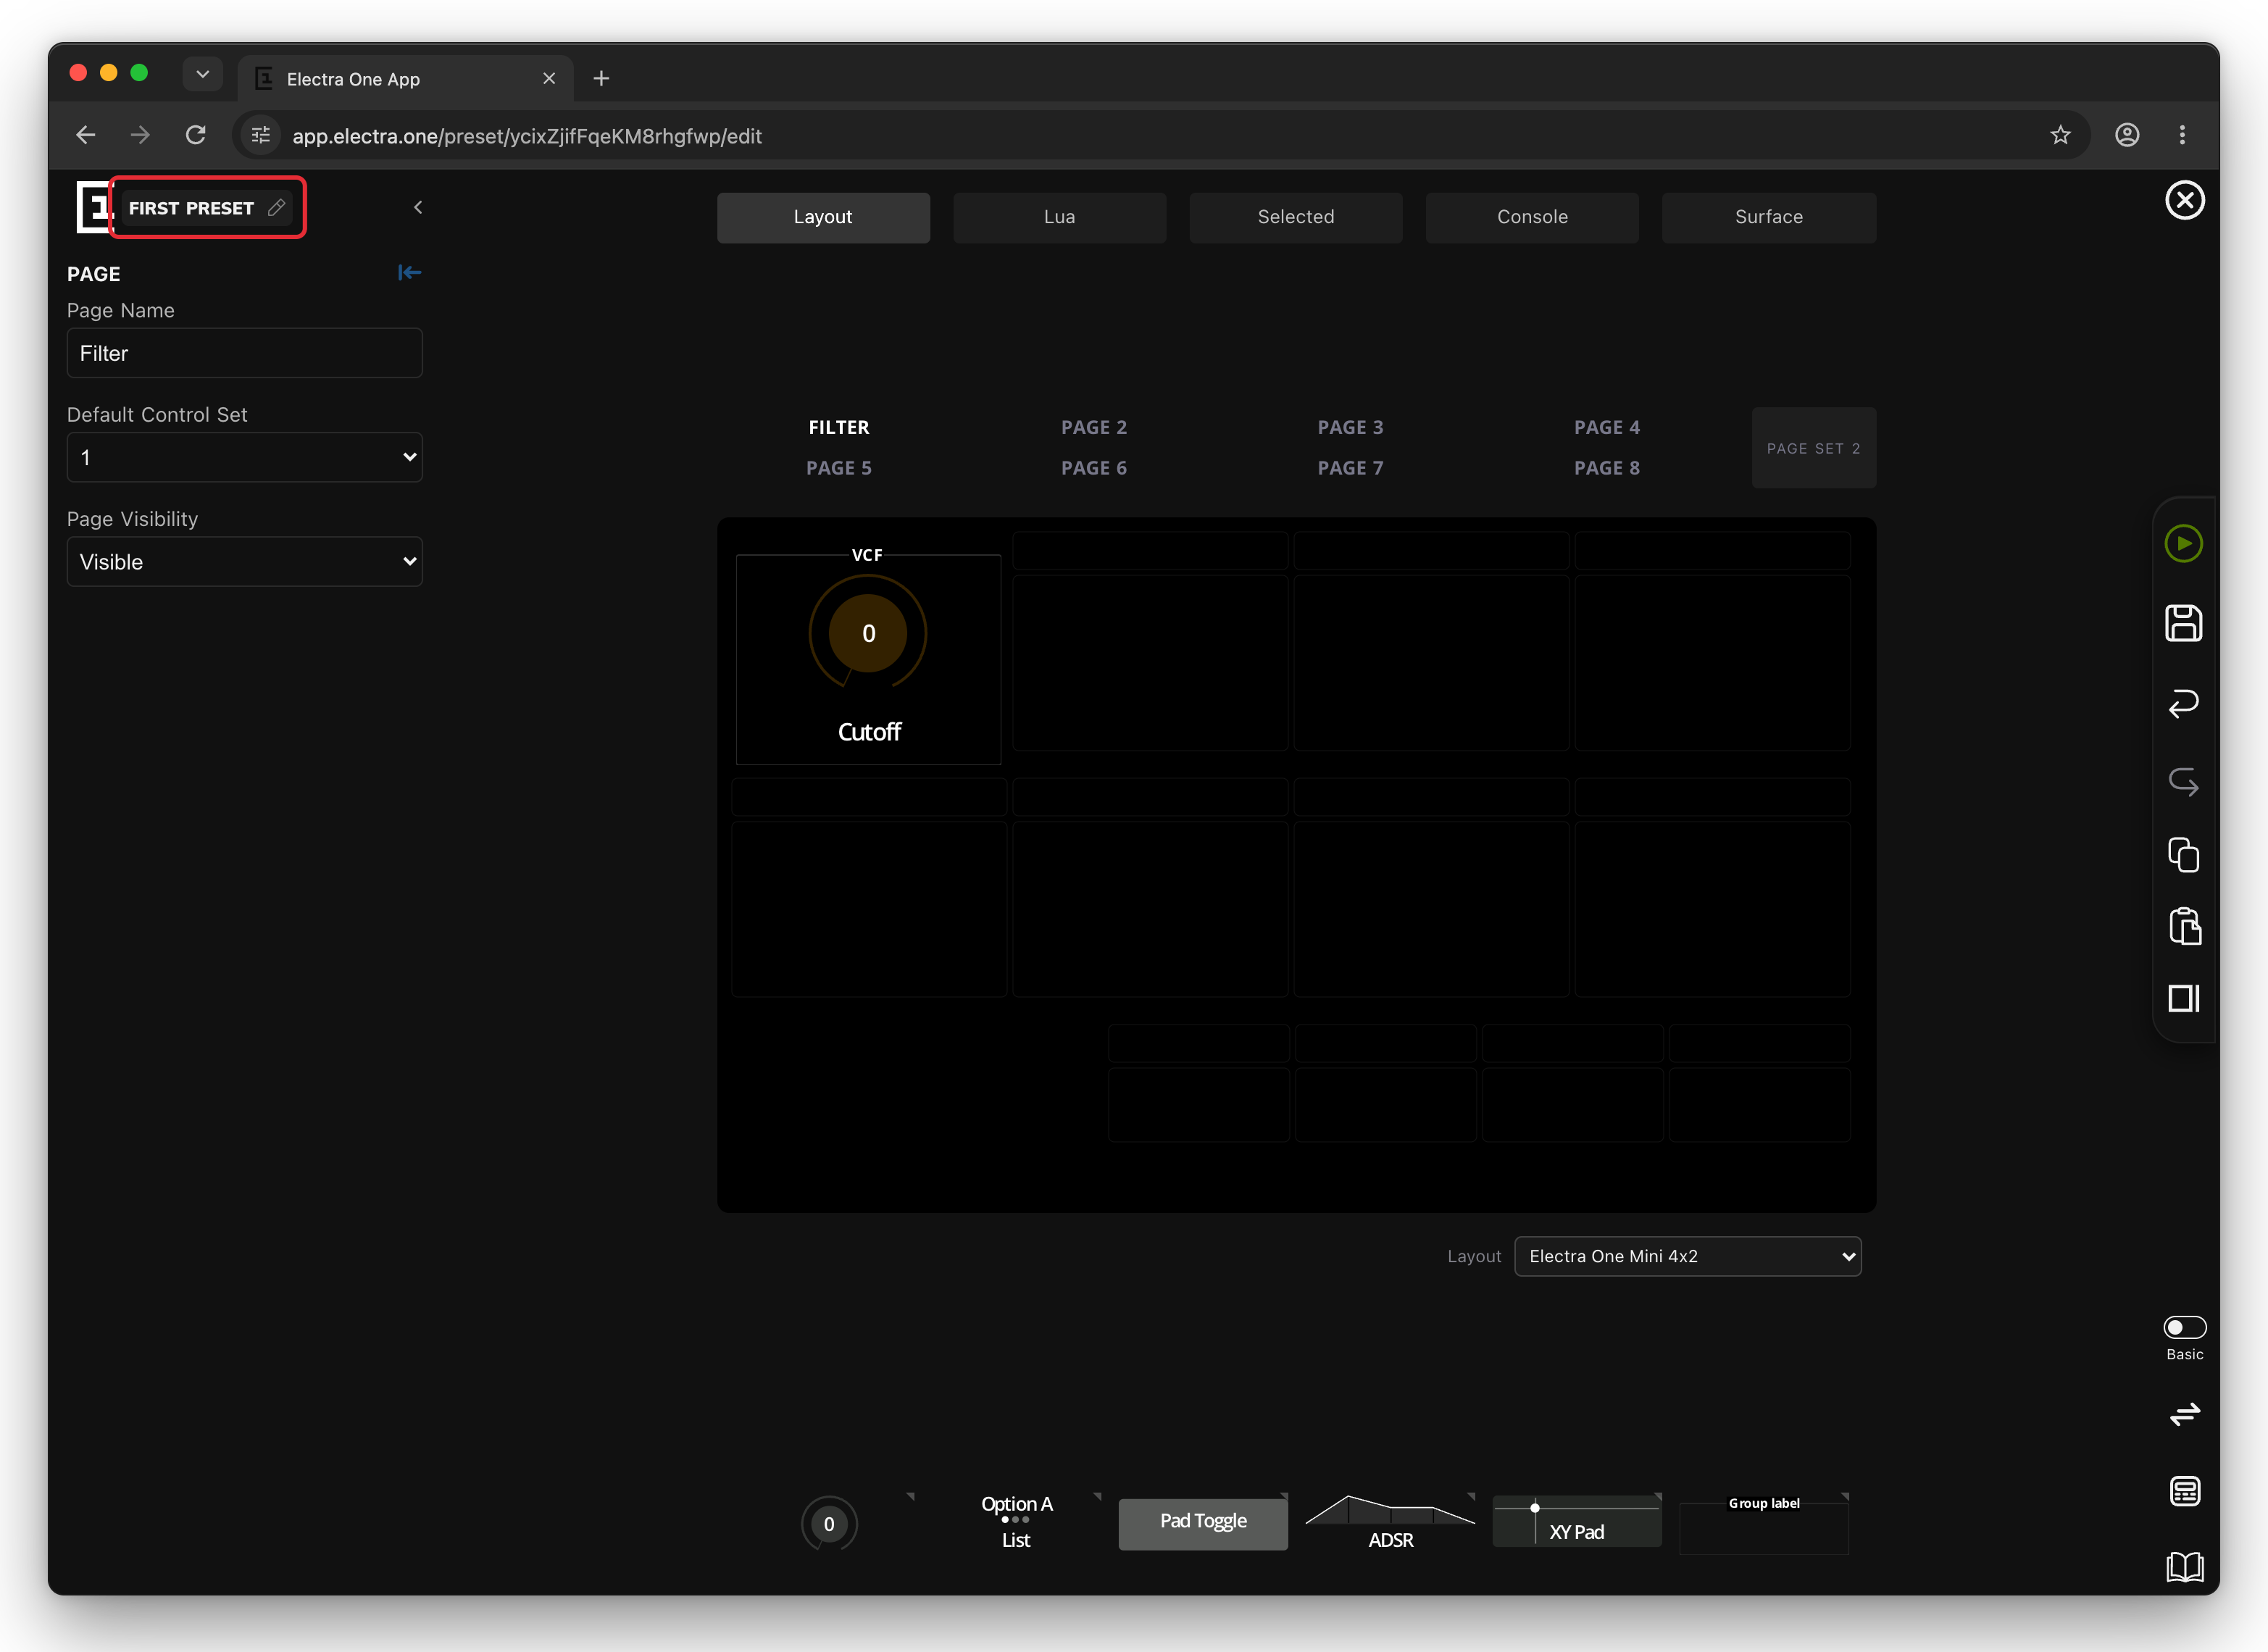
Click the pencil next to MY PRESET in the top-left corner of the editor, type First Preset and press Enter.
8. Send the preset to your Electra One
On the right edge of the editor, move the mouse over the green play button. It says Send to Electra. Click it.
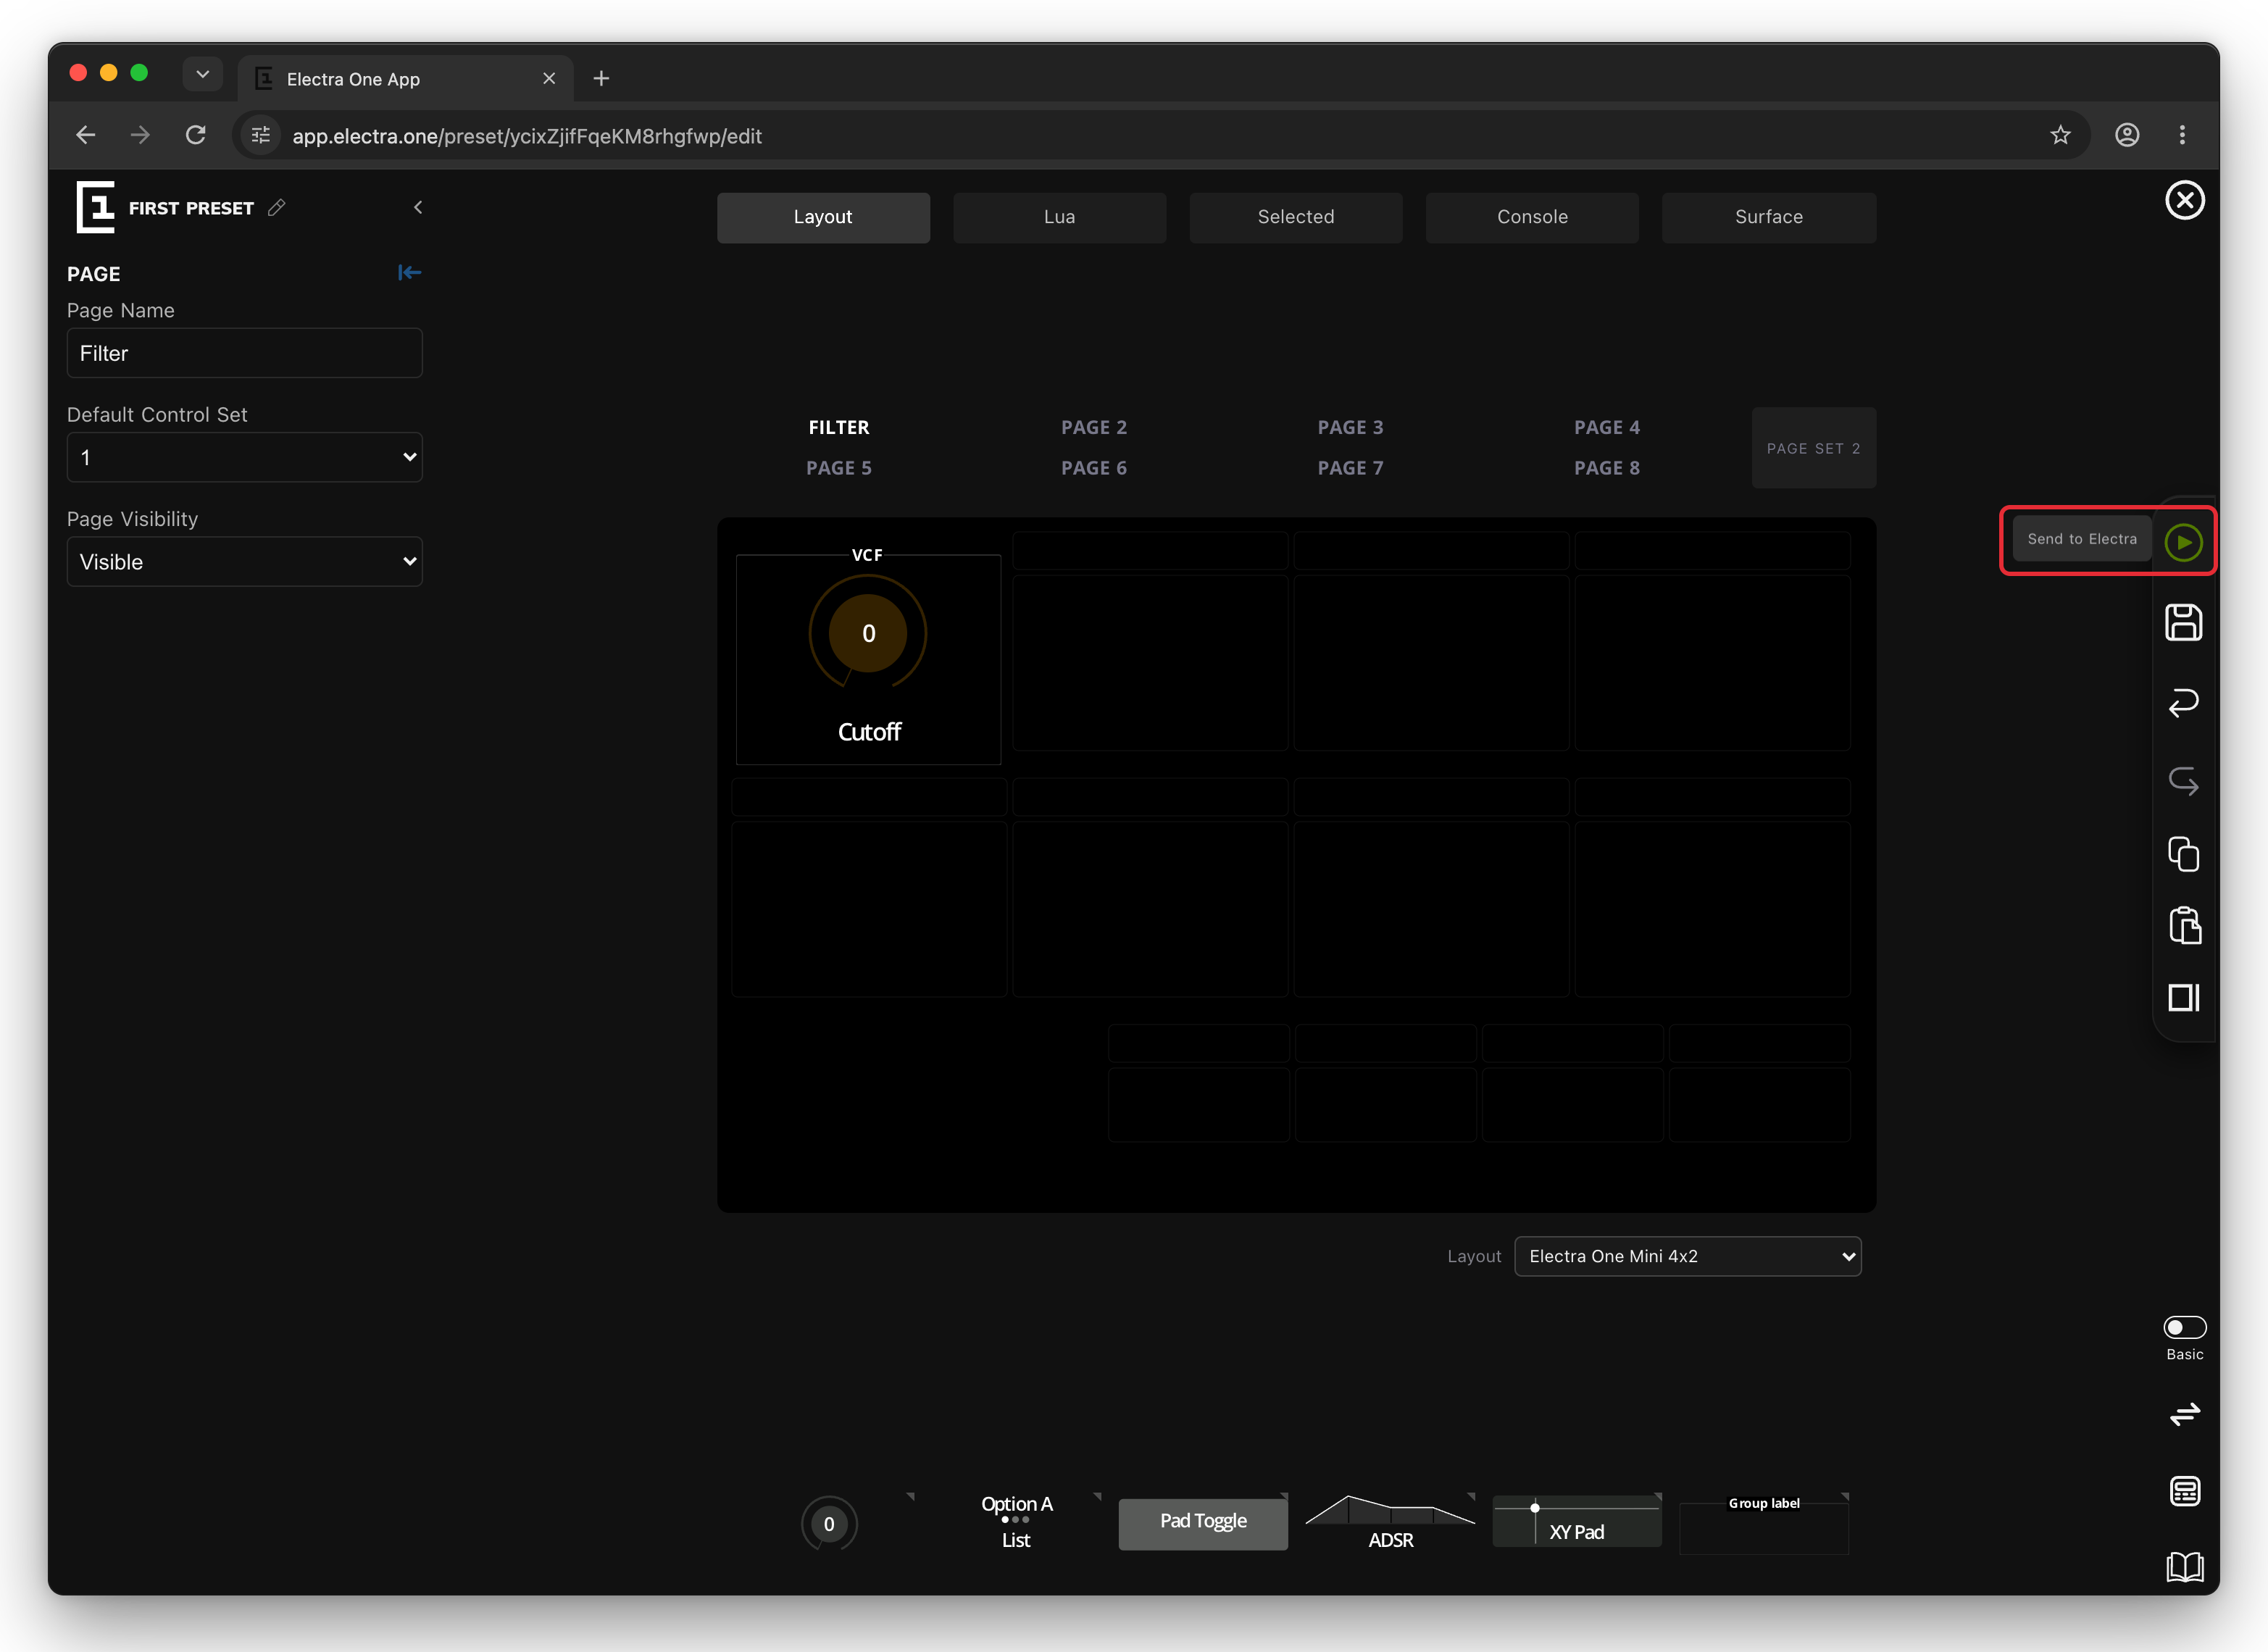
The preset goes to the preset slot that is currently selected on your Electra One and replaces whatever that slot held before. It is also saved to your account at the same time, so you will find it under MY PRESETS.
9. Try it on your controller
Your Electra One now shows the Filter page with the orange Cutoff dial in its VCF frame, and the name of the preset and the page at the bottom of the screen. Turn the top-left knob. The dial follows your hand, and the controller sends Control Change 10 messages on MIDI port 1, channel 1. On the Electra One Mk2 you can also use the touch screen.
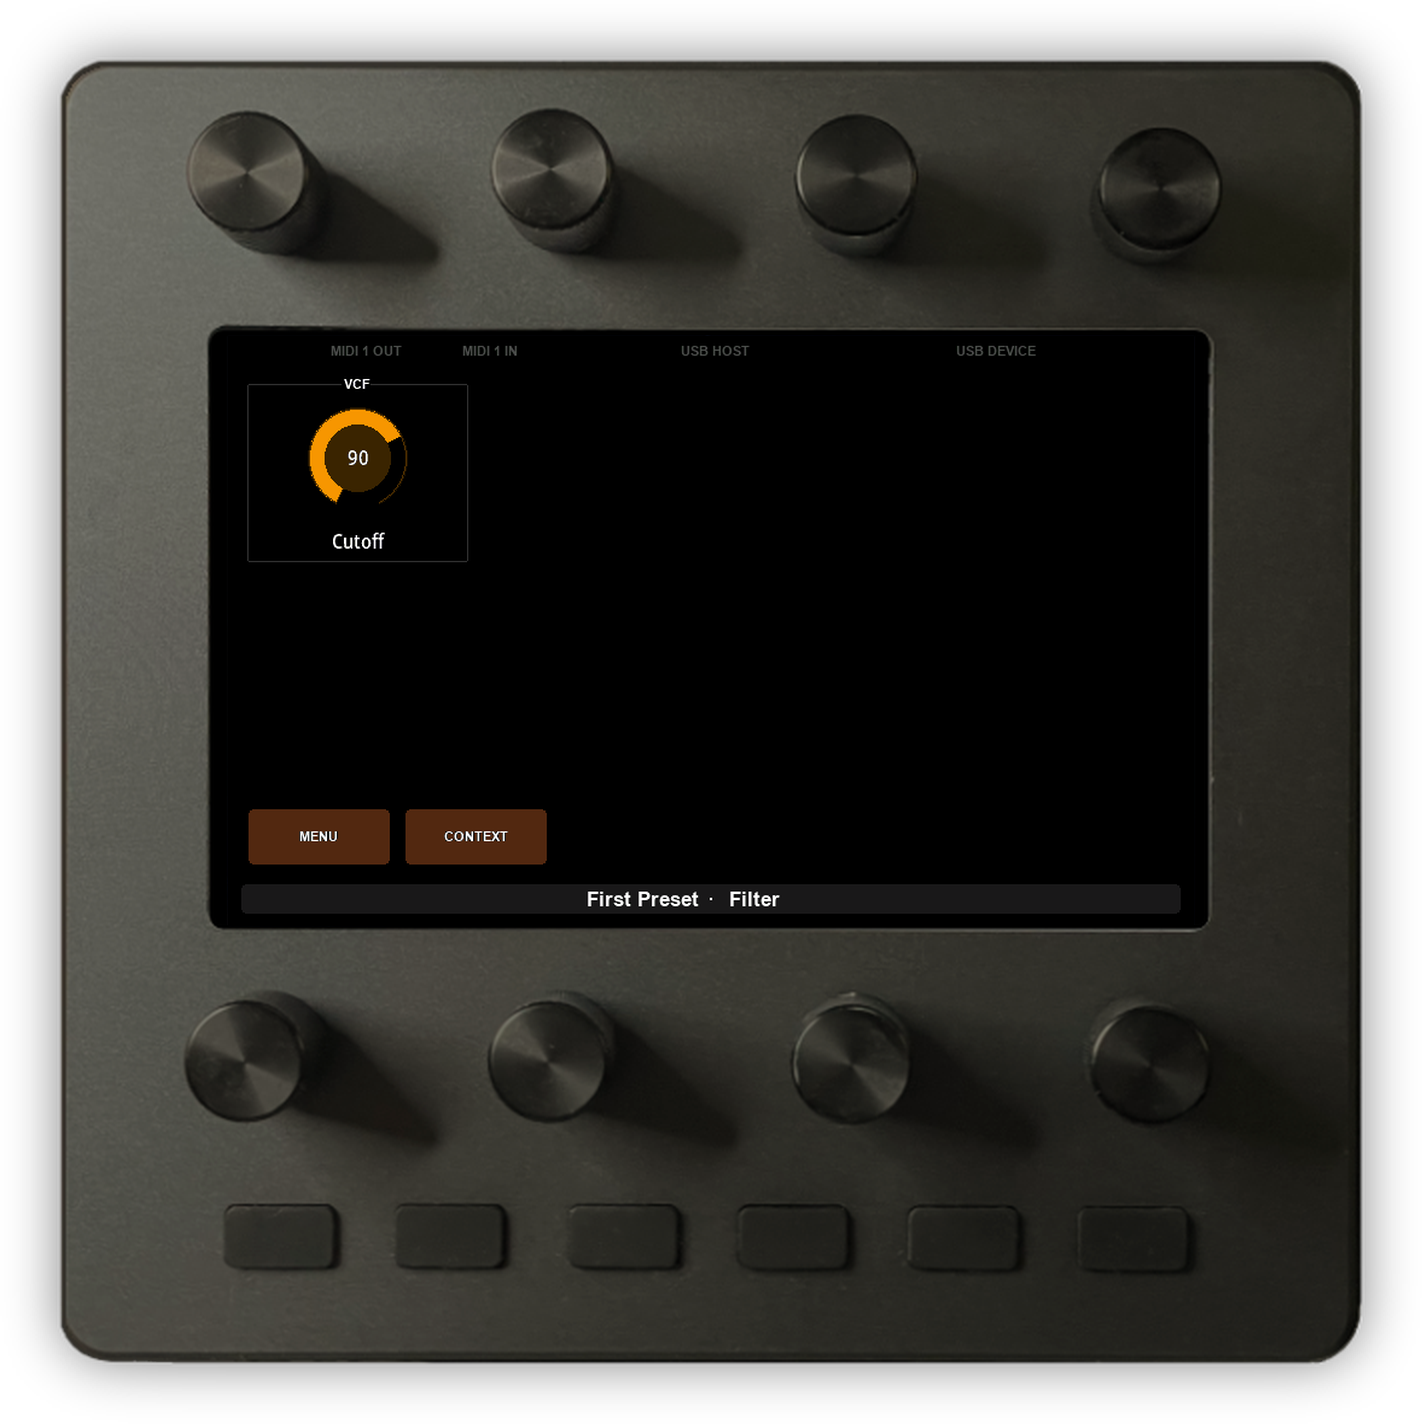
Congratulations, you have made your first preset. It is active and ready to control your hardware or software instruments. To learn more about how controls, messages and devices fit together, head over to the next chapter of the User Guide: The Concept of Control.