

Version5.0.0 beta
Layouts, Pages and Controls
This chapter explains how a preset is put together in the Layout view: controller-specific layouts, pages, placing and arranging controls and groups, the devices the controls communicate with, MIDI Learn, and the Controls view. The behaviour of individual controls is described in Control Settings.
Layouts
A project can carry a layout for each controller model, and each layout has its own pages:
| Layout | Model | Pages | One page |
|---|---|---|---|
| Electra One Mk2 6x6 | Mk2 (and Mk1) | 12 | 36 controls in 6 rows of 6, in three control sets of 12 |
| Electra One Mini 4x2 | Mini | 16 | 8 controls in 2 rows of 4, and 4 hardware buttons |
The Layout selector under the page chooses which layout the view shows. When the editor opens, it shows the layout of the connected controller.
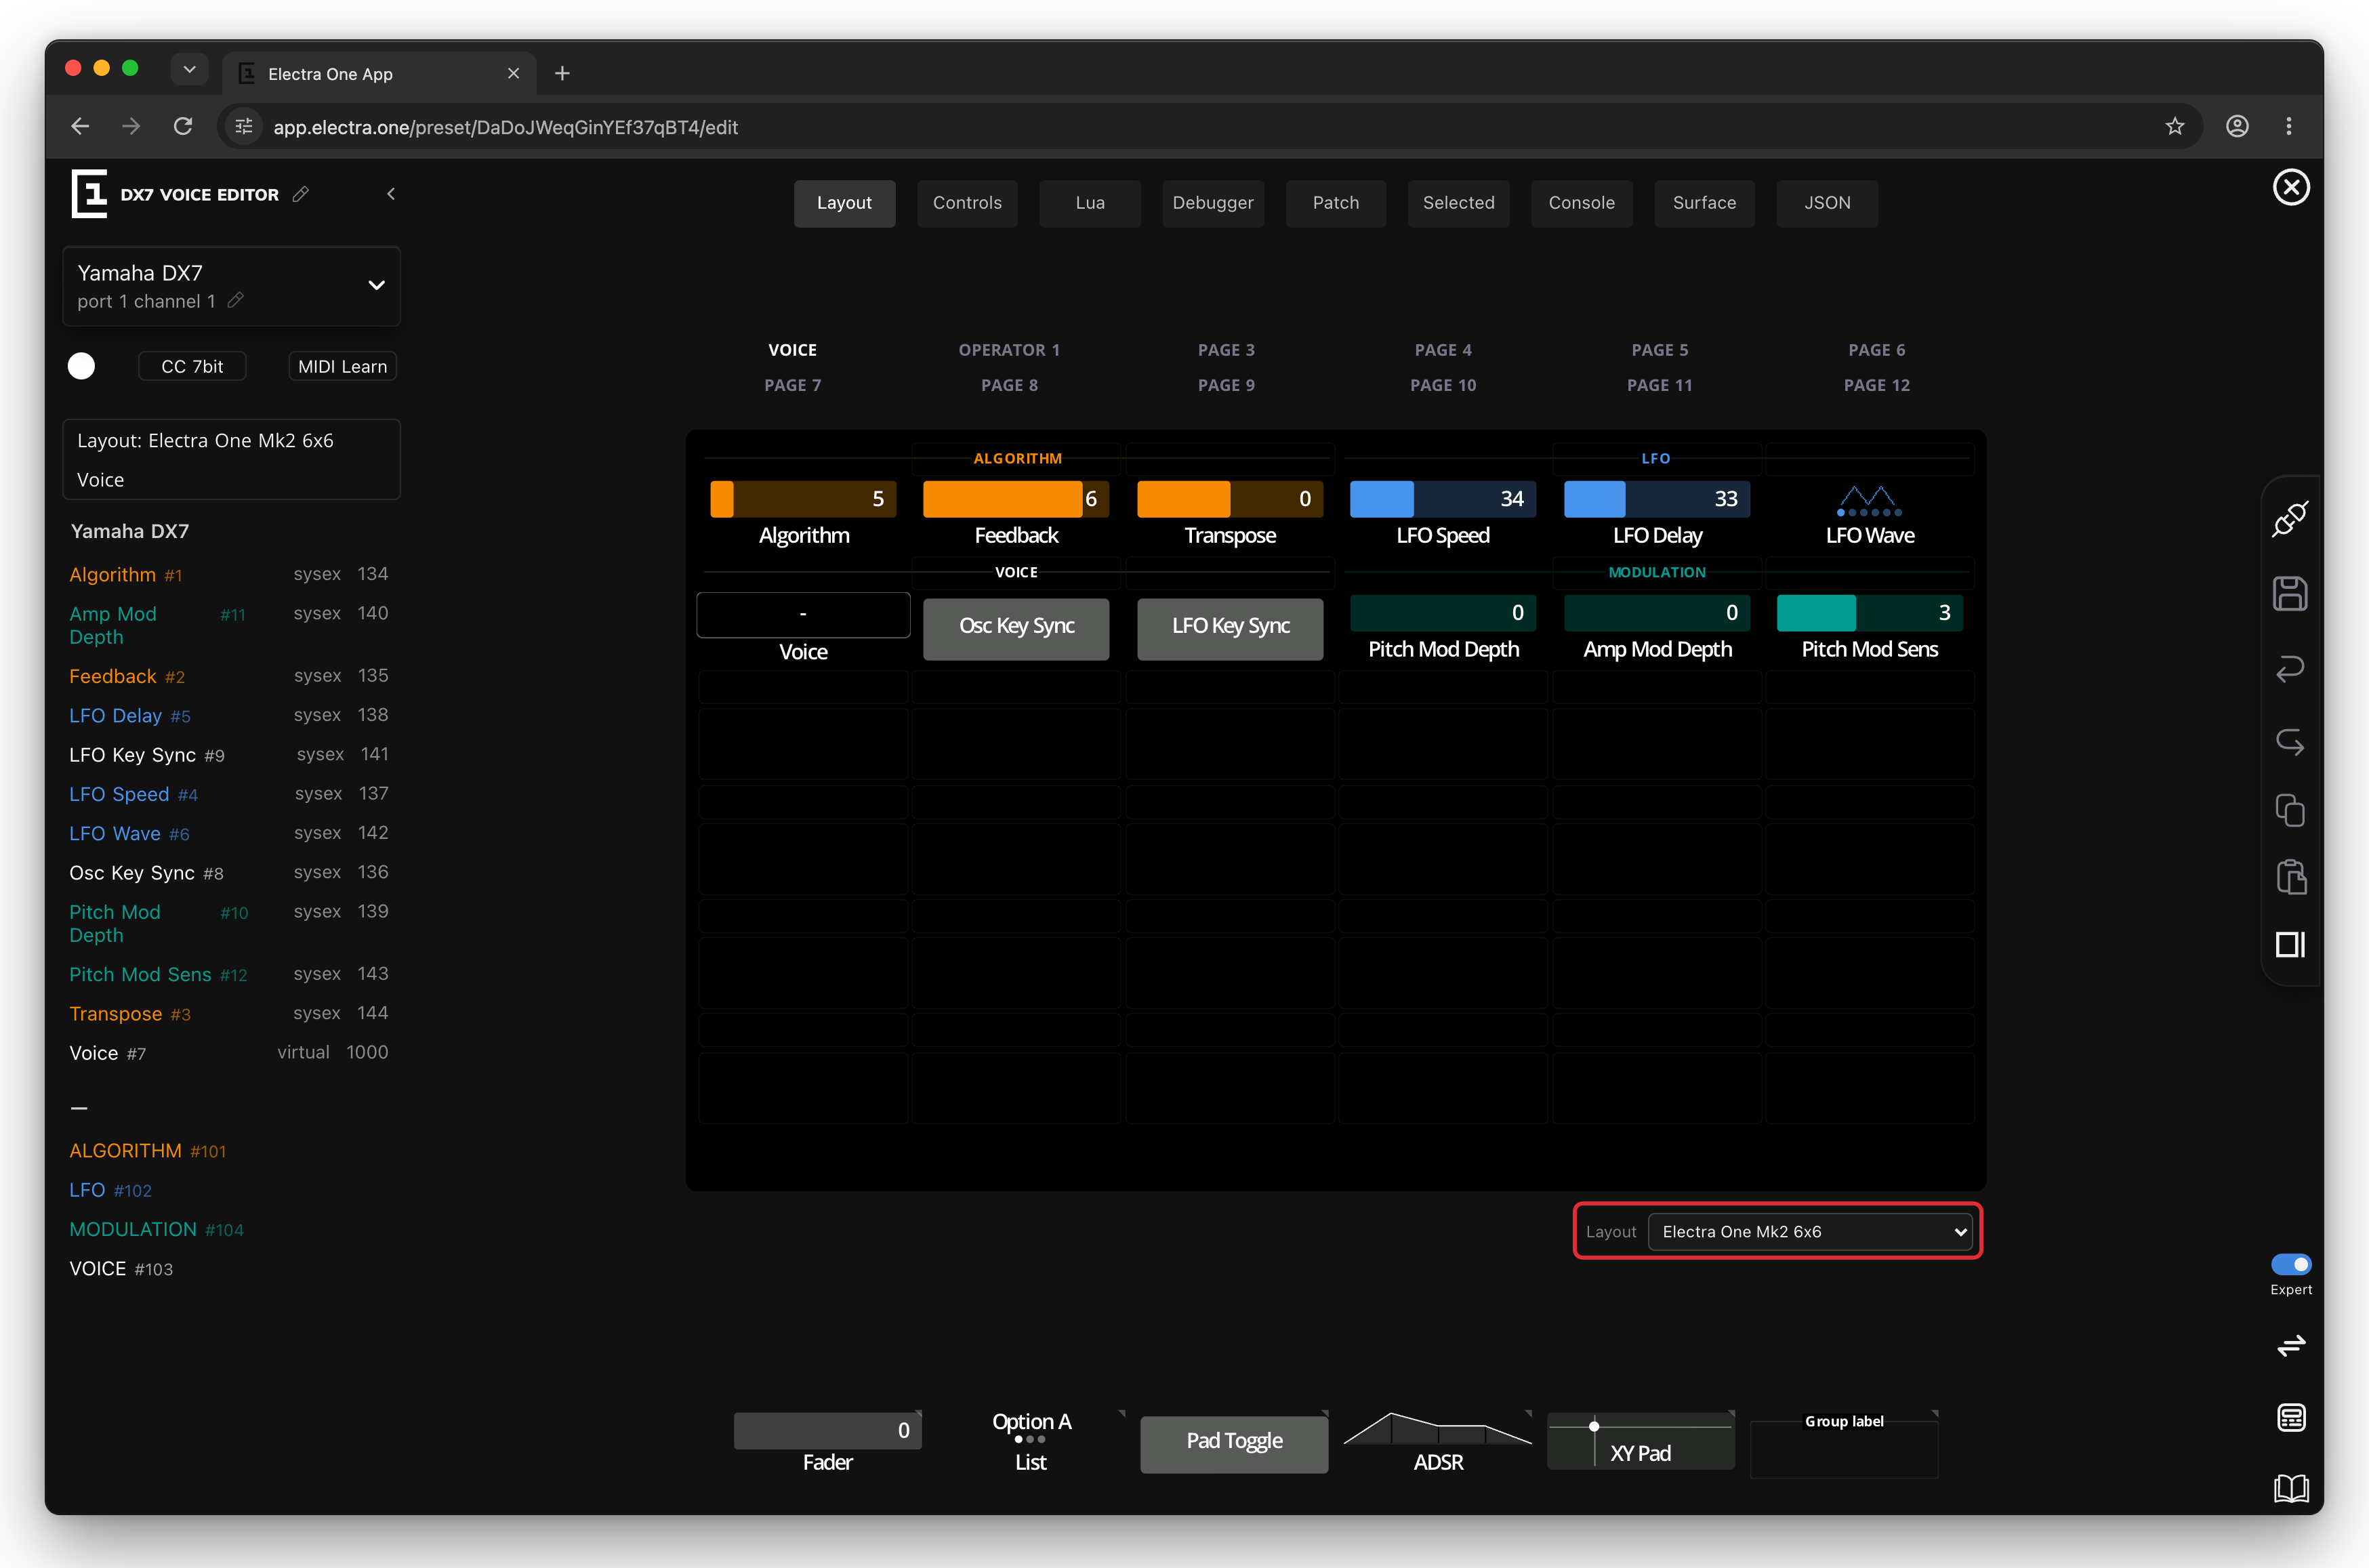
Why layouts, and not one preset per model? Because most of a preset is the same on every model: the devices, the MIDI messages, the ranges, the lists, the Lua script. Only the arrangement on the screen differs. A control placed in both layouts is one control: its settings are shared, and a change made in one layout is a change in the other. See Using one control on both models.
Send to Electra always sends the layout for the connected model. A layout with no controls on it is not part of the preset, and the preset library shows a preset for the models whose layouts have controls.
TIP
If both a Mk2 and a Mini are connected, choosing a layout also makes the controller of that model the active one, so Send to Electra sends to it.
IO connectors
Pages
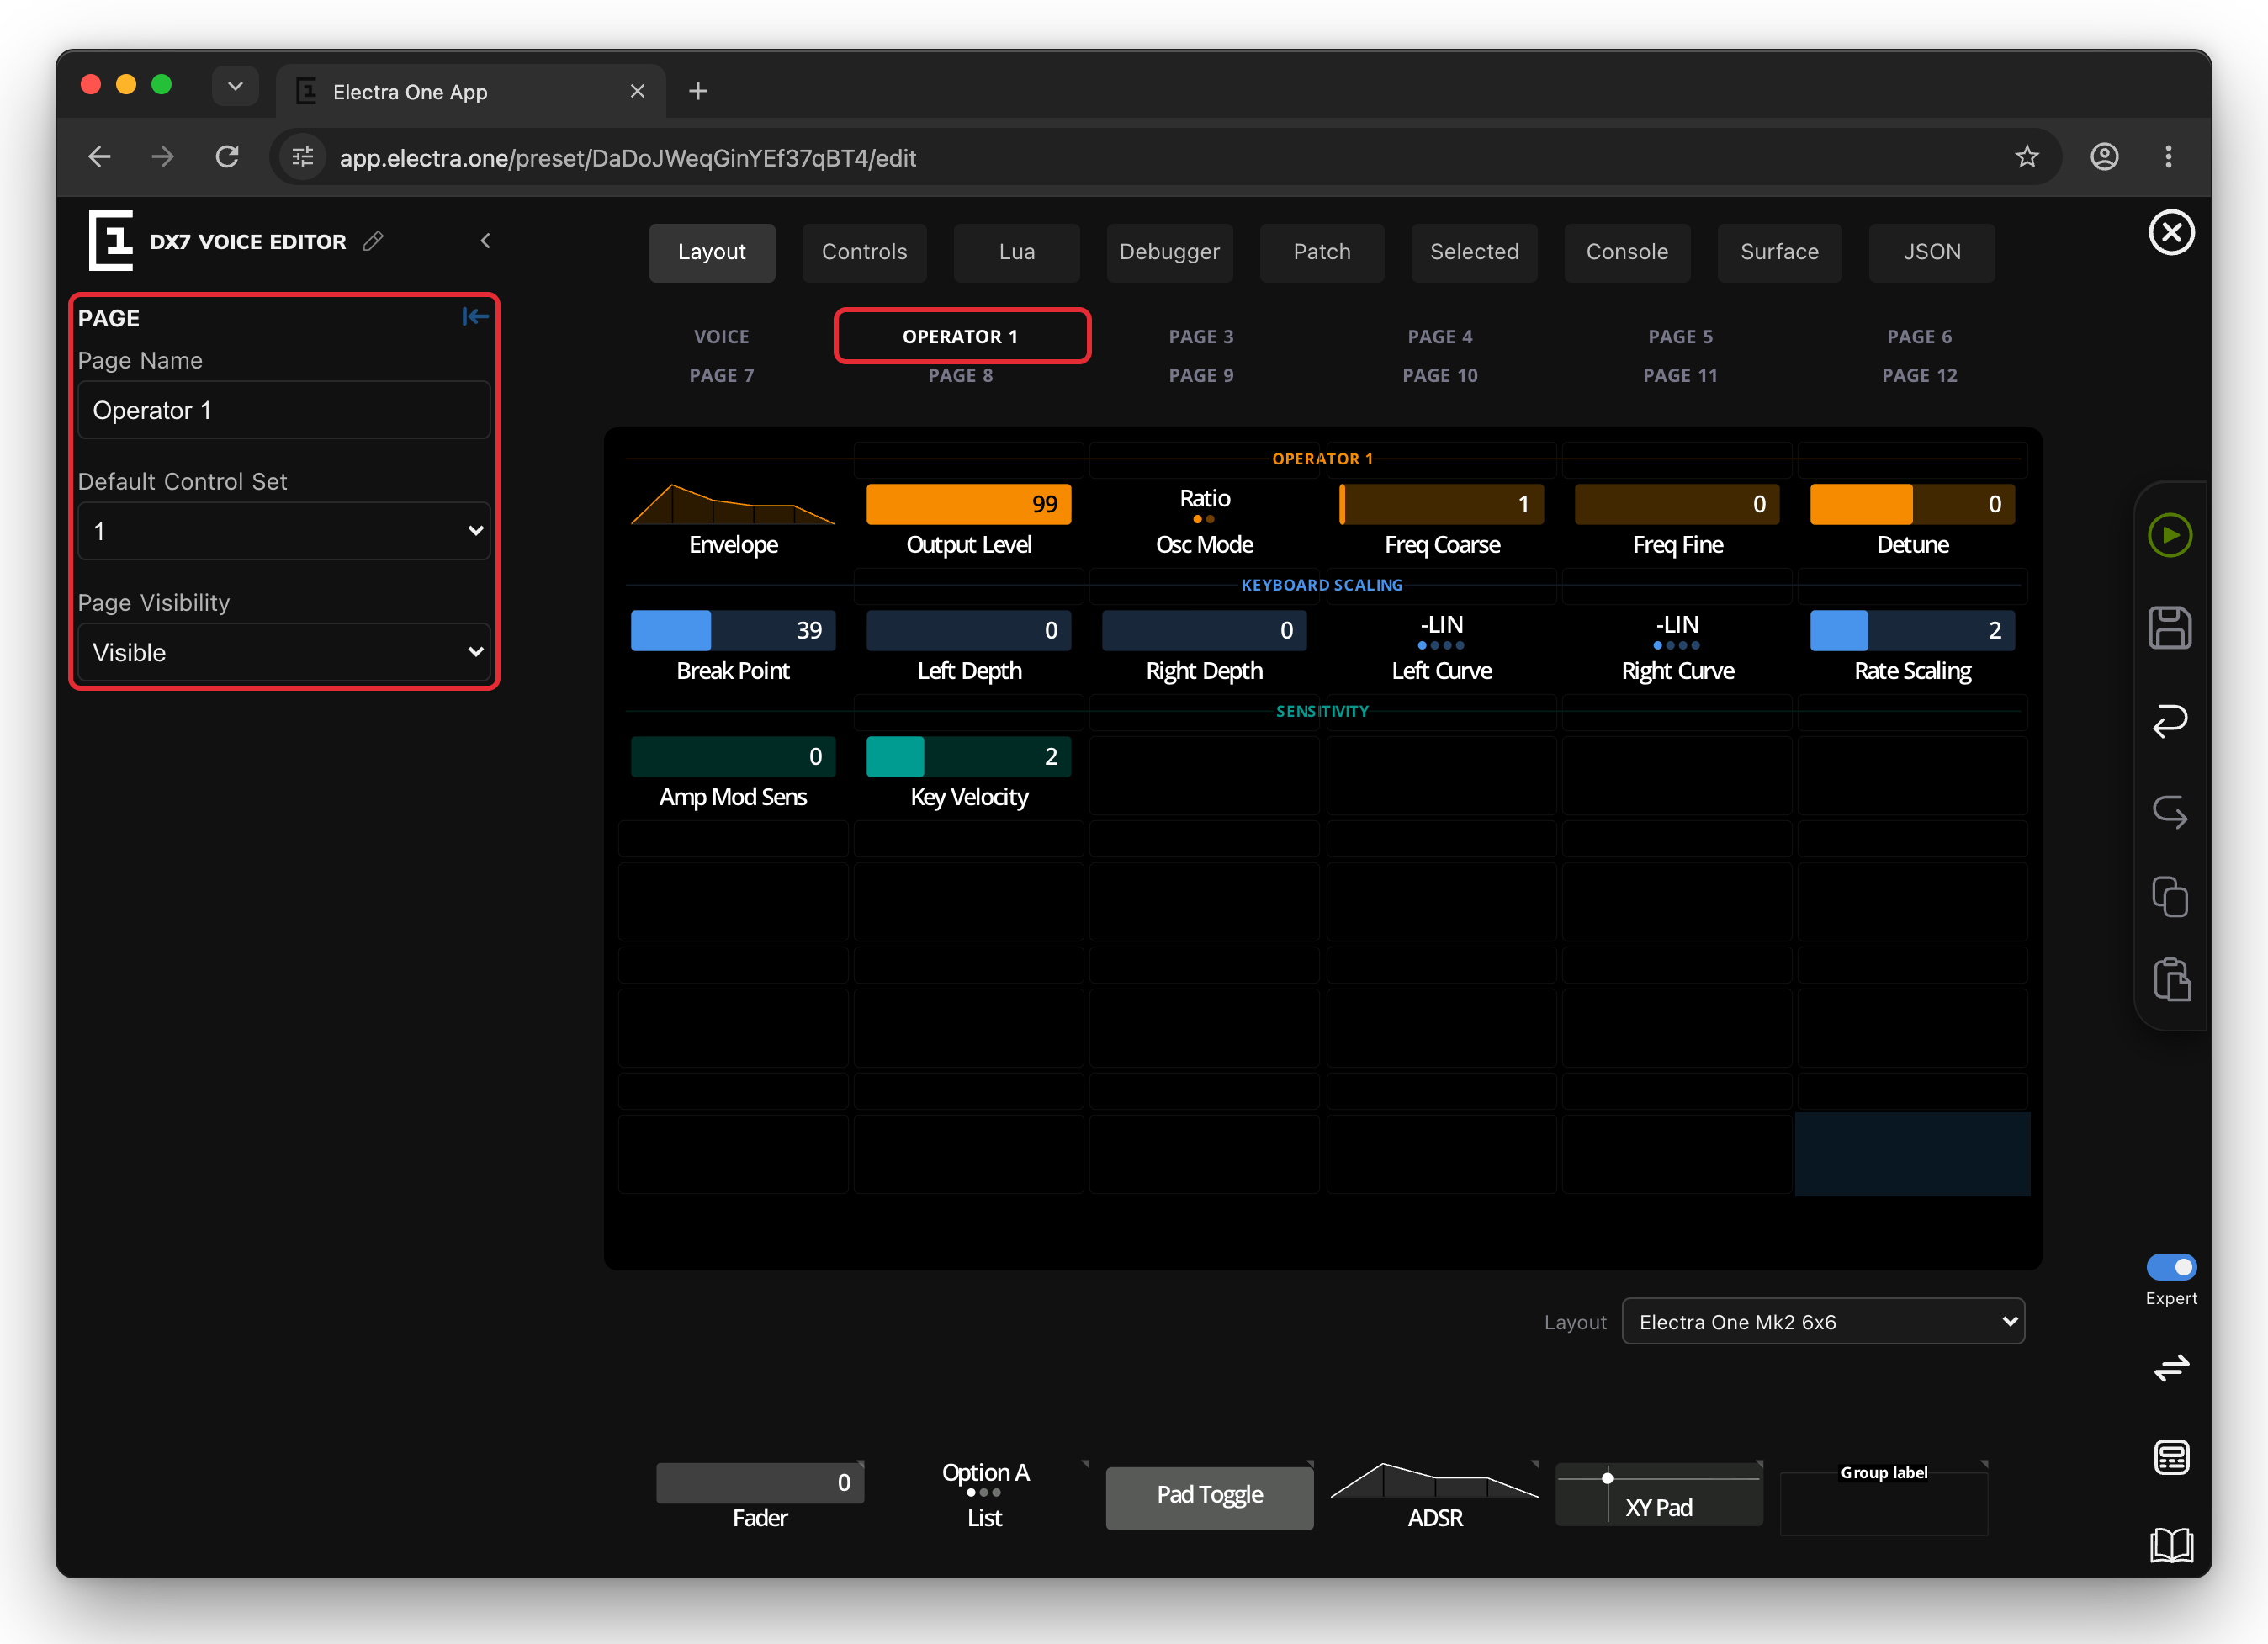
The page strip above the grid shows the pages of the layout.
- Click a page to show it.
- The pencil next to a page name opens the page's settings in the sidebar.
- Drag a page onto another to swap the two pages, together with their controls. The other pages stay where they are.
The Mini has 16 pages but shows 8 at a time. The PAGE SET 2 button next to the strip shows pages 9 to 16, and PAGE SET 1 goes back. To move a page to the other set, drag it and hold it over that button until the set changes.
The page settings are:
- Page name, shown in the page list on the controller.
- Default Control Set, on the Mk2: which of the three control sets, two rows of six controls each, the knobs control when the page opens. See Which knob moves which control.
- Page visibility: a Hidden page is not offered on the controller. A Lua script can still show it.
Placing controls
The control repository under the grid holds the controls to place, one tile per group:
| Group | Controls |
|---|---|
| faders | Fader, Thin Fader, Dial, Relative |
| lists | List, Value only |
| pads | Pad Toggle, Pad Momentary, Checkbox, Pad Value Only |
| envelopes | ADSR, AR, ADR, ADSSR, AHDSR, Four-Stage |
| misc | XY Pad, V Fader 4, Custom (Expert), Text box |
| labels | Group label, Group label (highlighted), Label |
On the Mini, the faders group starts with the Dial. A tile with a small triangle has several variants. Click it to open its variants, then click the one you want; that variant stays on the tile for the next drags. Escape or a click elsewhere closes the variants.
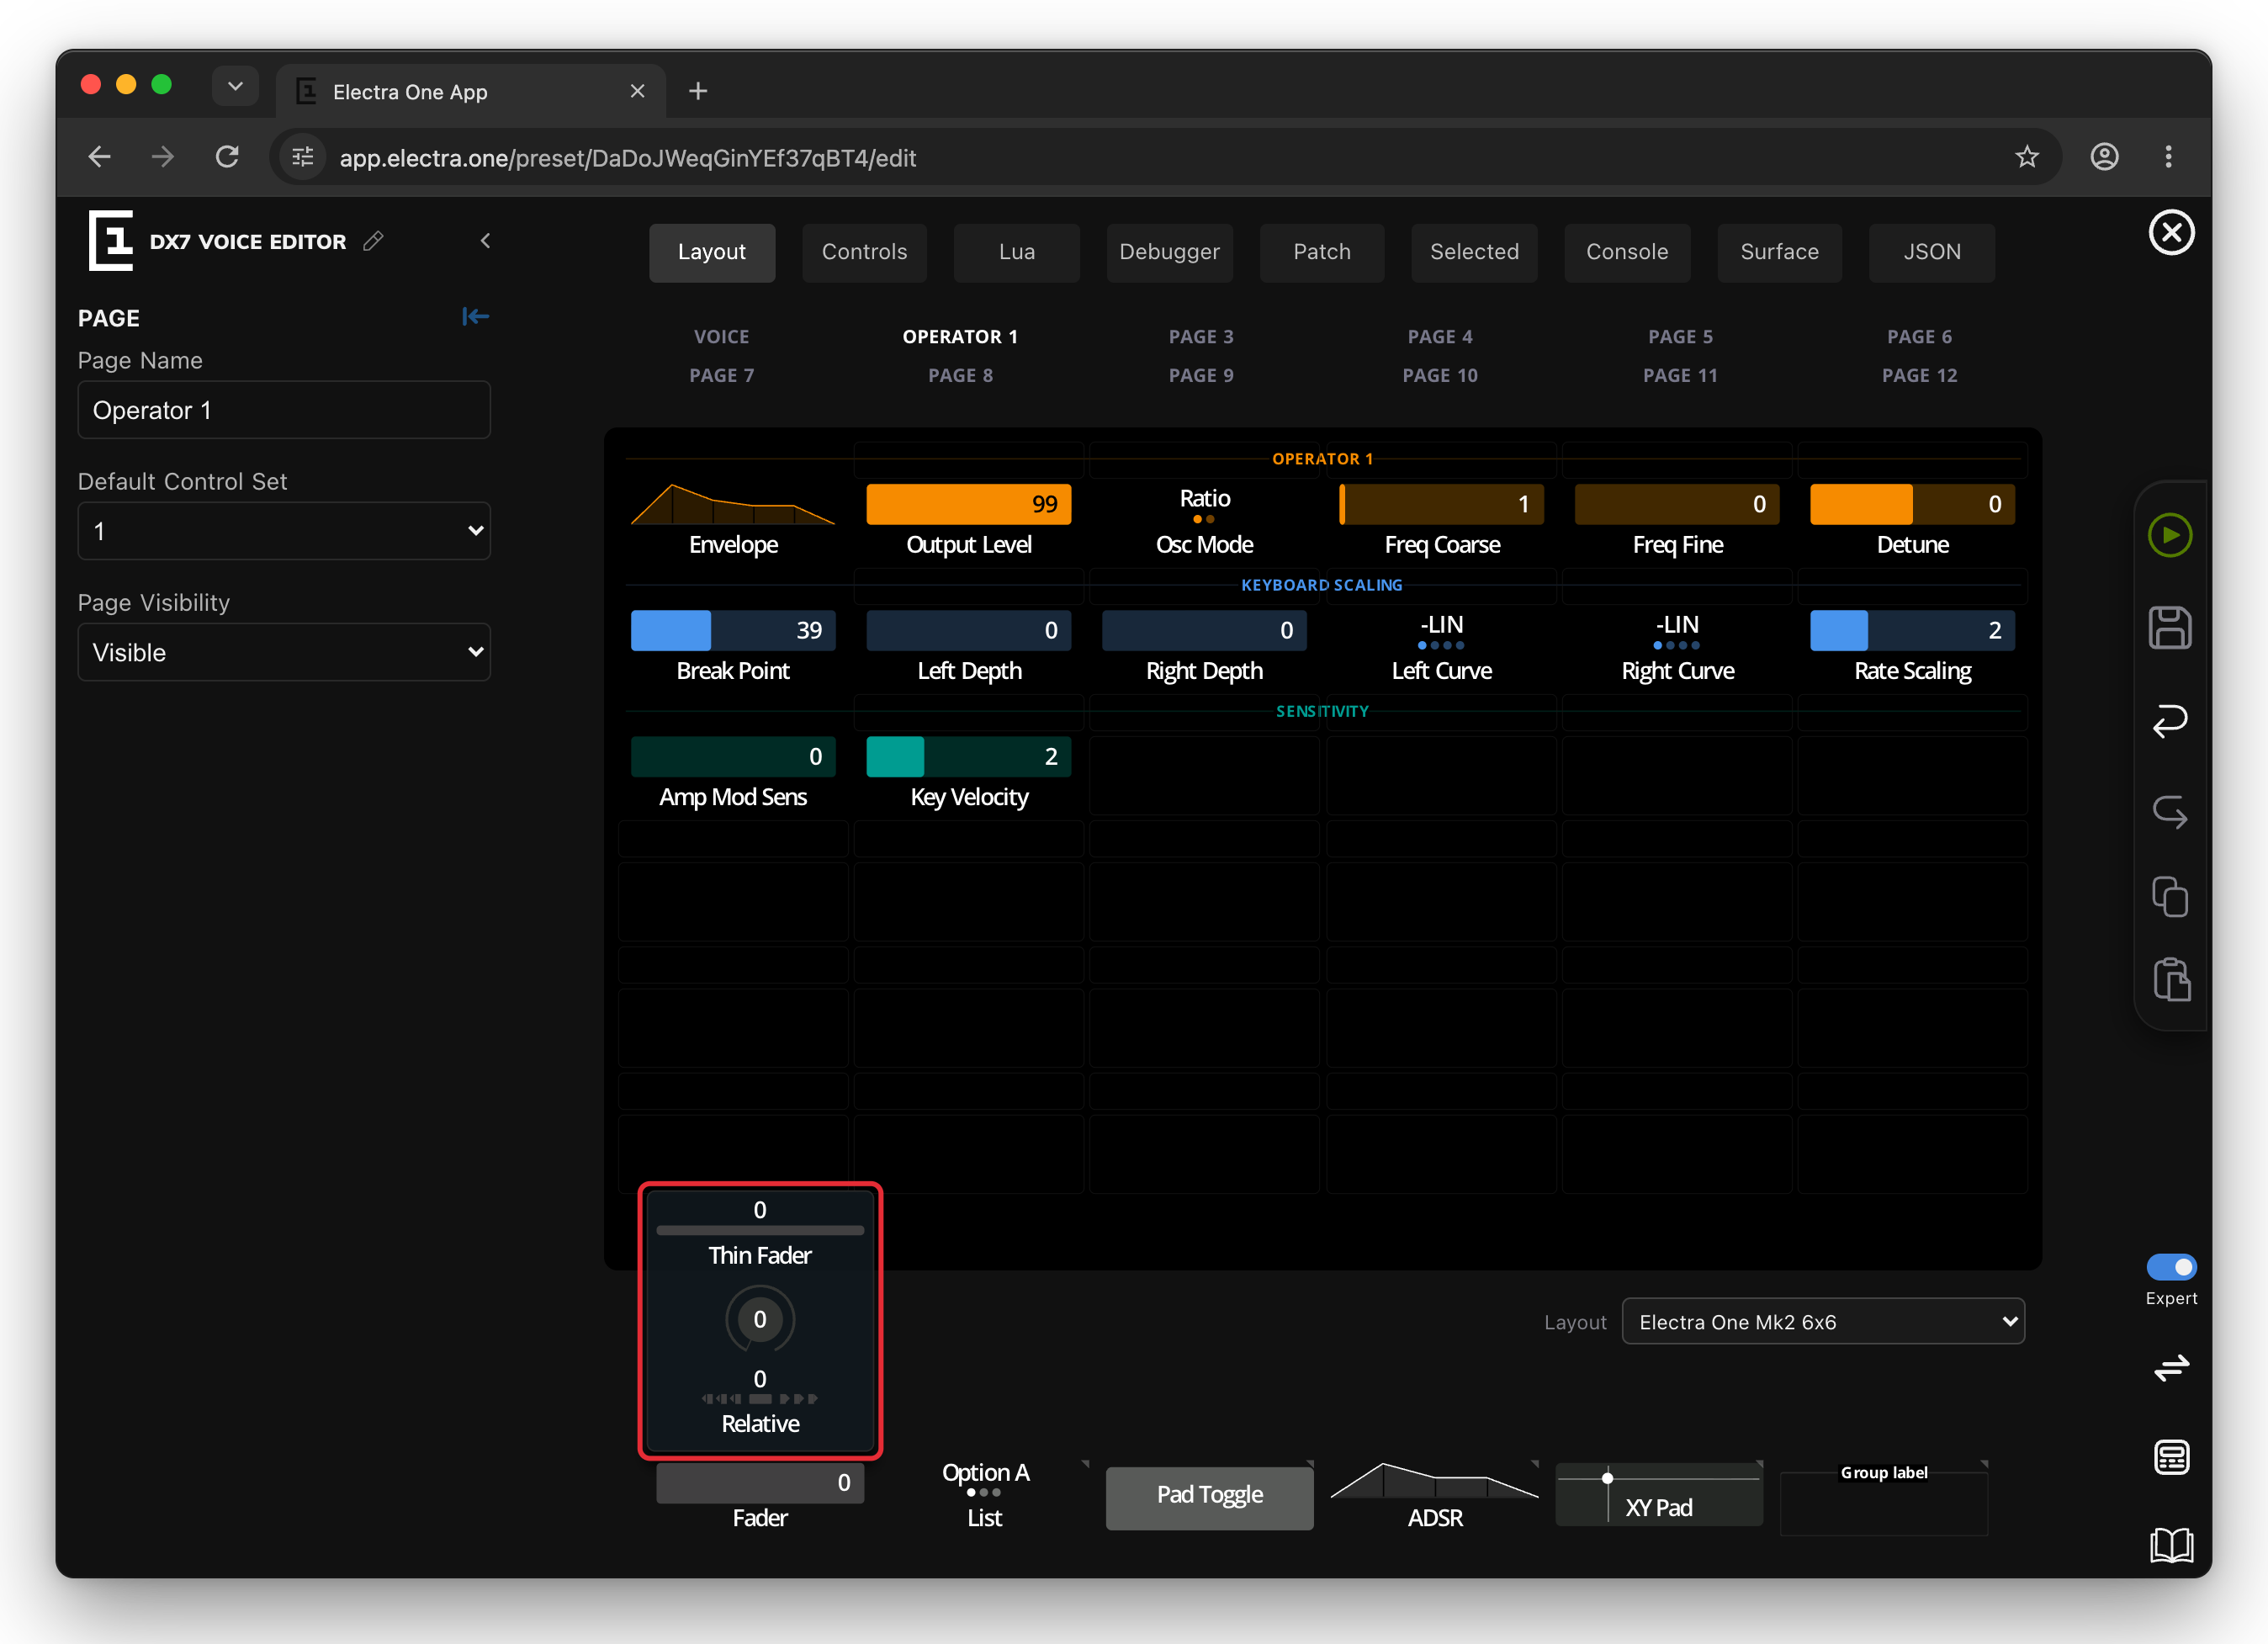
Drag a control onto a slot of the page to place it. Controls go into control slots and group labels into the thin label rows between them. A new control:
- gets the device selected in the sidebar, and the colour and message type set in the defaults row (see Defaults),
- gets the next free reference number, which identifies the control in the preset and in Lua,
- gets a parameter number one above the highest one already used, so a row of new faders sends CC 1, CC 2, CC 3 and so on.
Dropping a control on a slot that holds one replaces it. On the Mini, the bottom row of each page belongs to the four hardware buttons and accepts only pads and lists.
A Text box and a Custom control can be larger than one slot: select it and drag its corner handle, or set Width and Height in its settings. A slot a stretched control covers takes no other control, and the editor says so when you try.
On the Mini, a list placed in the button row steps to its next item with each press of the button, and after the last item starts again at the first. See Mini Presets in the Editor.
Filling many slots at once
Select several empty slots (click the first, Shift-click the last) and the sidebar shows FILL N SLOTS: choose a control, variant, colour, device, message type, the First parameter and the Parameter step, and FILL THE SLOTS places them all, numbered in order. If a control was copied first, the form starts with copies of it, COPYING THIS CONTROL; choosing another control type leaves that, and COPY THIS CONTROL returns to it.
Selecting
- Click a control or group to select it. Its settings open in the sidebar.
- Shift-click another slot to select everything in the rectangle between the two.
- ⌘ A / Ctrl A selects everything on the page.
- Click the background or press Escape to clear the selection.
- The arrow keys move a single selection to the neighbouring slot.
Pointing at a control highlights it in the page overview in the sidebar, and pointing at an entry in the overview highlights the control.
With several items selected, the sidebar lists them with the buttons Copy, Cut, Set color and Delete.
Moving, copying and removing
- Drag a placed control to another slot to move it. If the slot holds a control, the two swap places.
- Copy (⌘ C) and Cut (⌘ X), then select a slot and Paste (⌘ V). The copied items keep their arrangement. Copies get new reference numbers; cut controls keep theirs the first time they are pasted, and pasting them again makes copies.
- Backspace or Delete removes the selected items from the layout. The Remove control icon in the control's settings does the same, after asking.
The slot you paste into must be of the same kind, a label row or a control slot, as the top-left copied item. On the Mini, only pads and lists can be pasted into the button row. The settings of a control or group also have Copy, Cut and Remove icons.
Using one control on both models
To give a preset both a Mk2 and a Mini layout, open split view with the Mk2 layout in one view and the Mini layout in the other, and drag controls from one to the other.
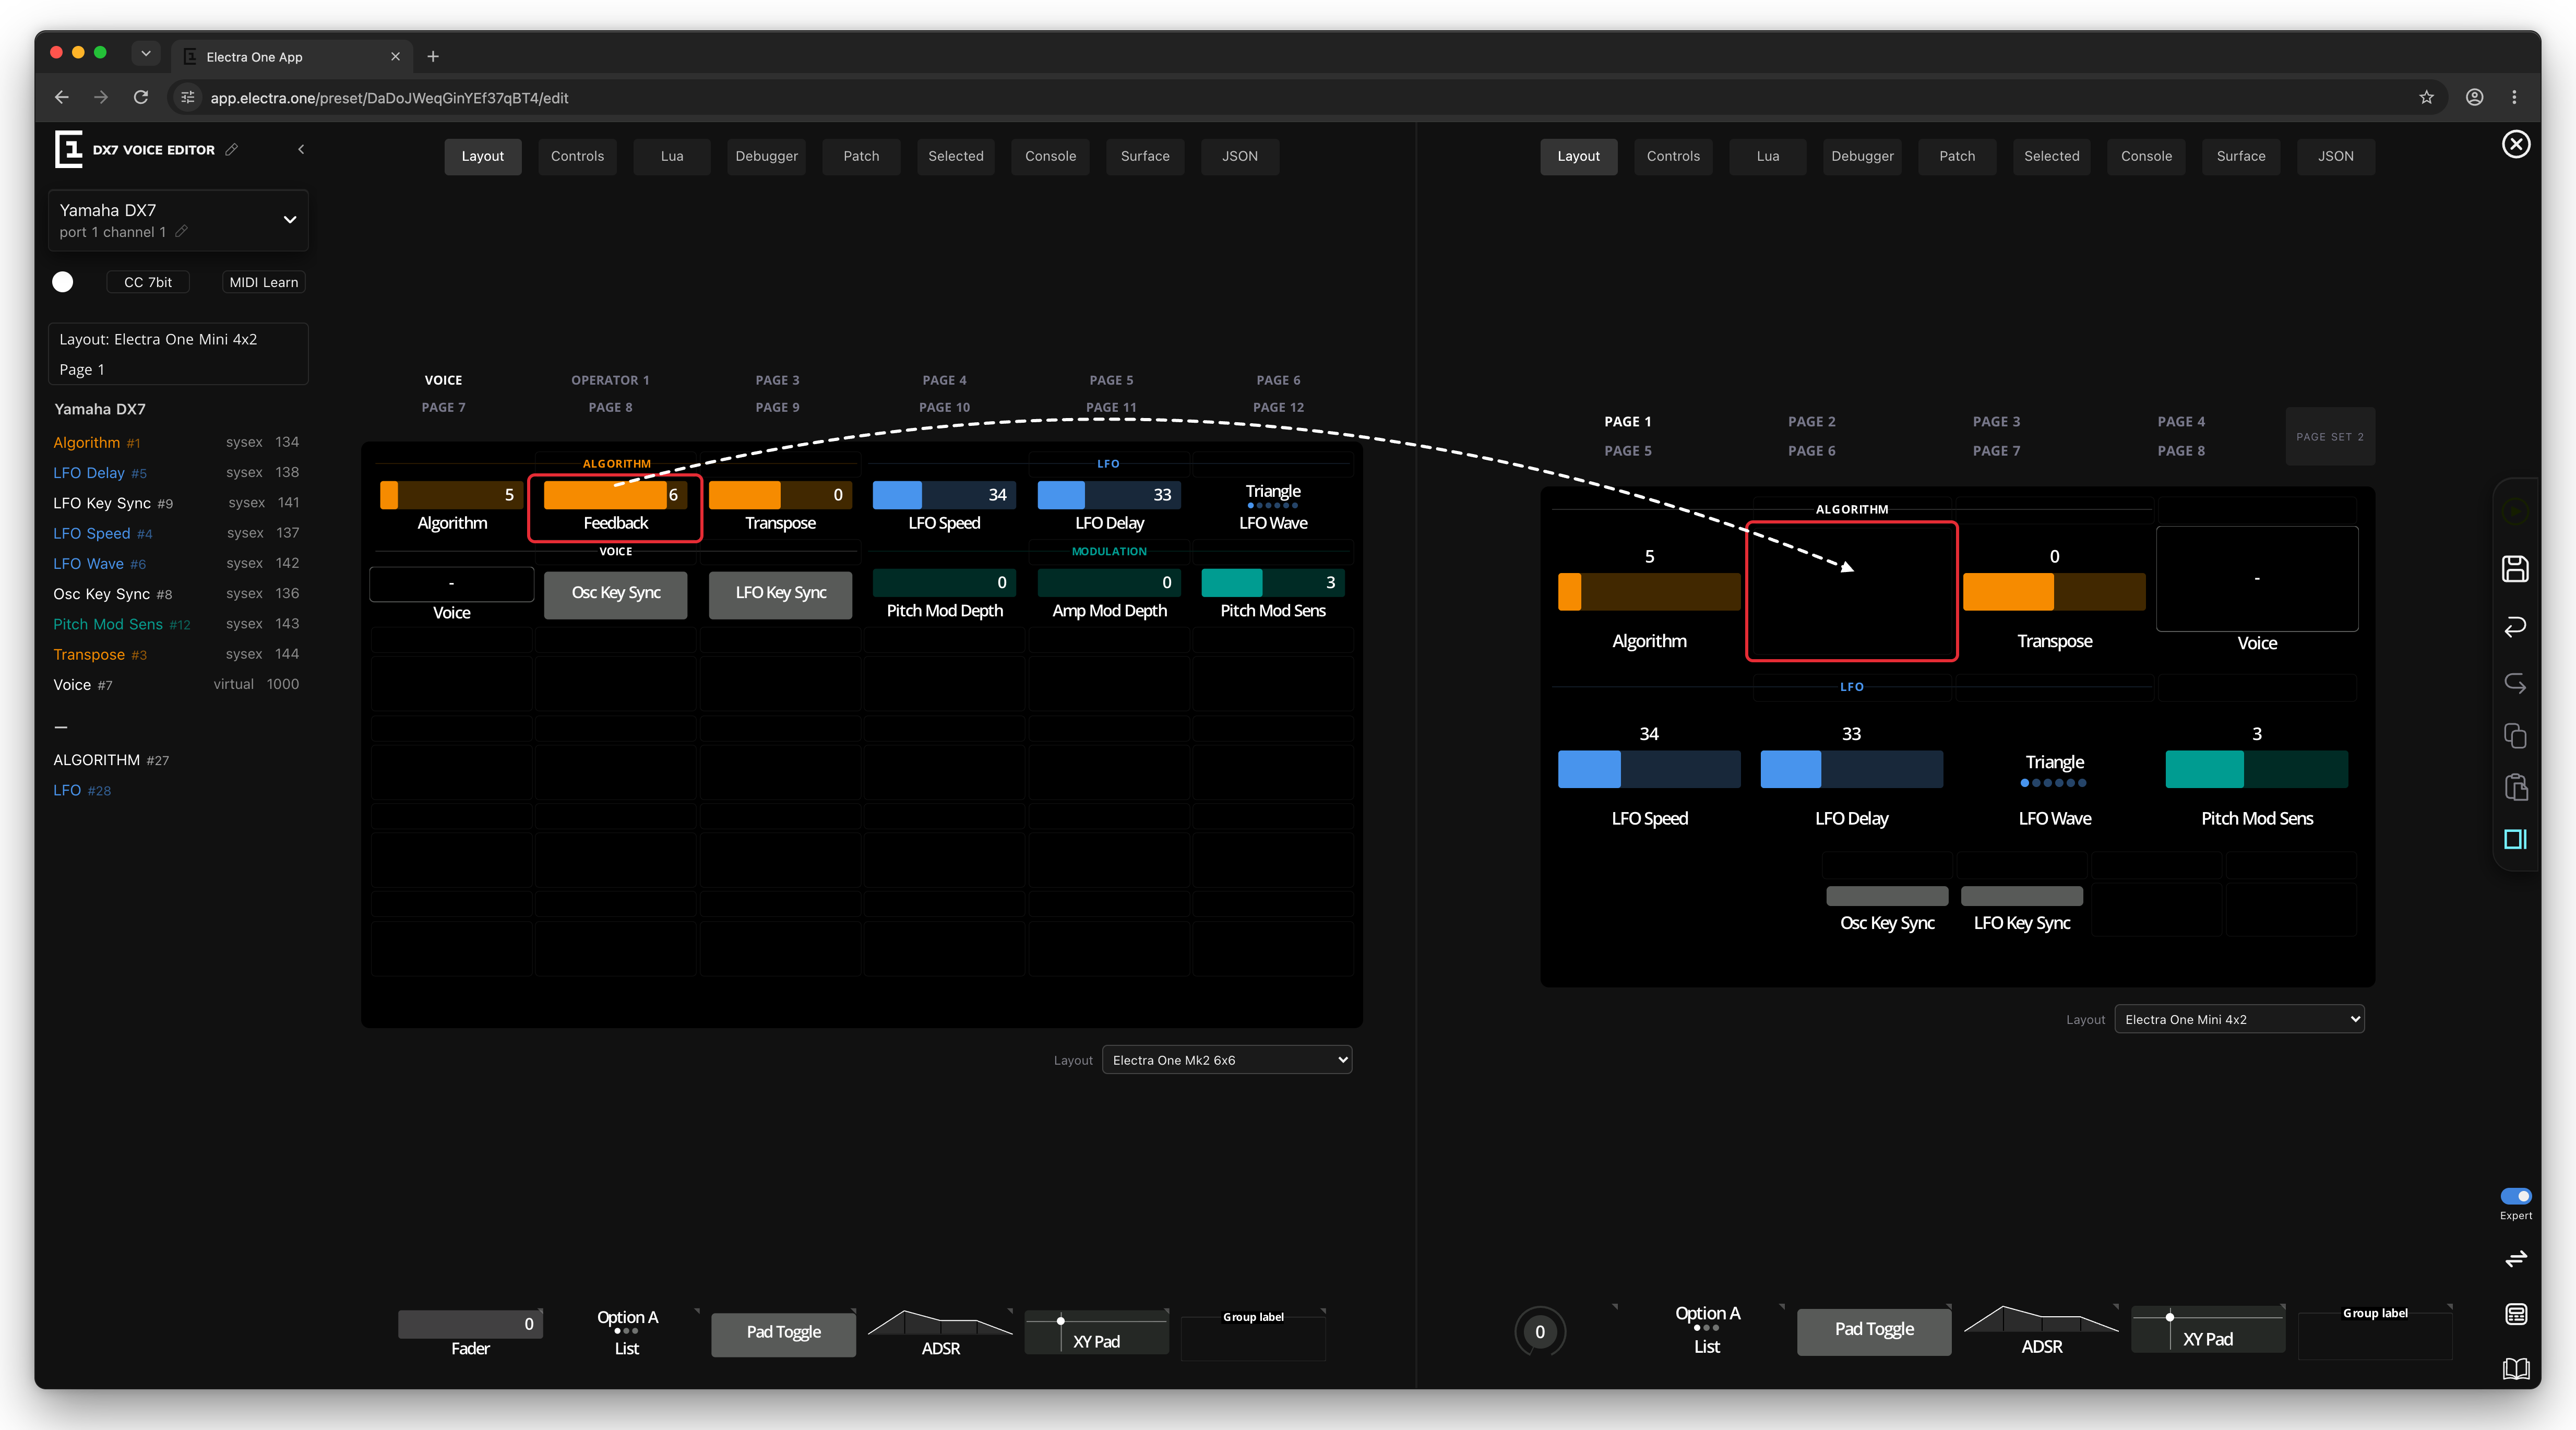
A control dragged to the other layout is shared: both layouts show the same control, with the same reference number and the same settings. Removing it from one layout leaves it in the other. Copy and paste, by contrast, always make new controls.
Groups
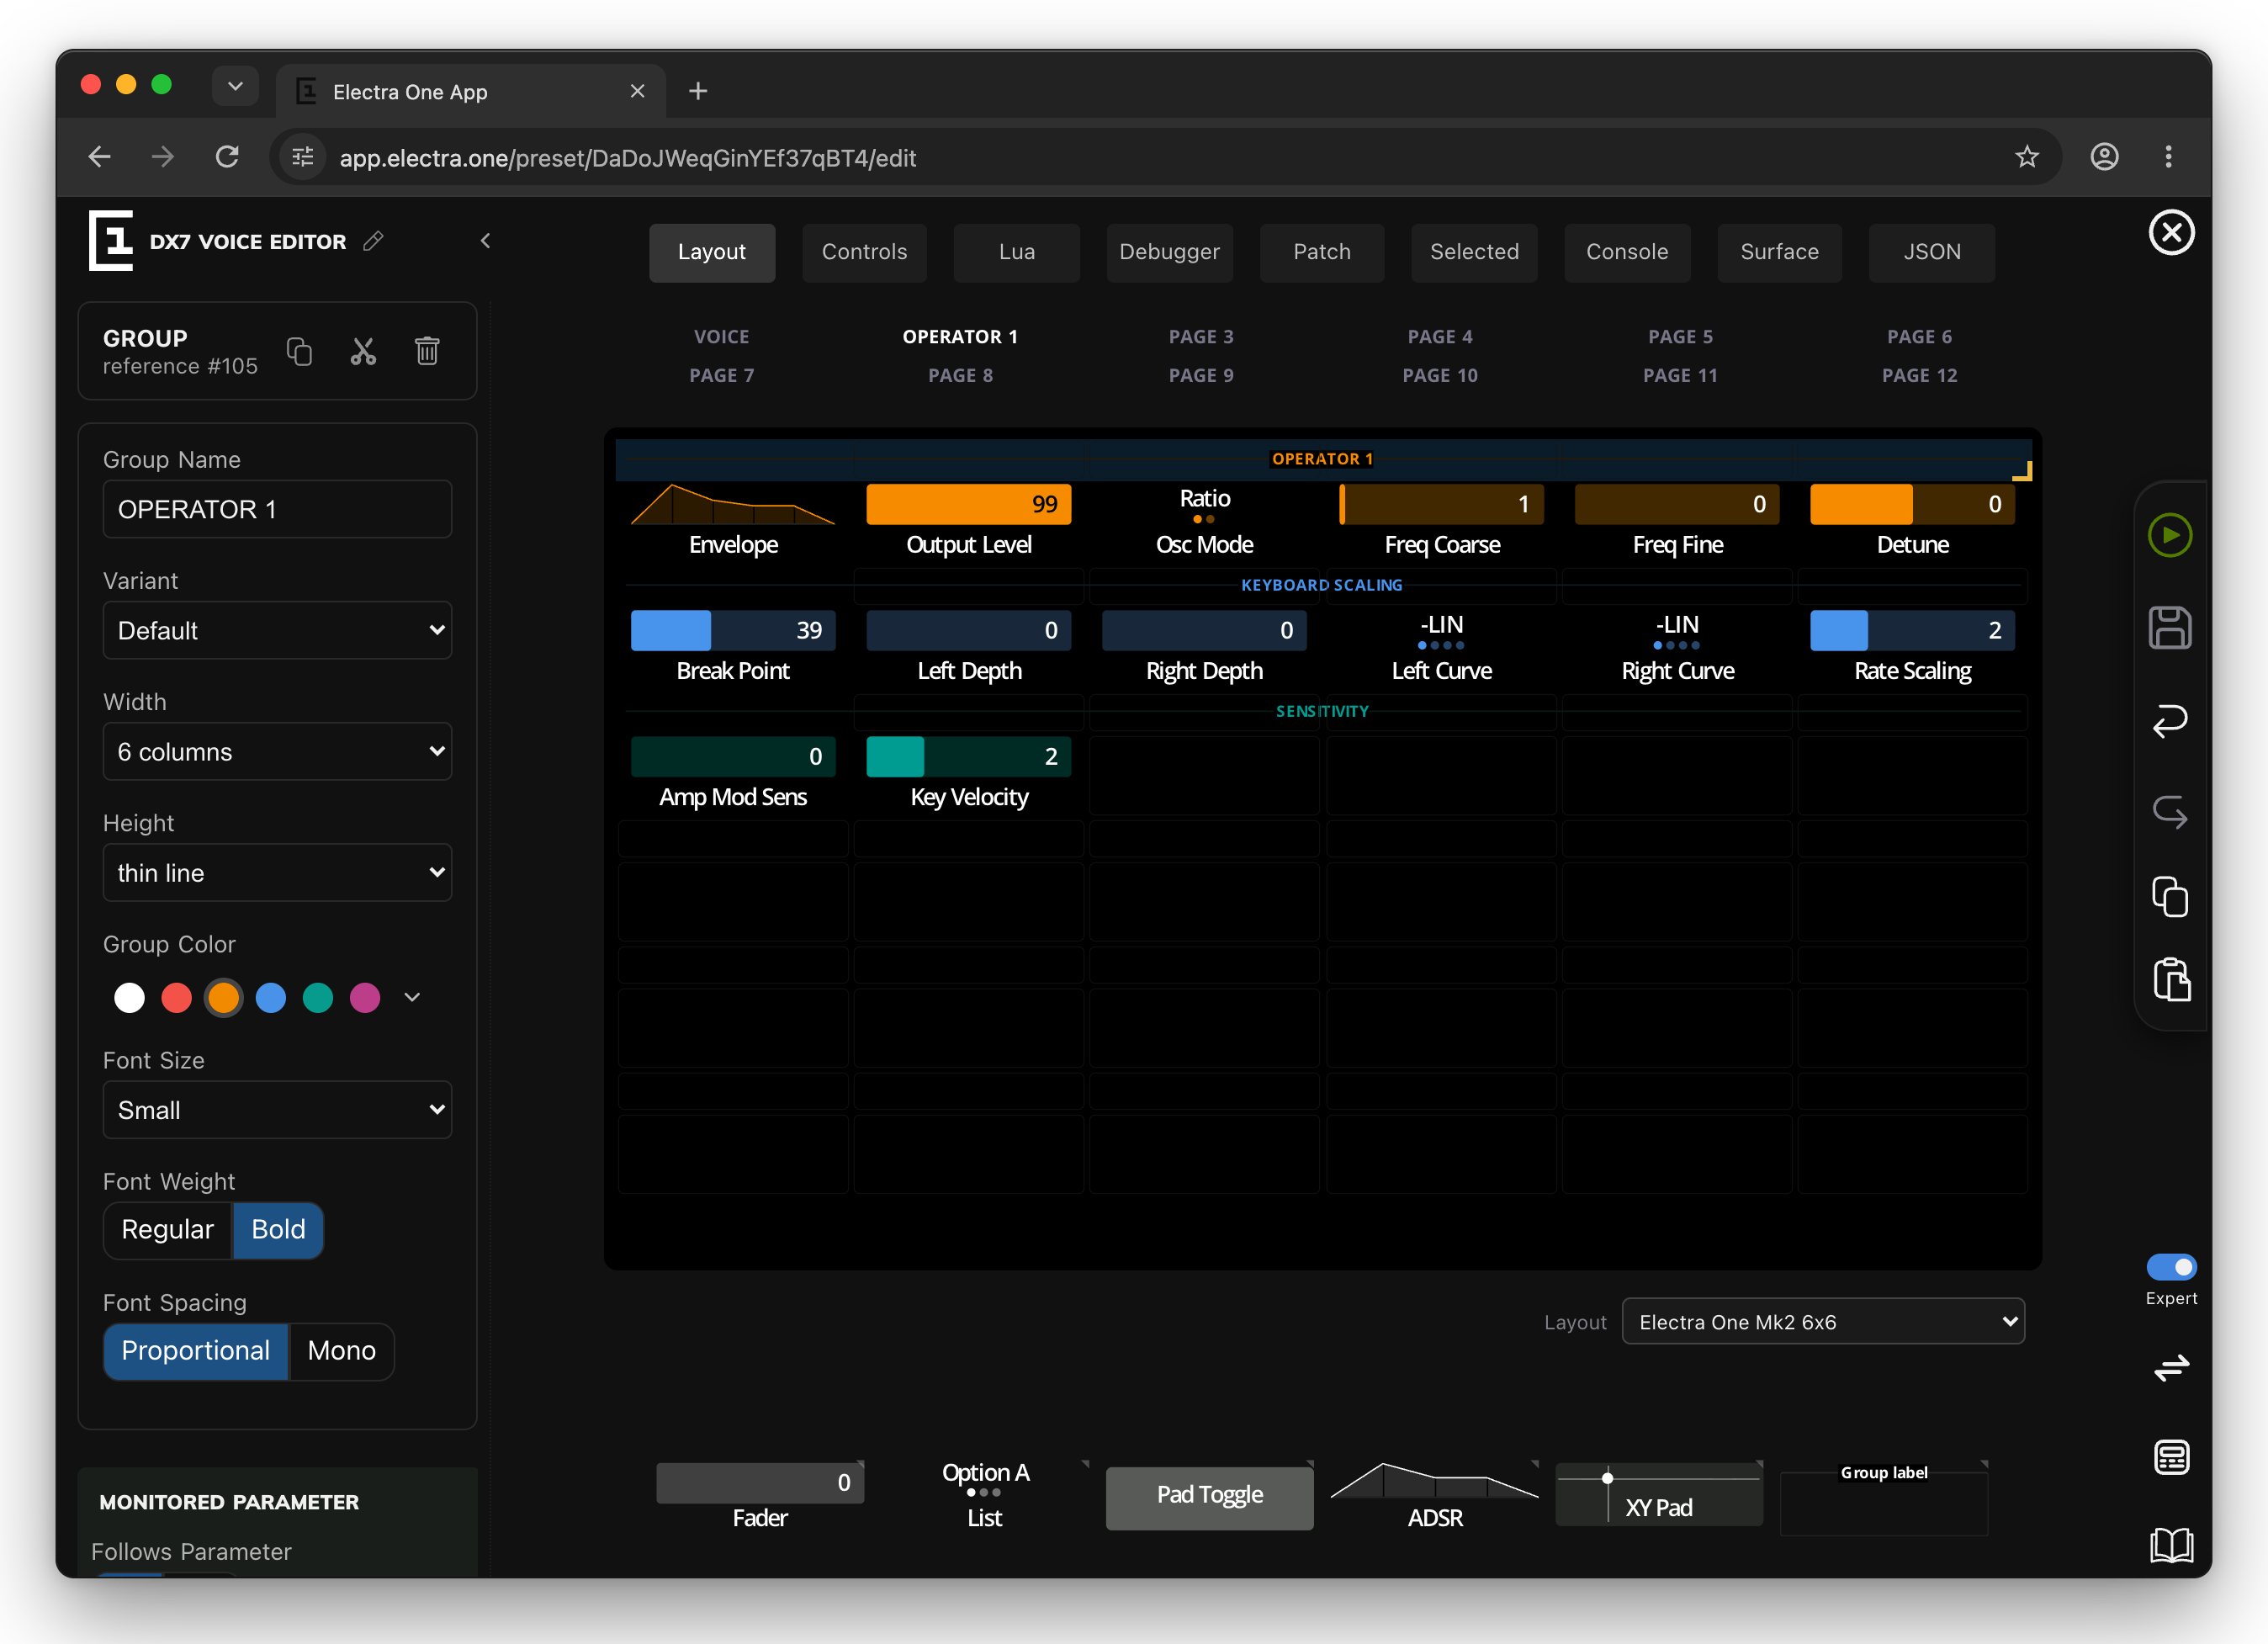
Groups are labels that give a page structure: a name over a row of related controls, such as FILTER or LFO. They do not change what the controls do.
Drag a group label from the labels group onto a label row. Select it to change it:
- Group name and Group color,
- Variant: Default (a line with the name), Highlighted (a filled bar) or Button (a button-like label),
- Width, from 1 to 6 columns on the Mk2 and up to 4 on the Mini, and Height, from a thin line to several rows. The corner handle of a selected group does the same by dragging,
- Font size, weight and spacing.
Expert. Follows parameter makes the group show the state of a MIDI parameter: choose the device, message and parameter, and in Shown values give a name and colour to each value. When the parameter takes a value, the group shows that name in that colour, for example FILTER: LP 24 in orange and FILTER: HP in blue.
Keyboard shortcuts
These work while the Layout view has the focus. Save, Send to Electra, Undo and Redo work anywhere in the editor, see Keyboard shortcuts.
| Keys | Action |
|---|---|
| Click, Shift-click | Select, select a rectangle |
| ⌘ A / Ctrl A | Select everything on the page |
| Arrow keys | Move the selection to the neighbouring slot |
| Escape | Clear the selection |
| ⌘ C, ⌘ X, ⌘ V / Ctrl C, X, V | Copy, cut, paste |
| Backspace, Delete | Remove the selected items |
| 1 to 6 | Set the colour of the selected items: white, red, orange, blue, green, magenta. With nothing selected, set the default colour for new controls |
| Space (hold) | Show the name, reference, message type and parameter, and the port and channel where known, on faders, lists, XY pads, V Faders, custom controls and the ADSR, ADR and Four-Stage envelopes |
The sidebar
With nothing selected, the sidebar shows the device, the defaults and the page overview.
The device
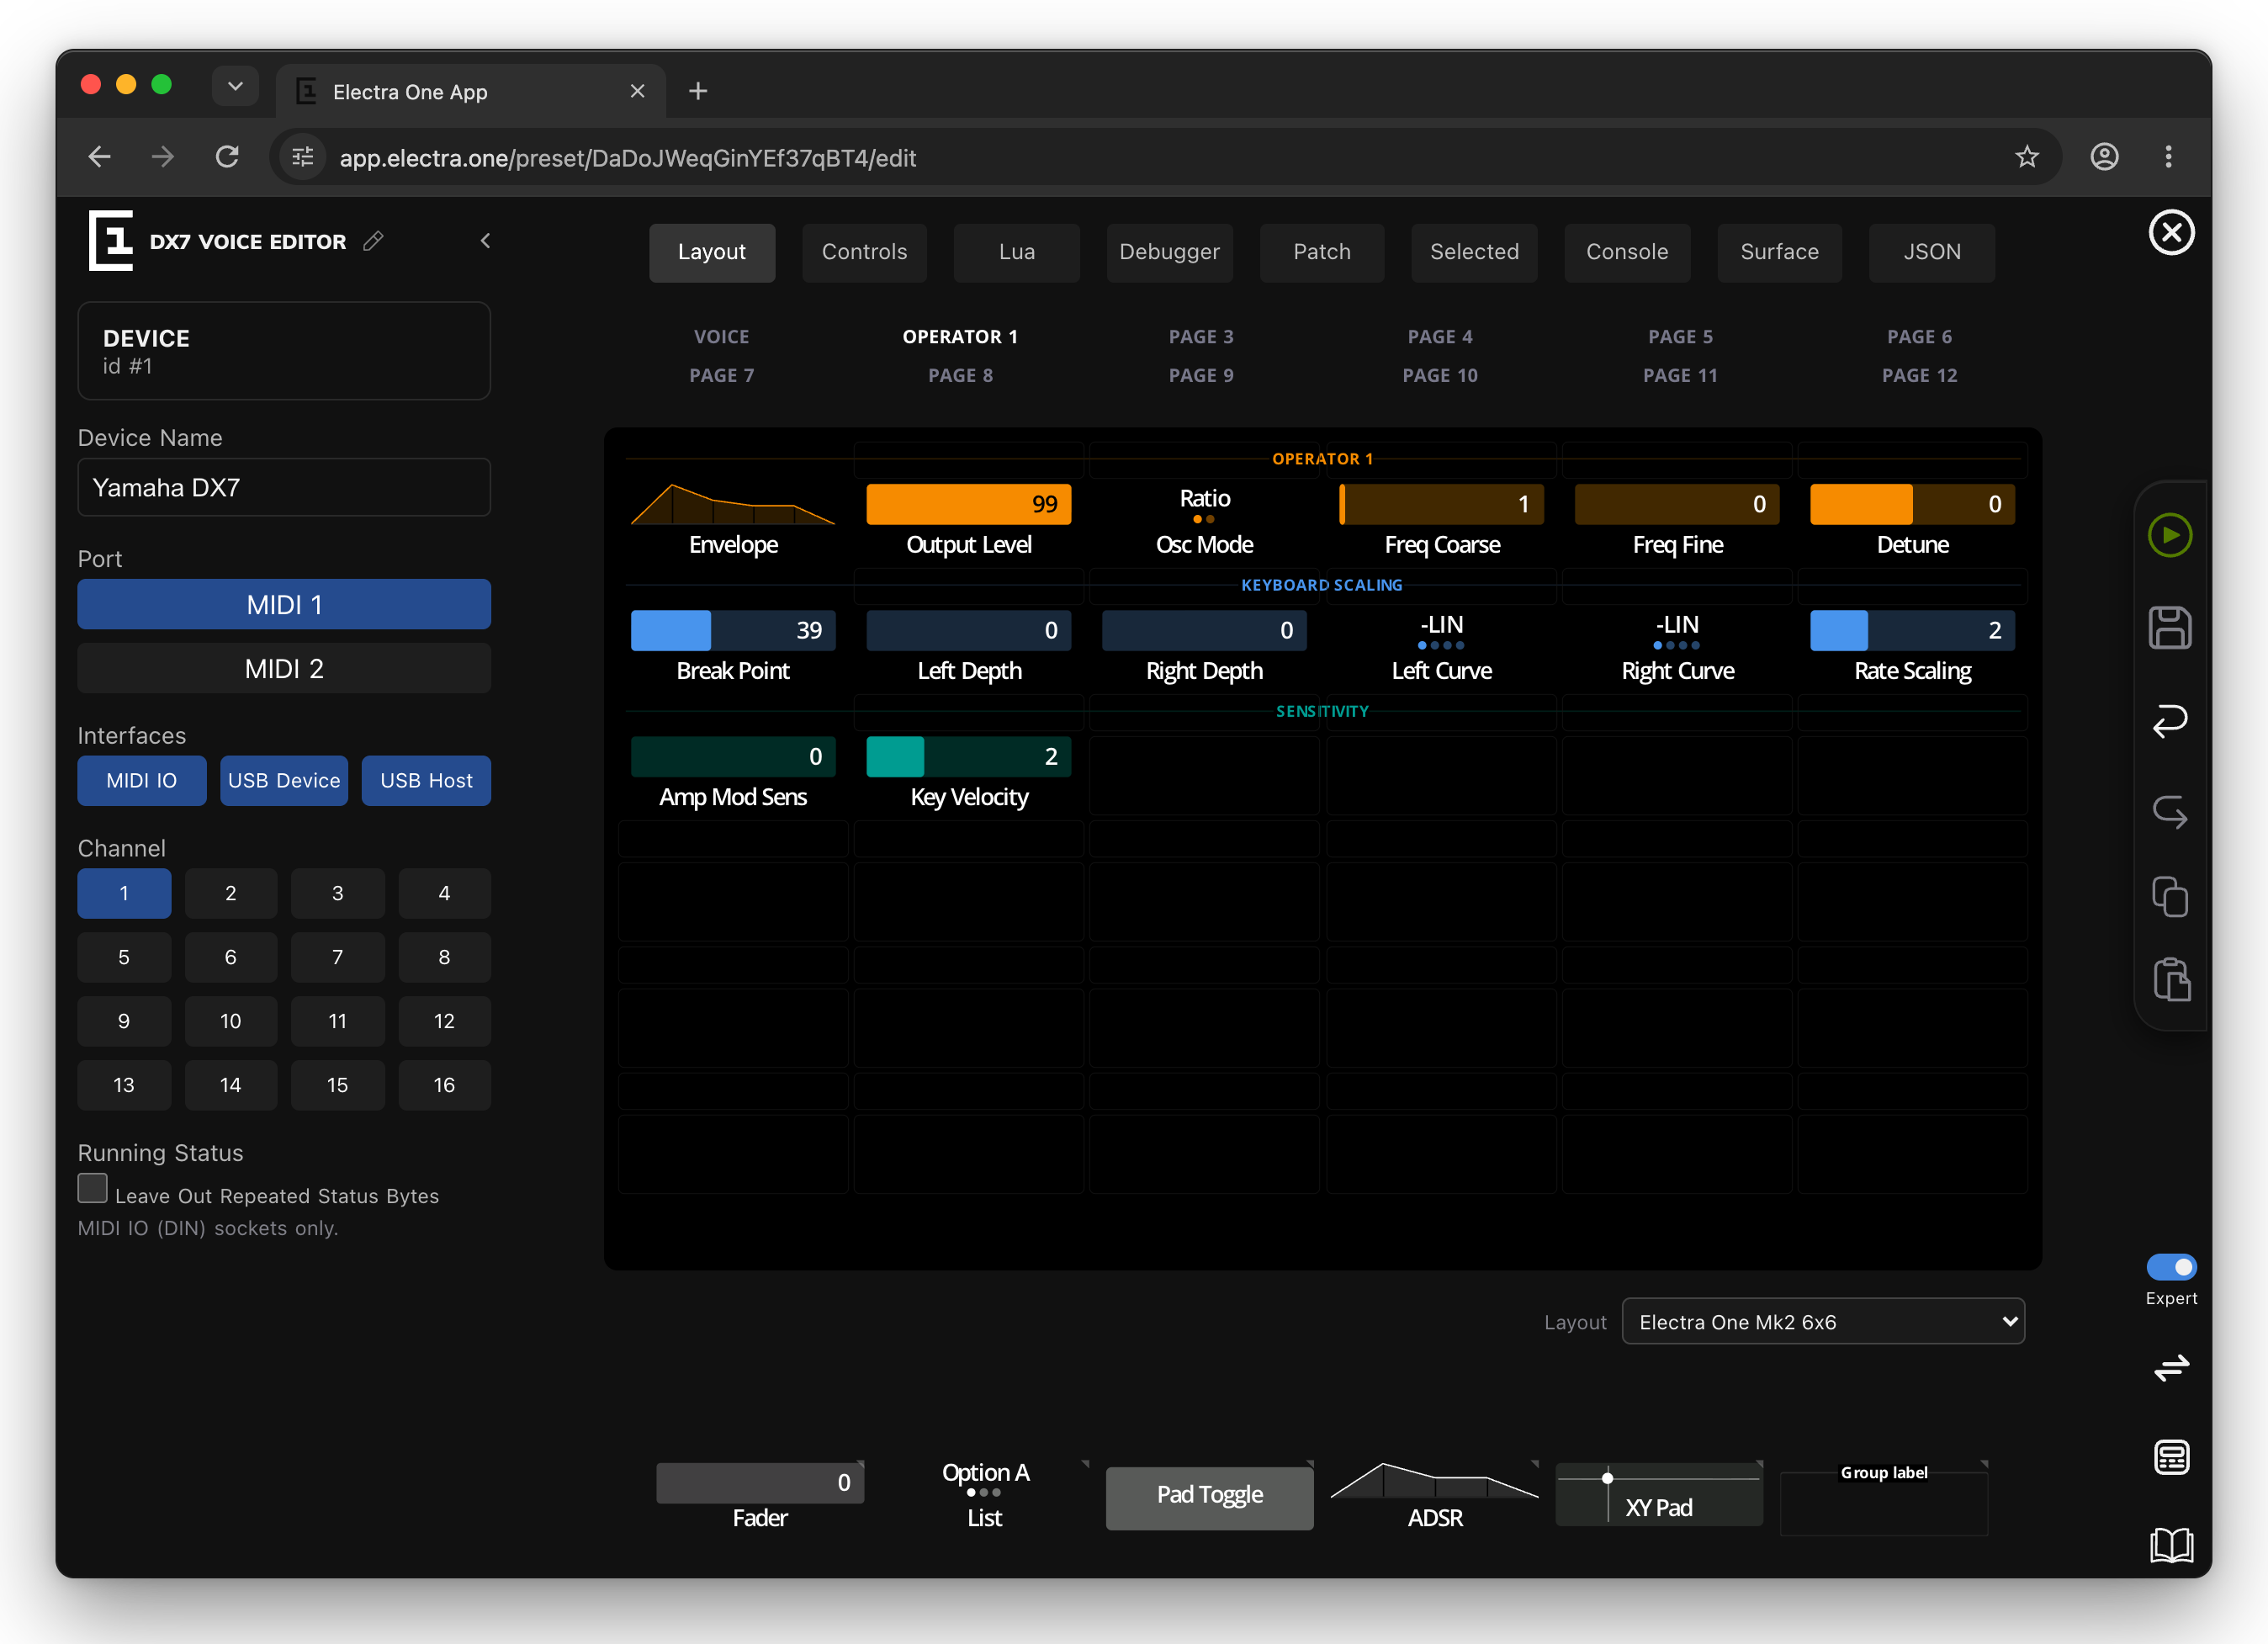
The box at the top shows the selected device: its name, port and channel. Click it to choose another device; the devices are listed by port and channel. The pencil opens the device's settings.
A preset has 32 devices, one for each channel of the two ports, named "MIDI Device 1" to "MIDI Device 32". Give the ones you use a name and the right port and channel. The settings are:
- Device name,
- Port: MIDI 1 or MIDI 2,
- Interfaces: which of MIDI IO, USB Device and USB Host the device is reached through,
- Channel: 1 to 16,
- Running status: leaves out repeated status bytes on the MIDI IO connectors to save bytes. Turn it on only for instruments that accept it; it has no effect on USB.
What devices are and why controls use them is explained in Devices. The selected device is also the one the patch editor edits.
Defaults
The row under the device sets what new controls get:
- the colour dot opens the colour picker,
- the message type, for example CC 7bit, NRPN or Sysex,
- MIDI Learn starts MIDI learn.
Changing a control's message type also makes it the default for the next control.
MIDI learn
MIDI learn creates controls from the knobs of your instrument. Click MIDI Learn, then turn knobs and move sliders on the instrument. The controller reports every MIDI message it receives, and the sidebar, in place of the page overview, lists a control for each parameter on the selected device's port and channel (SysEx and Song Position only need the port): "Param. 74 (cc7)" and so on, with the lowest and highest value it has seen.
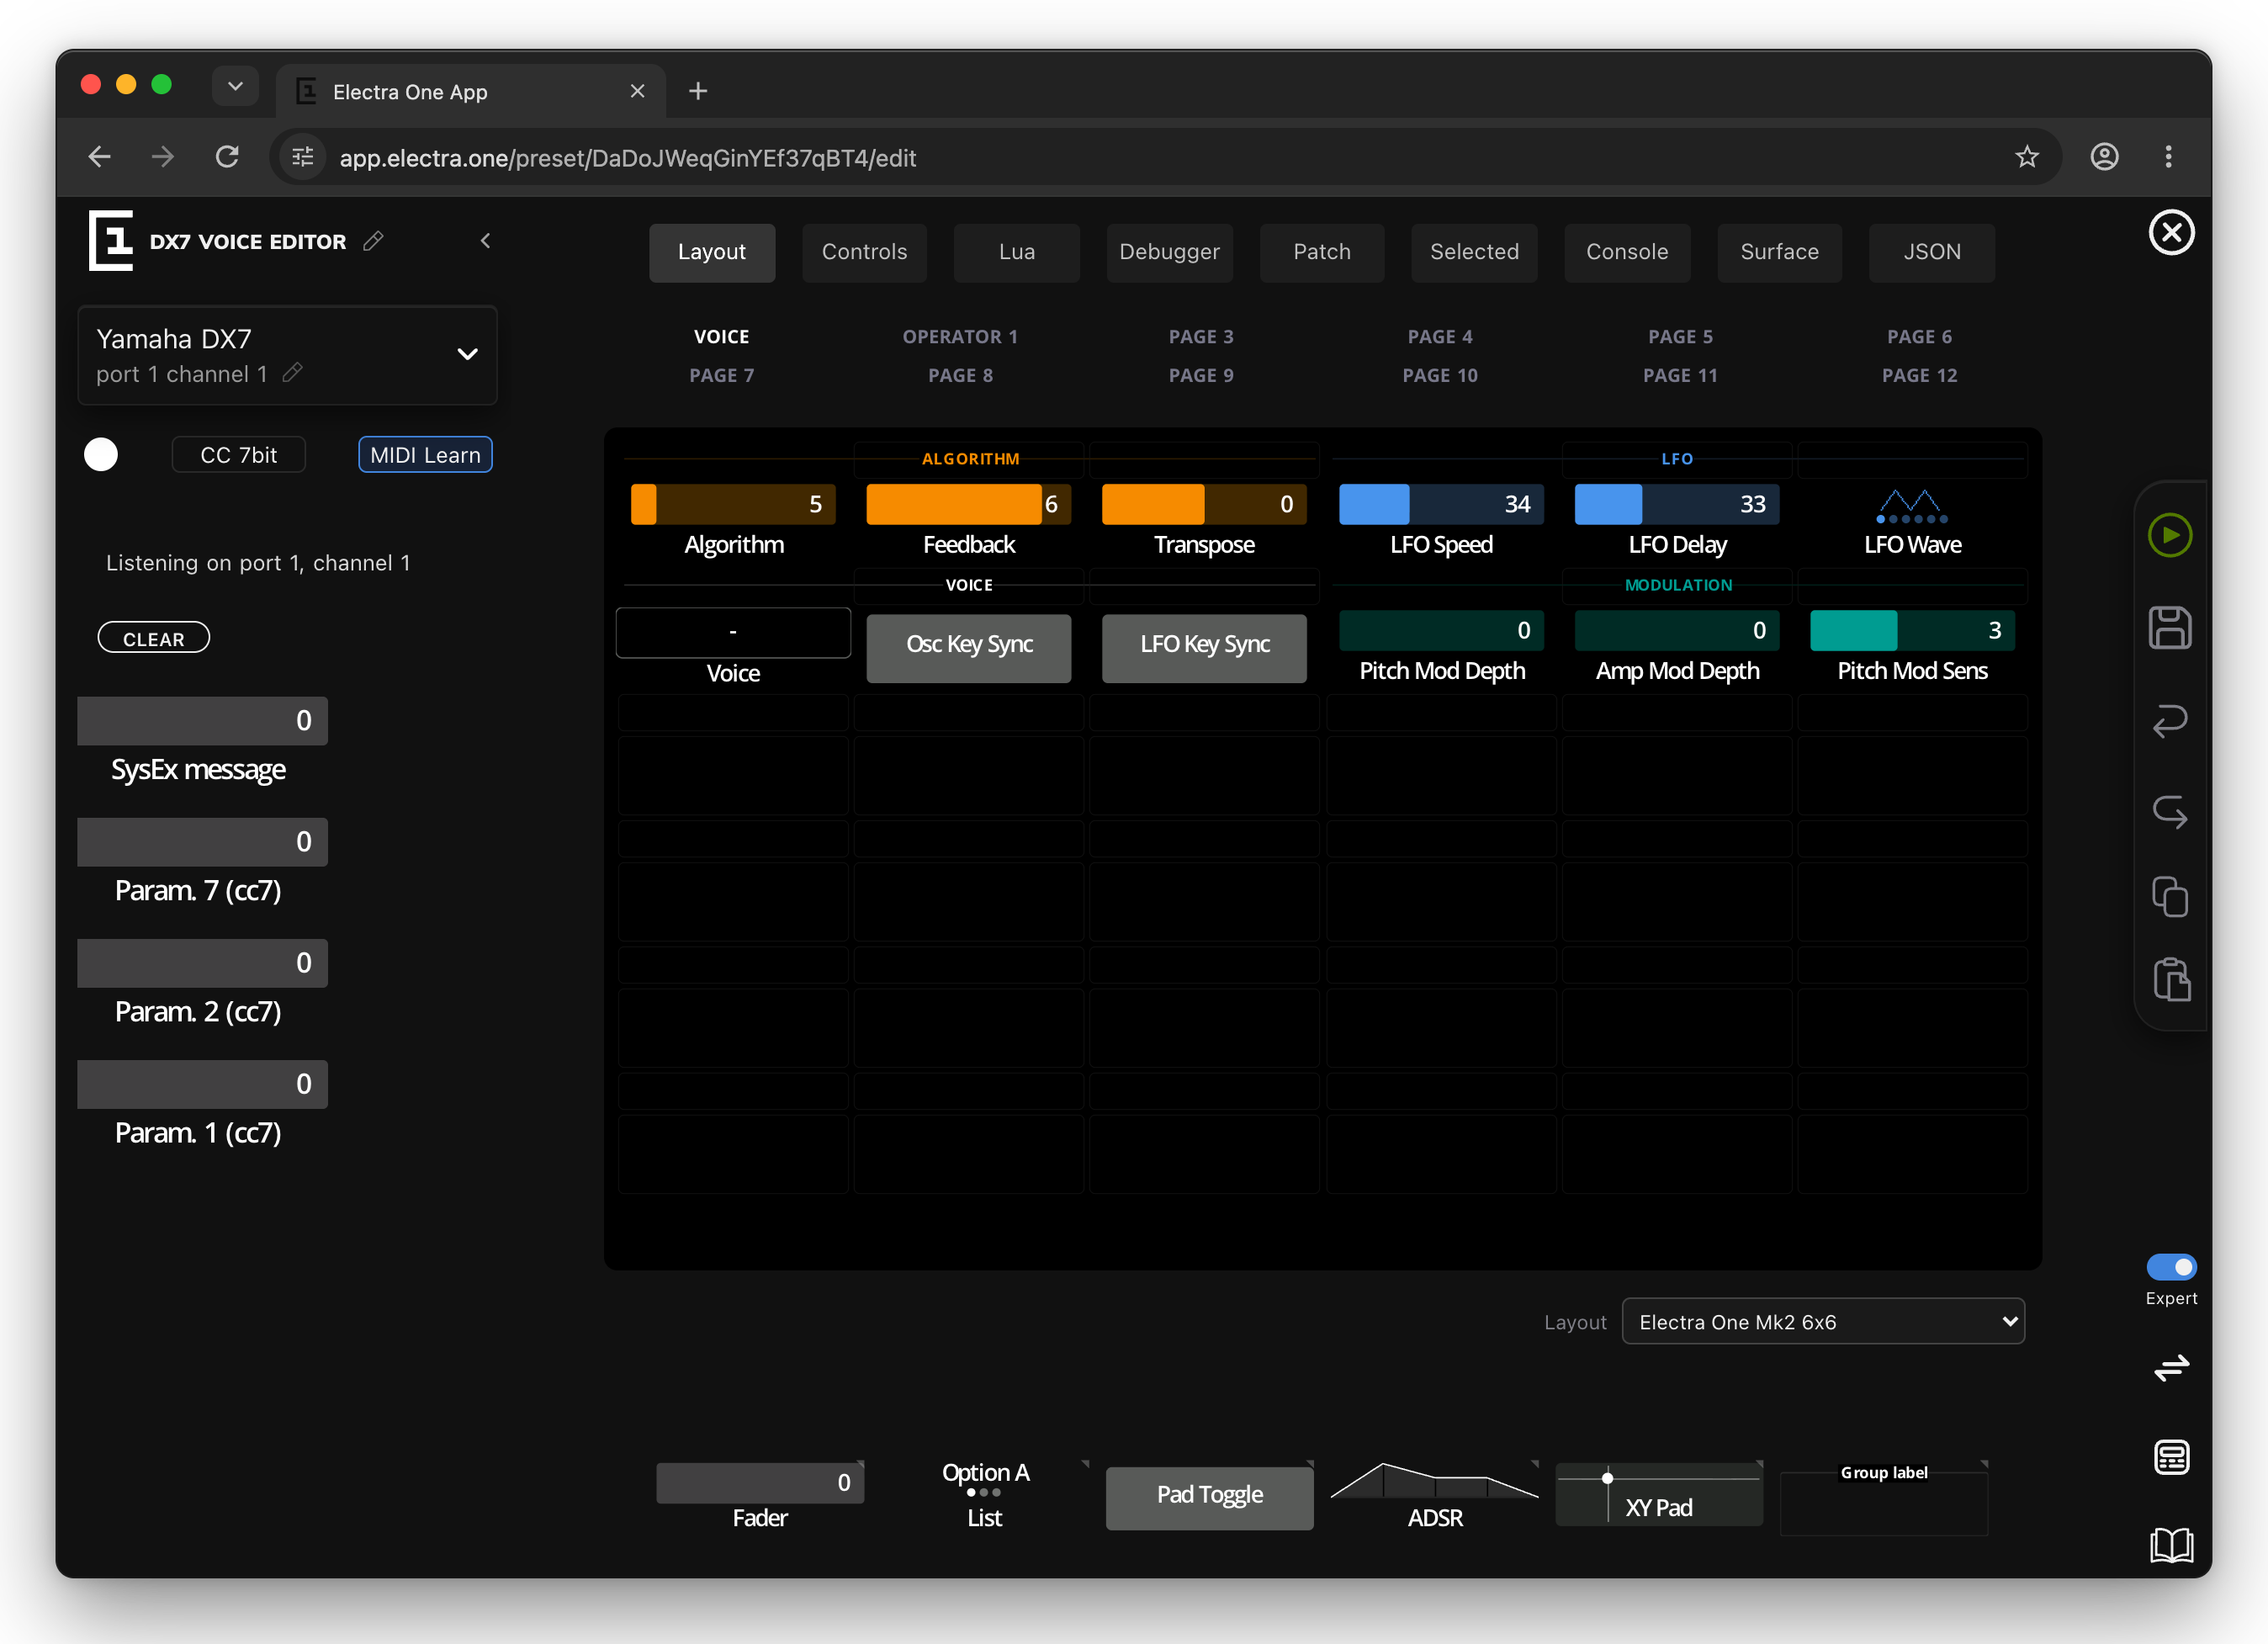
Drag a learned control onto the page to place it; it leaves the list. Learned controls are faders; change the type afterwards if needed. CLEAR empties the list. Messages from another port or channel show a notice instead, so check the device's port and channel if nothing is listed.
TIP
Turn each knob from one end to the other. MIDI learn then knows the whole range of the parameter.
MIDI learn also learns SysEx. Many instruments send a SysEx message, not a control change, when you turn a knob. MIDI learn lists such a parameter as SysEx message, and the control you drag onto the page sends the same message with its own value in it. You do not have to write the SysEx template yourself.
The controller cannot tell which byte of a SysEx message is the value, so the editor finds it by comparing messages:
- Turn one knob on the instrument, from one end to the other.
- The editor compares the last five SysEx messages it received. When exactly one byte differs between them, that byte is the value. It becomes a Parameter value byte of the template, and the lowest and highest value seen become the control's range. The other bytes stay as they were sent.
- Drag SysEx message onto the page, then click
CLEARbefore you turn the next knob.
All SysEx on the port is learned as one entry, because a SysEx message has no parameter number to tell two knobs apart. This is why one knob is learned at a time. When you move to another knob, two bytes differ, the parameter's number and its value, and the entry shows the last message as fixed bytes until five messages from the new knob have arrived. The range is kept until you click CLEAR, so without it the second control gets the range of the first.
Only a value carried in one byte, 0 to 127, is found this way. If the instrument spreads the value over two or more bytes, or adds a checksum, more than one byte changes and the message is learned as fixed bytes. Drag it onto the page anyway and mark the value and checksum bytes in the SysEx editor: the header and the parameter's address are already in place.
While MIDI learn is on, the controller does not process the MIDI it receives in the normal way. MIDI learn stops when you click MIDI Learn again, click anything on the page or the page strip, press Escape, change the layout or open the device settings. Dropping learned controls onto the page does not stop it.
Page overview
Under the defaults, the page overview lists the controls of the page, grouped by device, with each control's reference number, message type and parameter number. Click an entry to select the control.
The Controls view
Expert. The Controls view lists every control of the project, on every layout and page, including controls that are not placed anywhere.
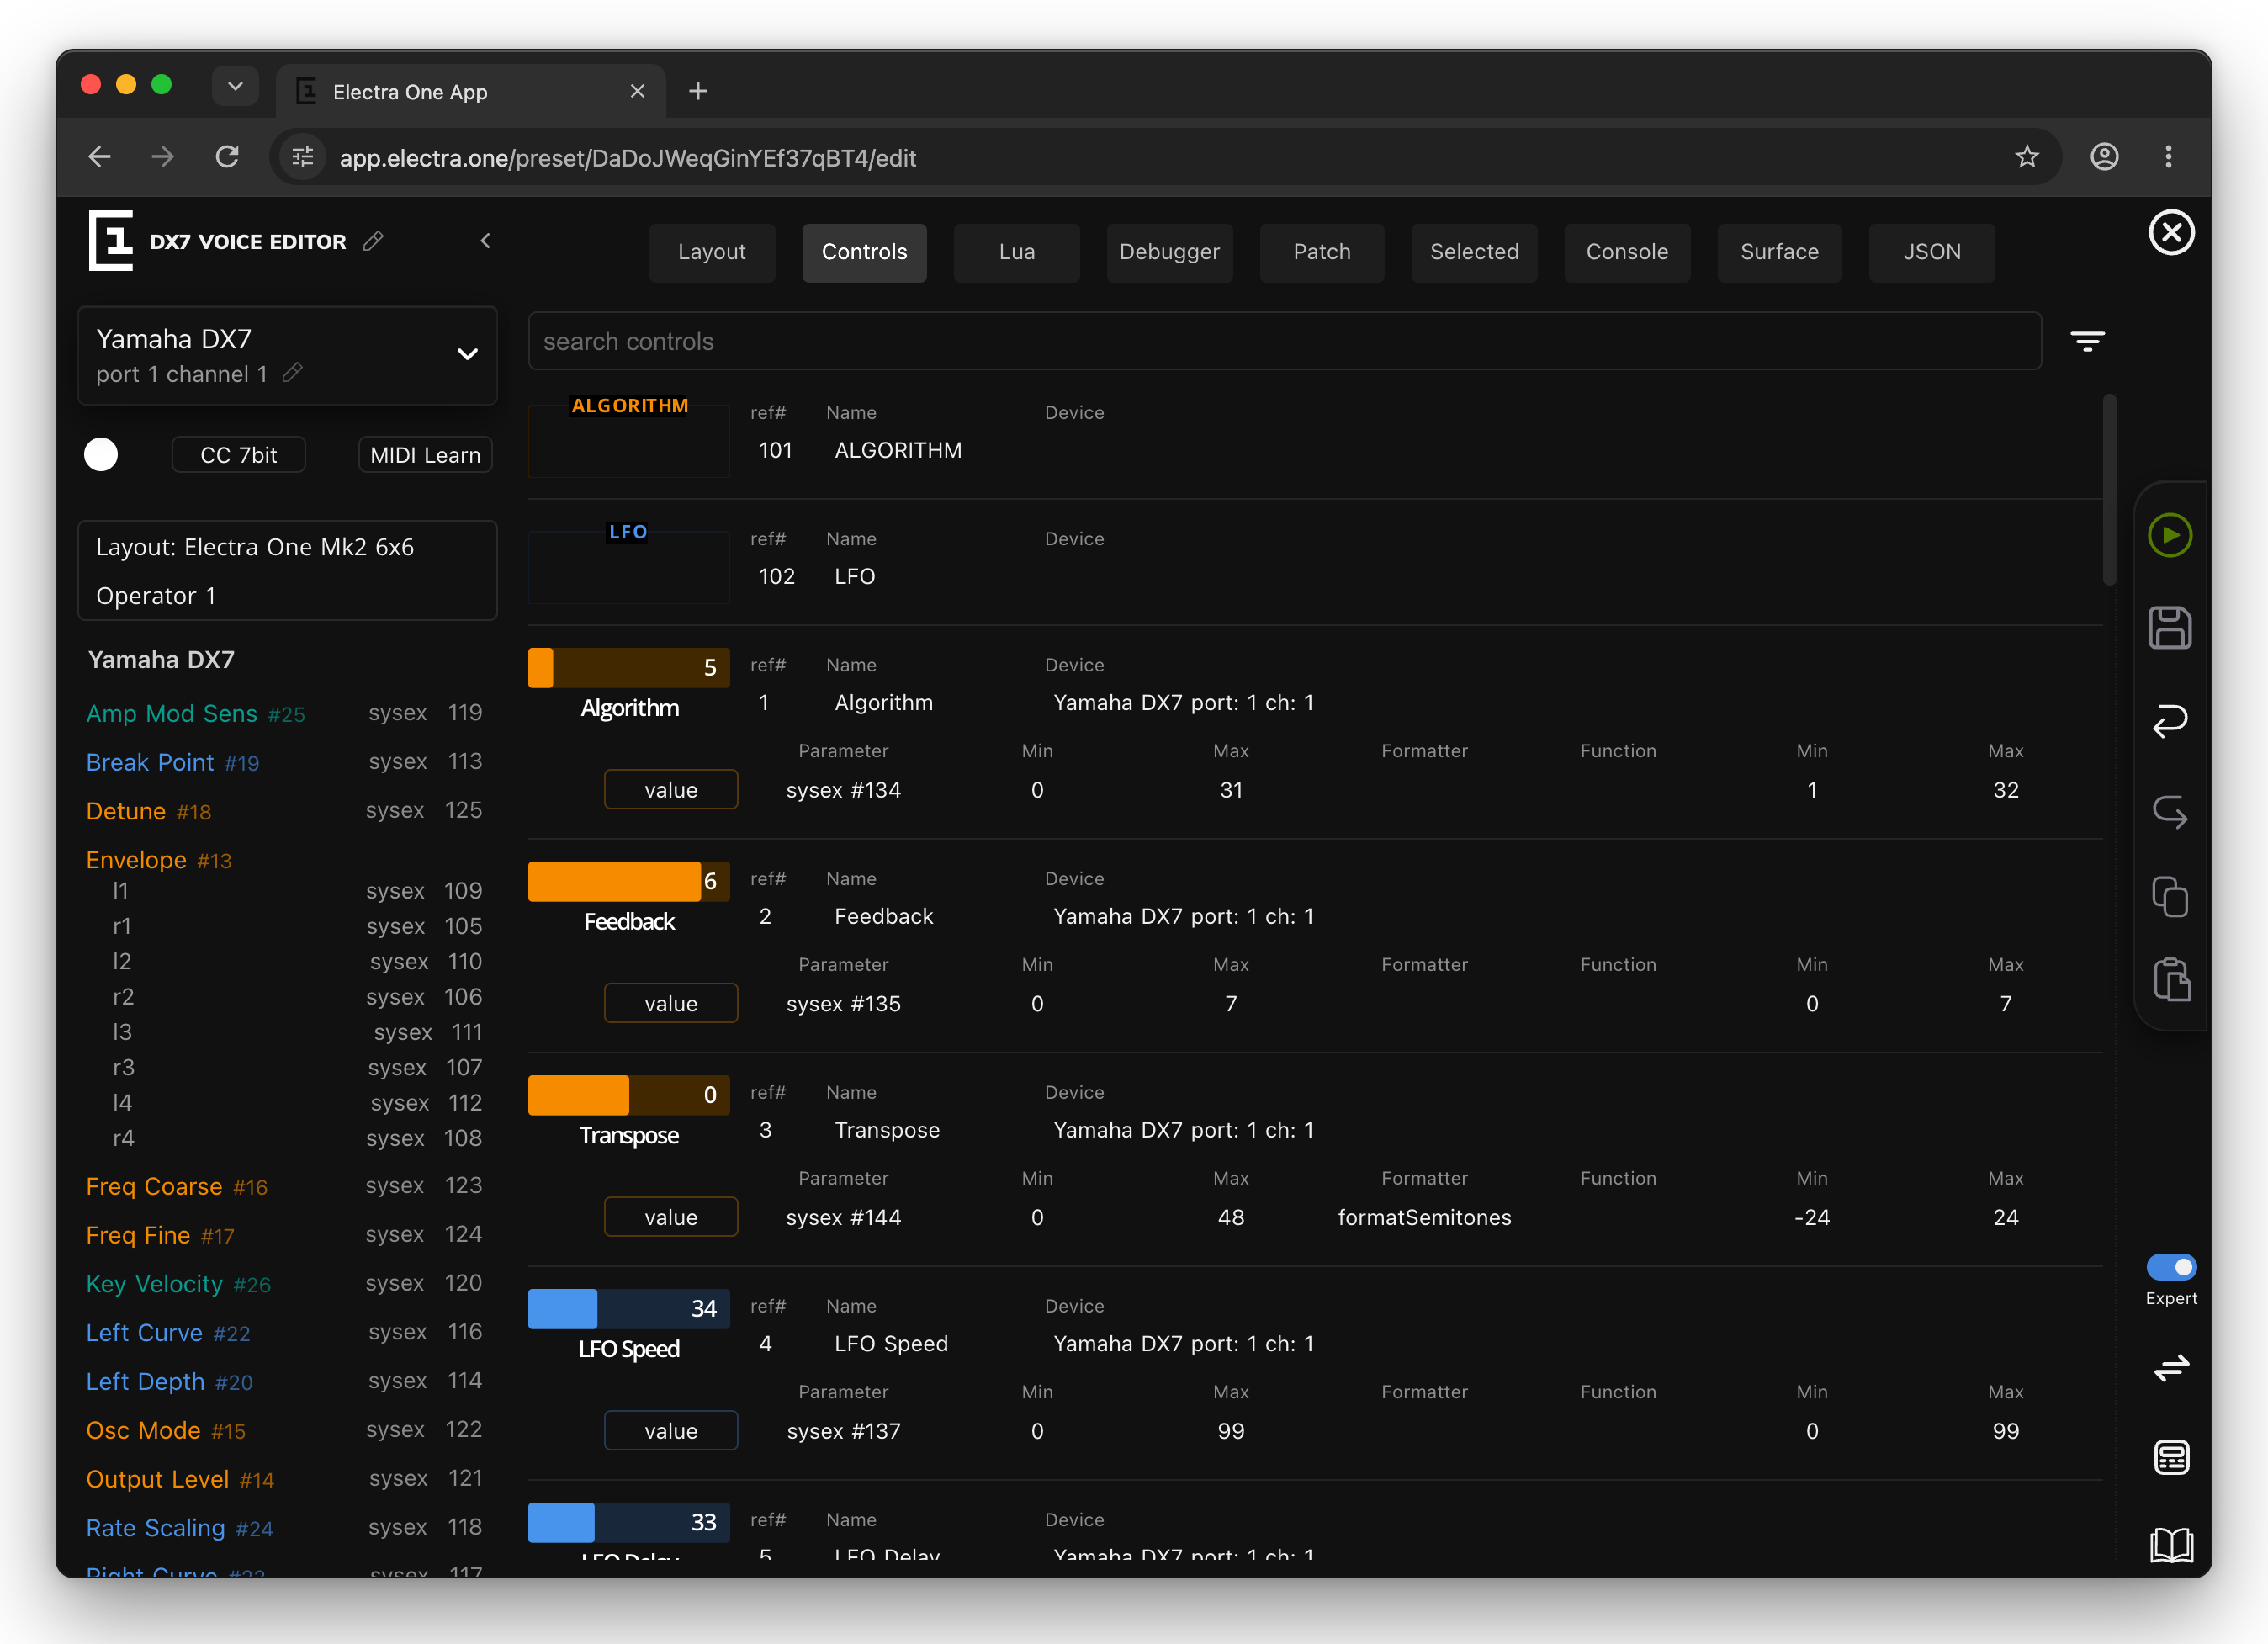
Each control shows its reference, name and device, and under it each of its values with the message, the MIDI range, the display range, the formatter and the function. Click a control to select it and show it on the layout, or click a value to jump to that value's settings.
The search field matches the reference, name, device name, port and channel, formatter and function names, and each value's message type and parameter. It matches text, so a number also finds longer numbers that start with it:
| Search | Finds |
|---|---|
cutoff | controls with "cutoff" in the name |
ref #12 | reference 12, and 120 to 129 |
ch:3 | controls of devices on channel 3 |
port:2 | controls of devices on port 2 |
sysex #134 | controls with a SysEx value on parameter 134 |
formatSemitones | controls with a value using that formatter or function |
The filter button narrows the list by device, by the message types the preset uses and by the pages of the selected layout. CLEAR removes the filter. The list includes groups.
Surfaces (beta)
Beta
Surfaces are a beta feature. They work, and they will grow.
A control surface is a drawing of a MIDI controller you own, such as a MIDImix or a keyboard with knobs. The Surface tab puts that drawing next to the layout, so you can connect its knobs to the controls of the preset. This is the editor side of static remote knobs: turning a knob on your controller moves a specific control of the preset.
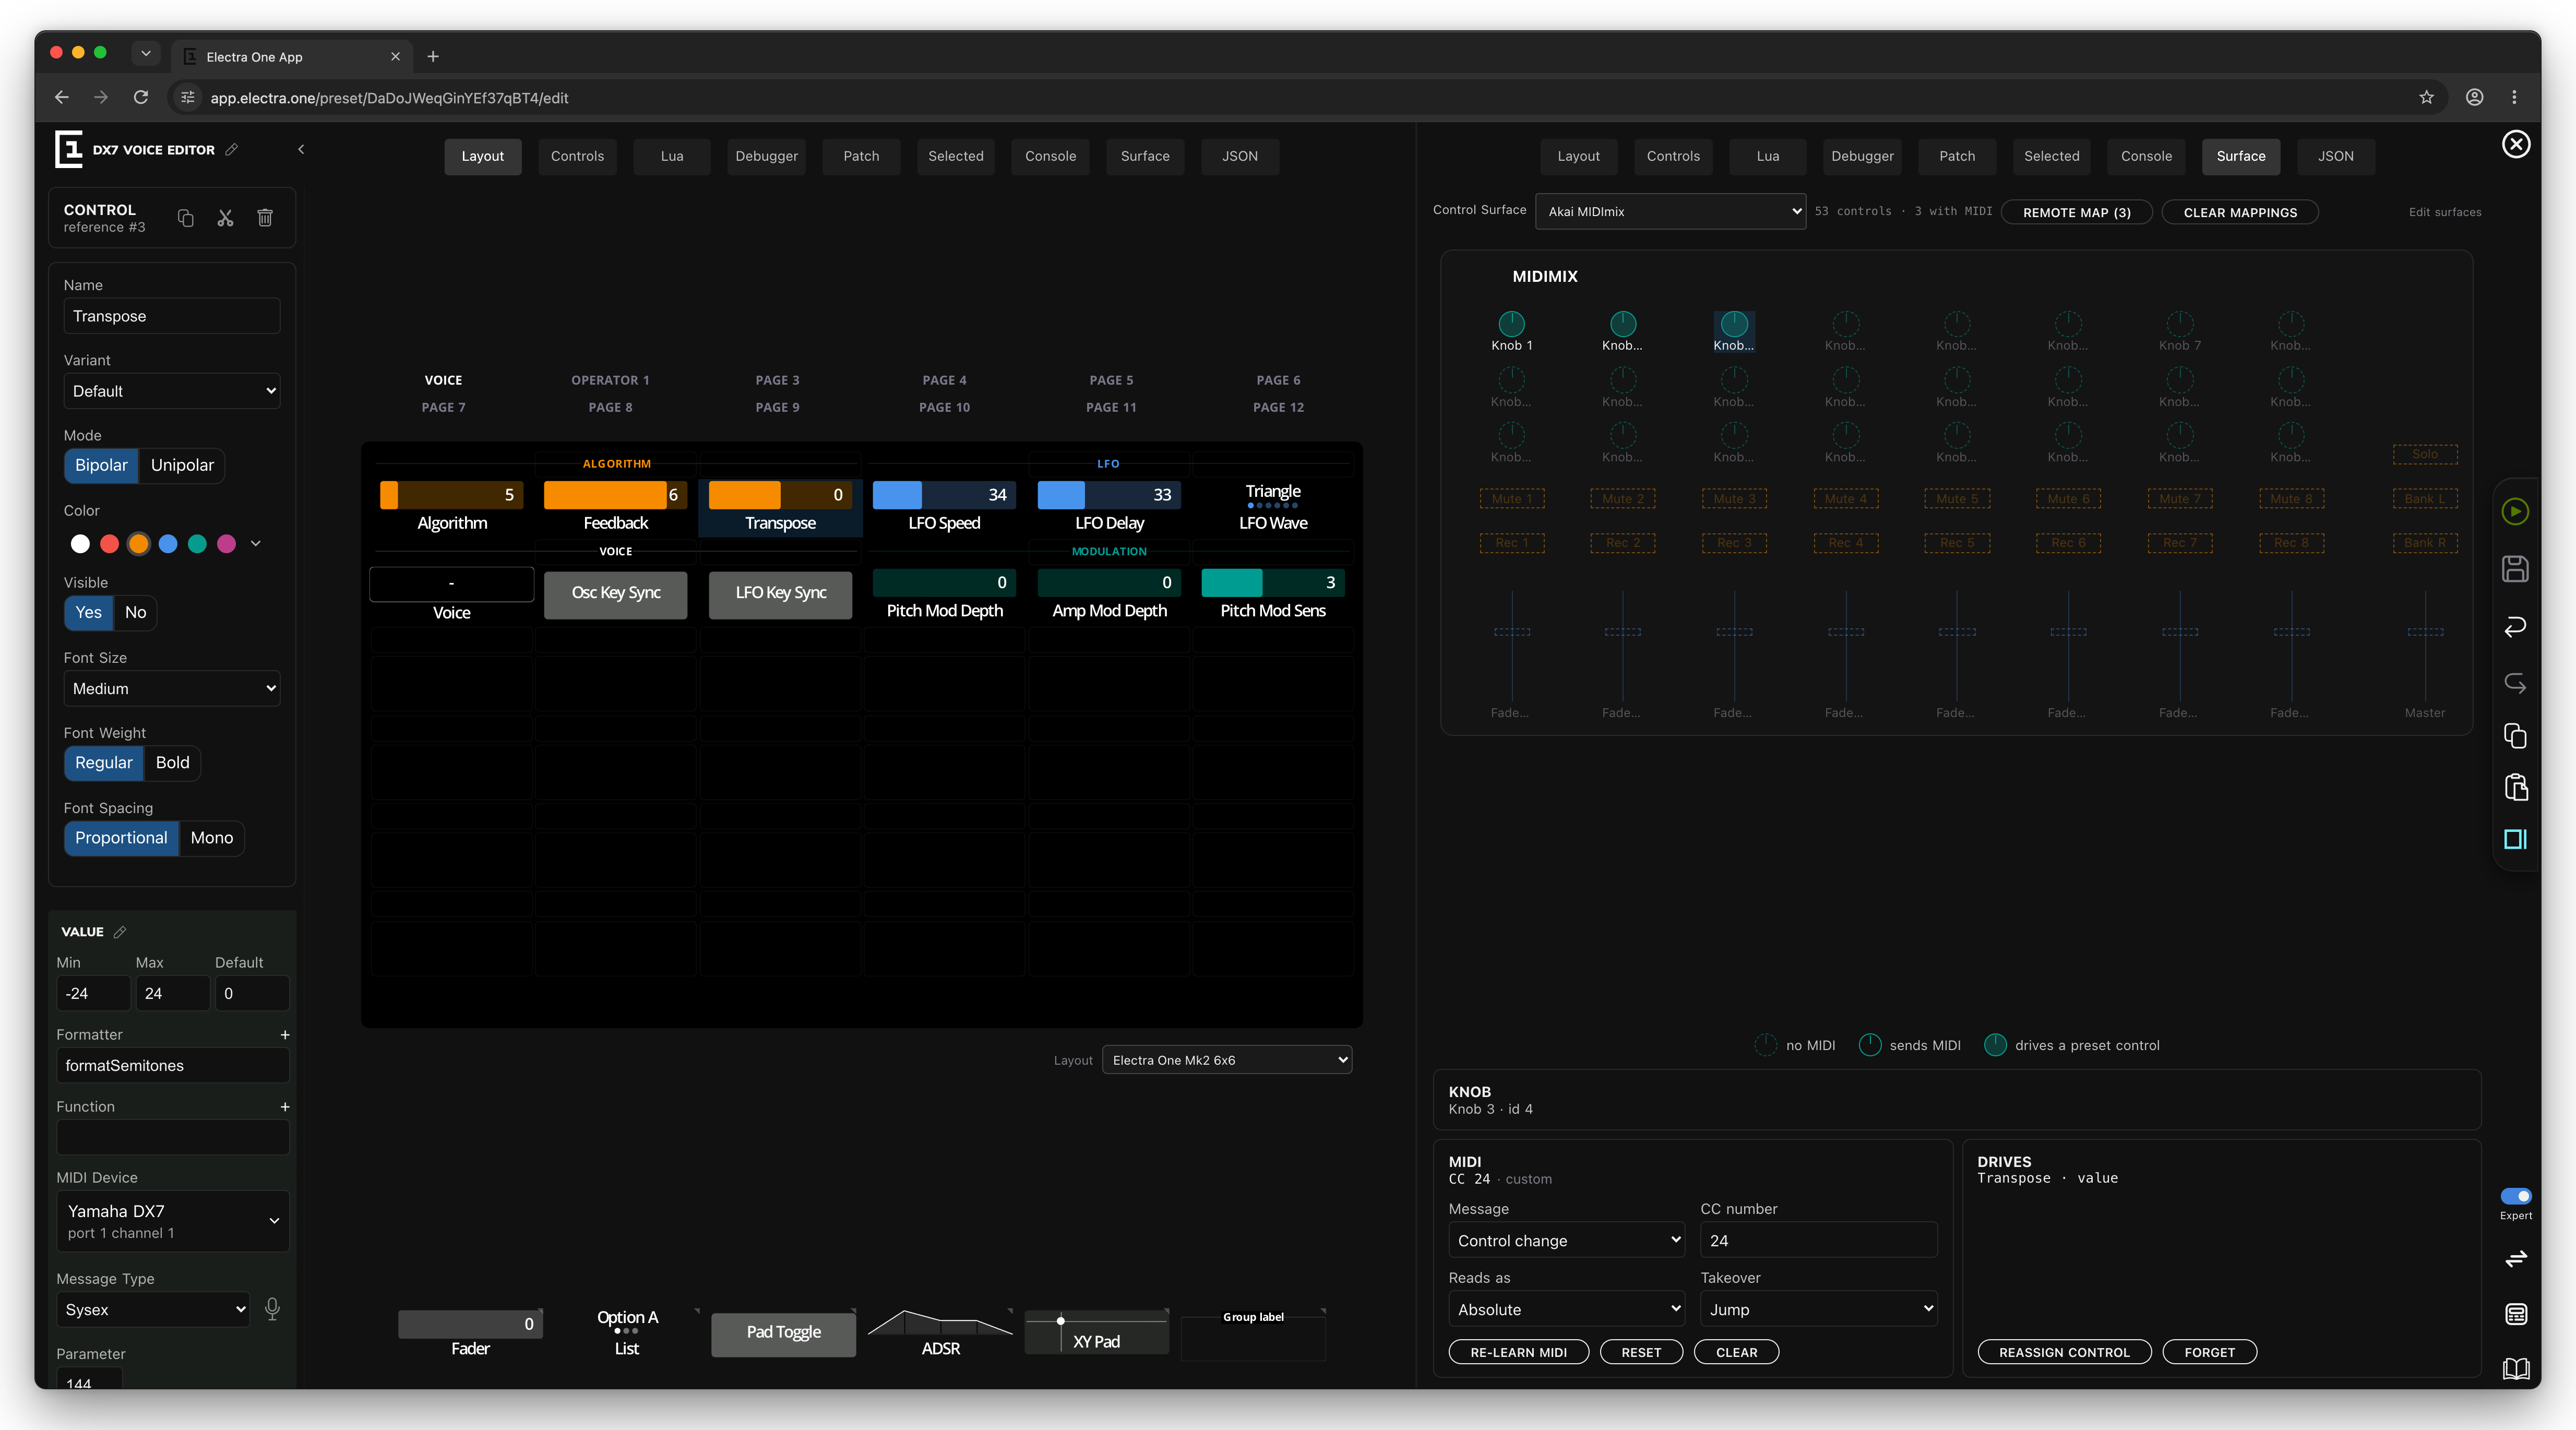
- Choose a surface in Control surface, or draw one on the Control surfaces page with Edit surfaces.
- Click a knob on the surface. In its MIDI card,
LEARN MIDIand move the knob (your MIDI controller must be connected to the computer), or set the message and number by hand, with Reads as Absolute or Relative, and a Takeover mode for an absolute CC.RESETandCLEARundo the MIDI. - In its Drives card,
ASSIGN CONTROL, then click the control it should move on the Layout view. For a control with several values, choose the Value.FORGETremoves the assignment. REMOTE MAPshows the mappings as the controller receives them.UPLOAD TO SLOTwrites them to the slot open on the controller, which must hold this preset, and reloads it.CLEAR MAPPINGS, clicked twice, removes them here and on the controller.
The mappings are not saved with the project yet: upload them before closing the editor or following Edit surfaces.