

Version5.0.0 beta
Settings
Electra One Mini keeps one settings window on the controller itself, the System window. The rest of its settings are made in the Electra One app: the names and colours of preset banks, remote knobs, MIDI control, the actions of the buttons, the MIDI router and the USB host ports.
The settings belong to the controller, not to a preset. They apply to every preset.
To open the window on the controller, hold [MENU] for one second. How to reach the rest in the app is described in The configuration in the Electra One app at the end of this chapter.
The Mini's settings are:
| Section | What it sets |
|---|---|
| Preset Banks | the names and colours of the five preset banks |
| Remote Knobs | other controllers' knobs that move the Mini's controls |
| MIDI Control | MIDI messages that run controller functions |
| Buttons | the actions of the Controller context and the Control context |
| Router | which MIDI messages pass between the ports |
| USB Host | which Mini ports the USB devices use |
| System | the controller's own window: hardware information, brightness, save, reboot and sleep |
The Mk2's User Interface section is not shown for the Mini.
Preset Banks
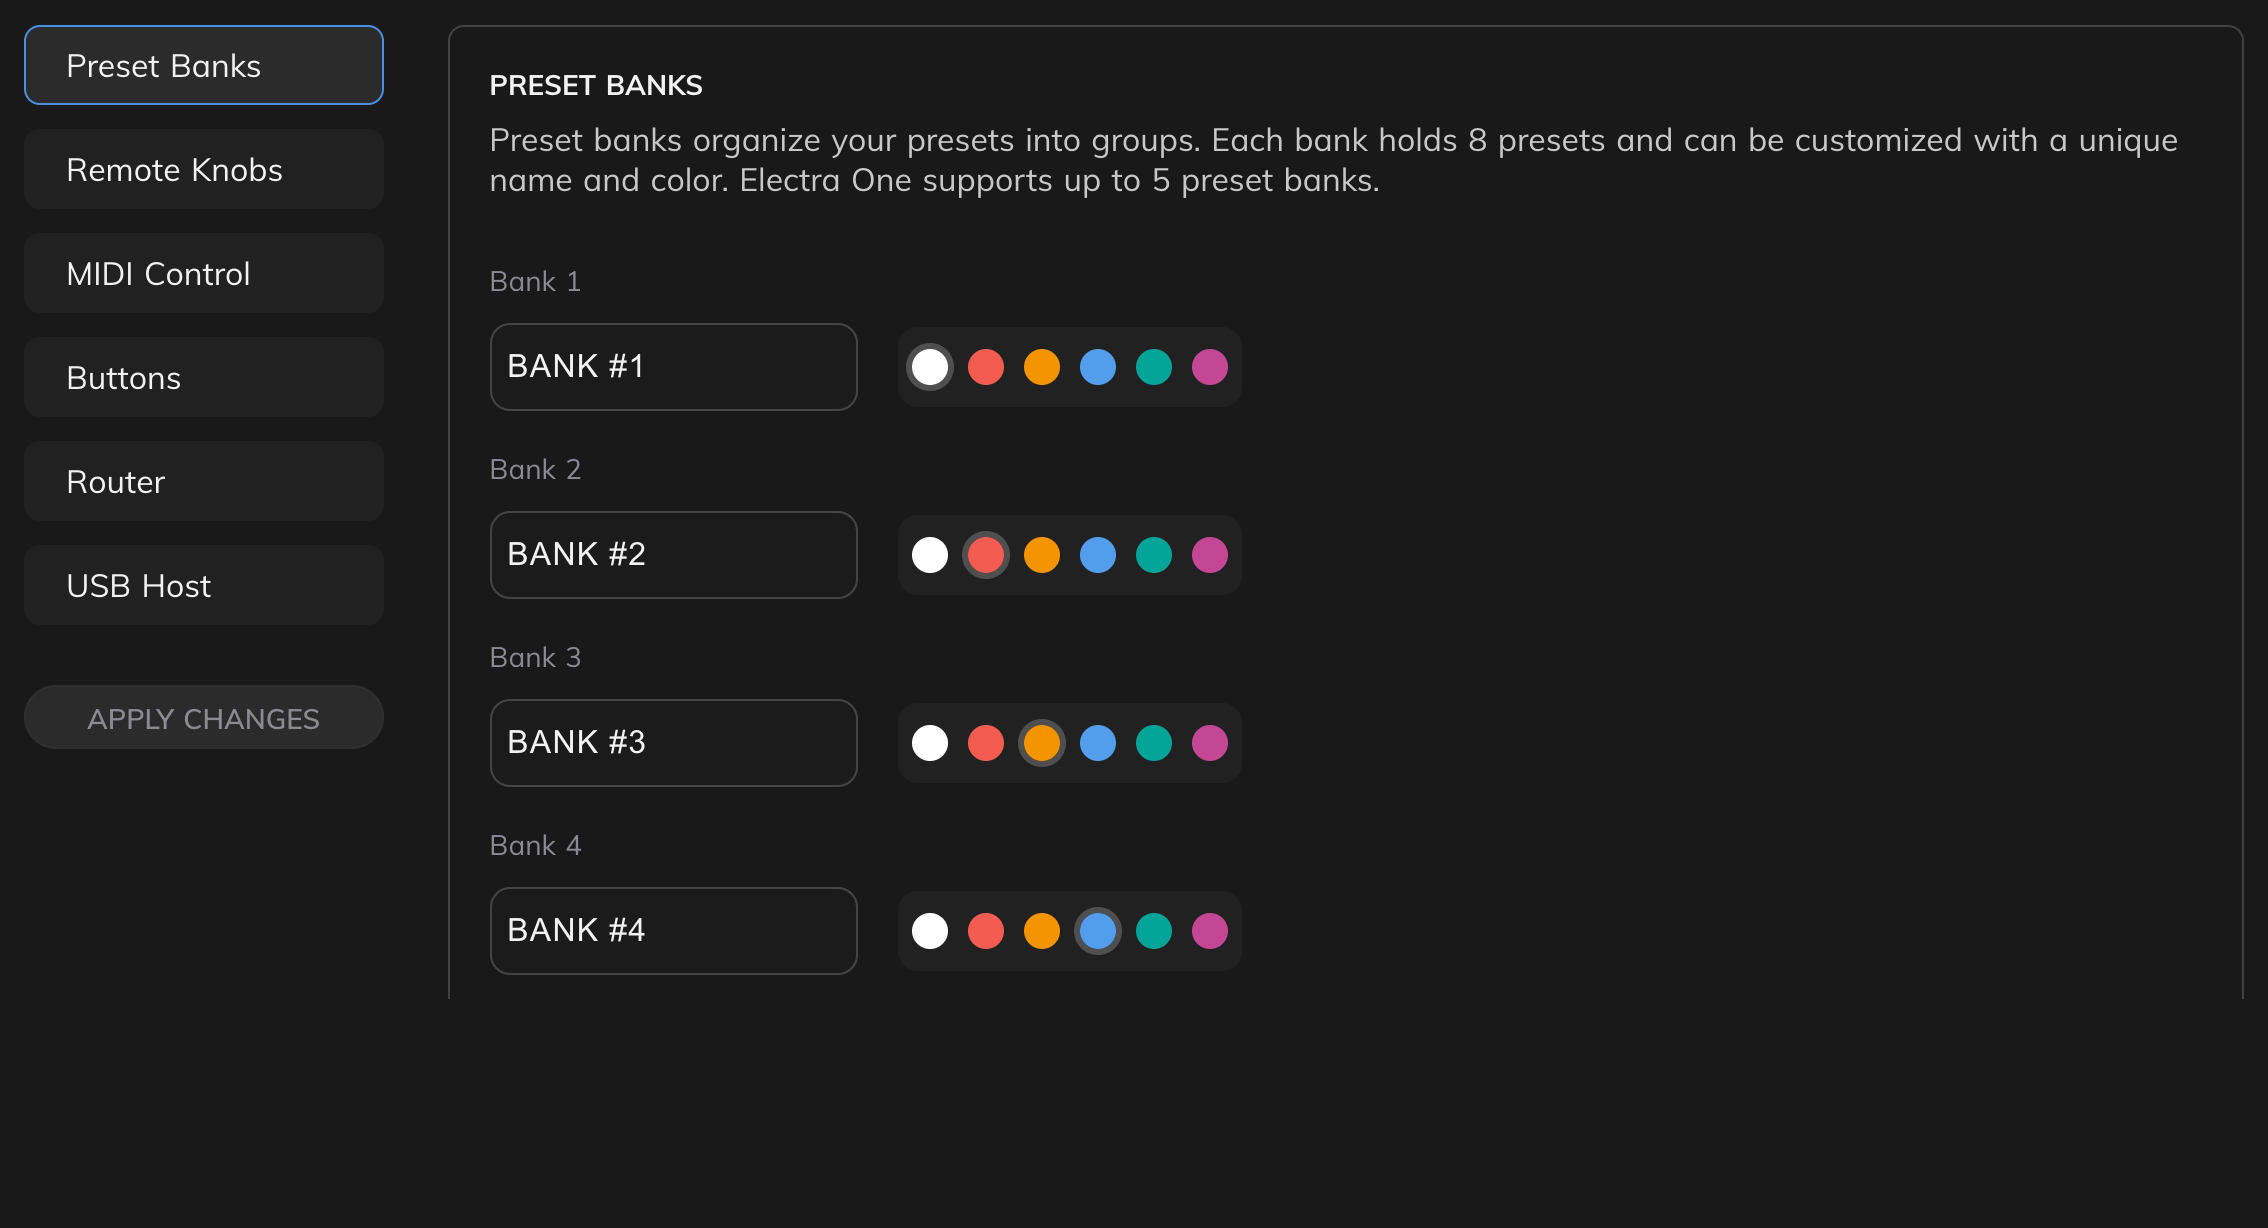
The Mini has five banks of eight presets. For each bank you can set:
- Bank name, shown on the bank buttons of preset selection,
- colour, chosen from the colours the controller can show.
Remote Knobs
Remote knobs let the knobs or pads of another MIDI controller, or a DAW, move the controls of the Mini, and send the values back when you turn the Mini's knobs. The ideas behind them are explained in Remote knobs.
On the Mini you can map up to 12 knob slots: the eight knobs and the four buttons.
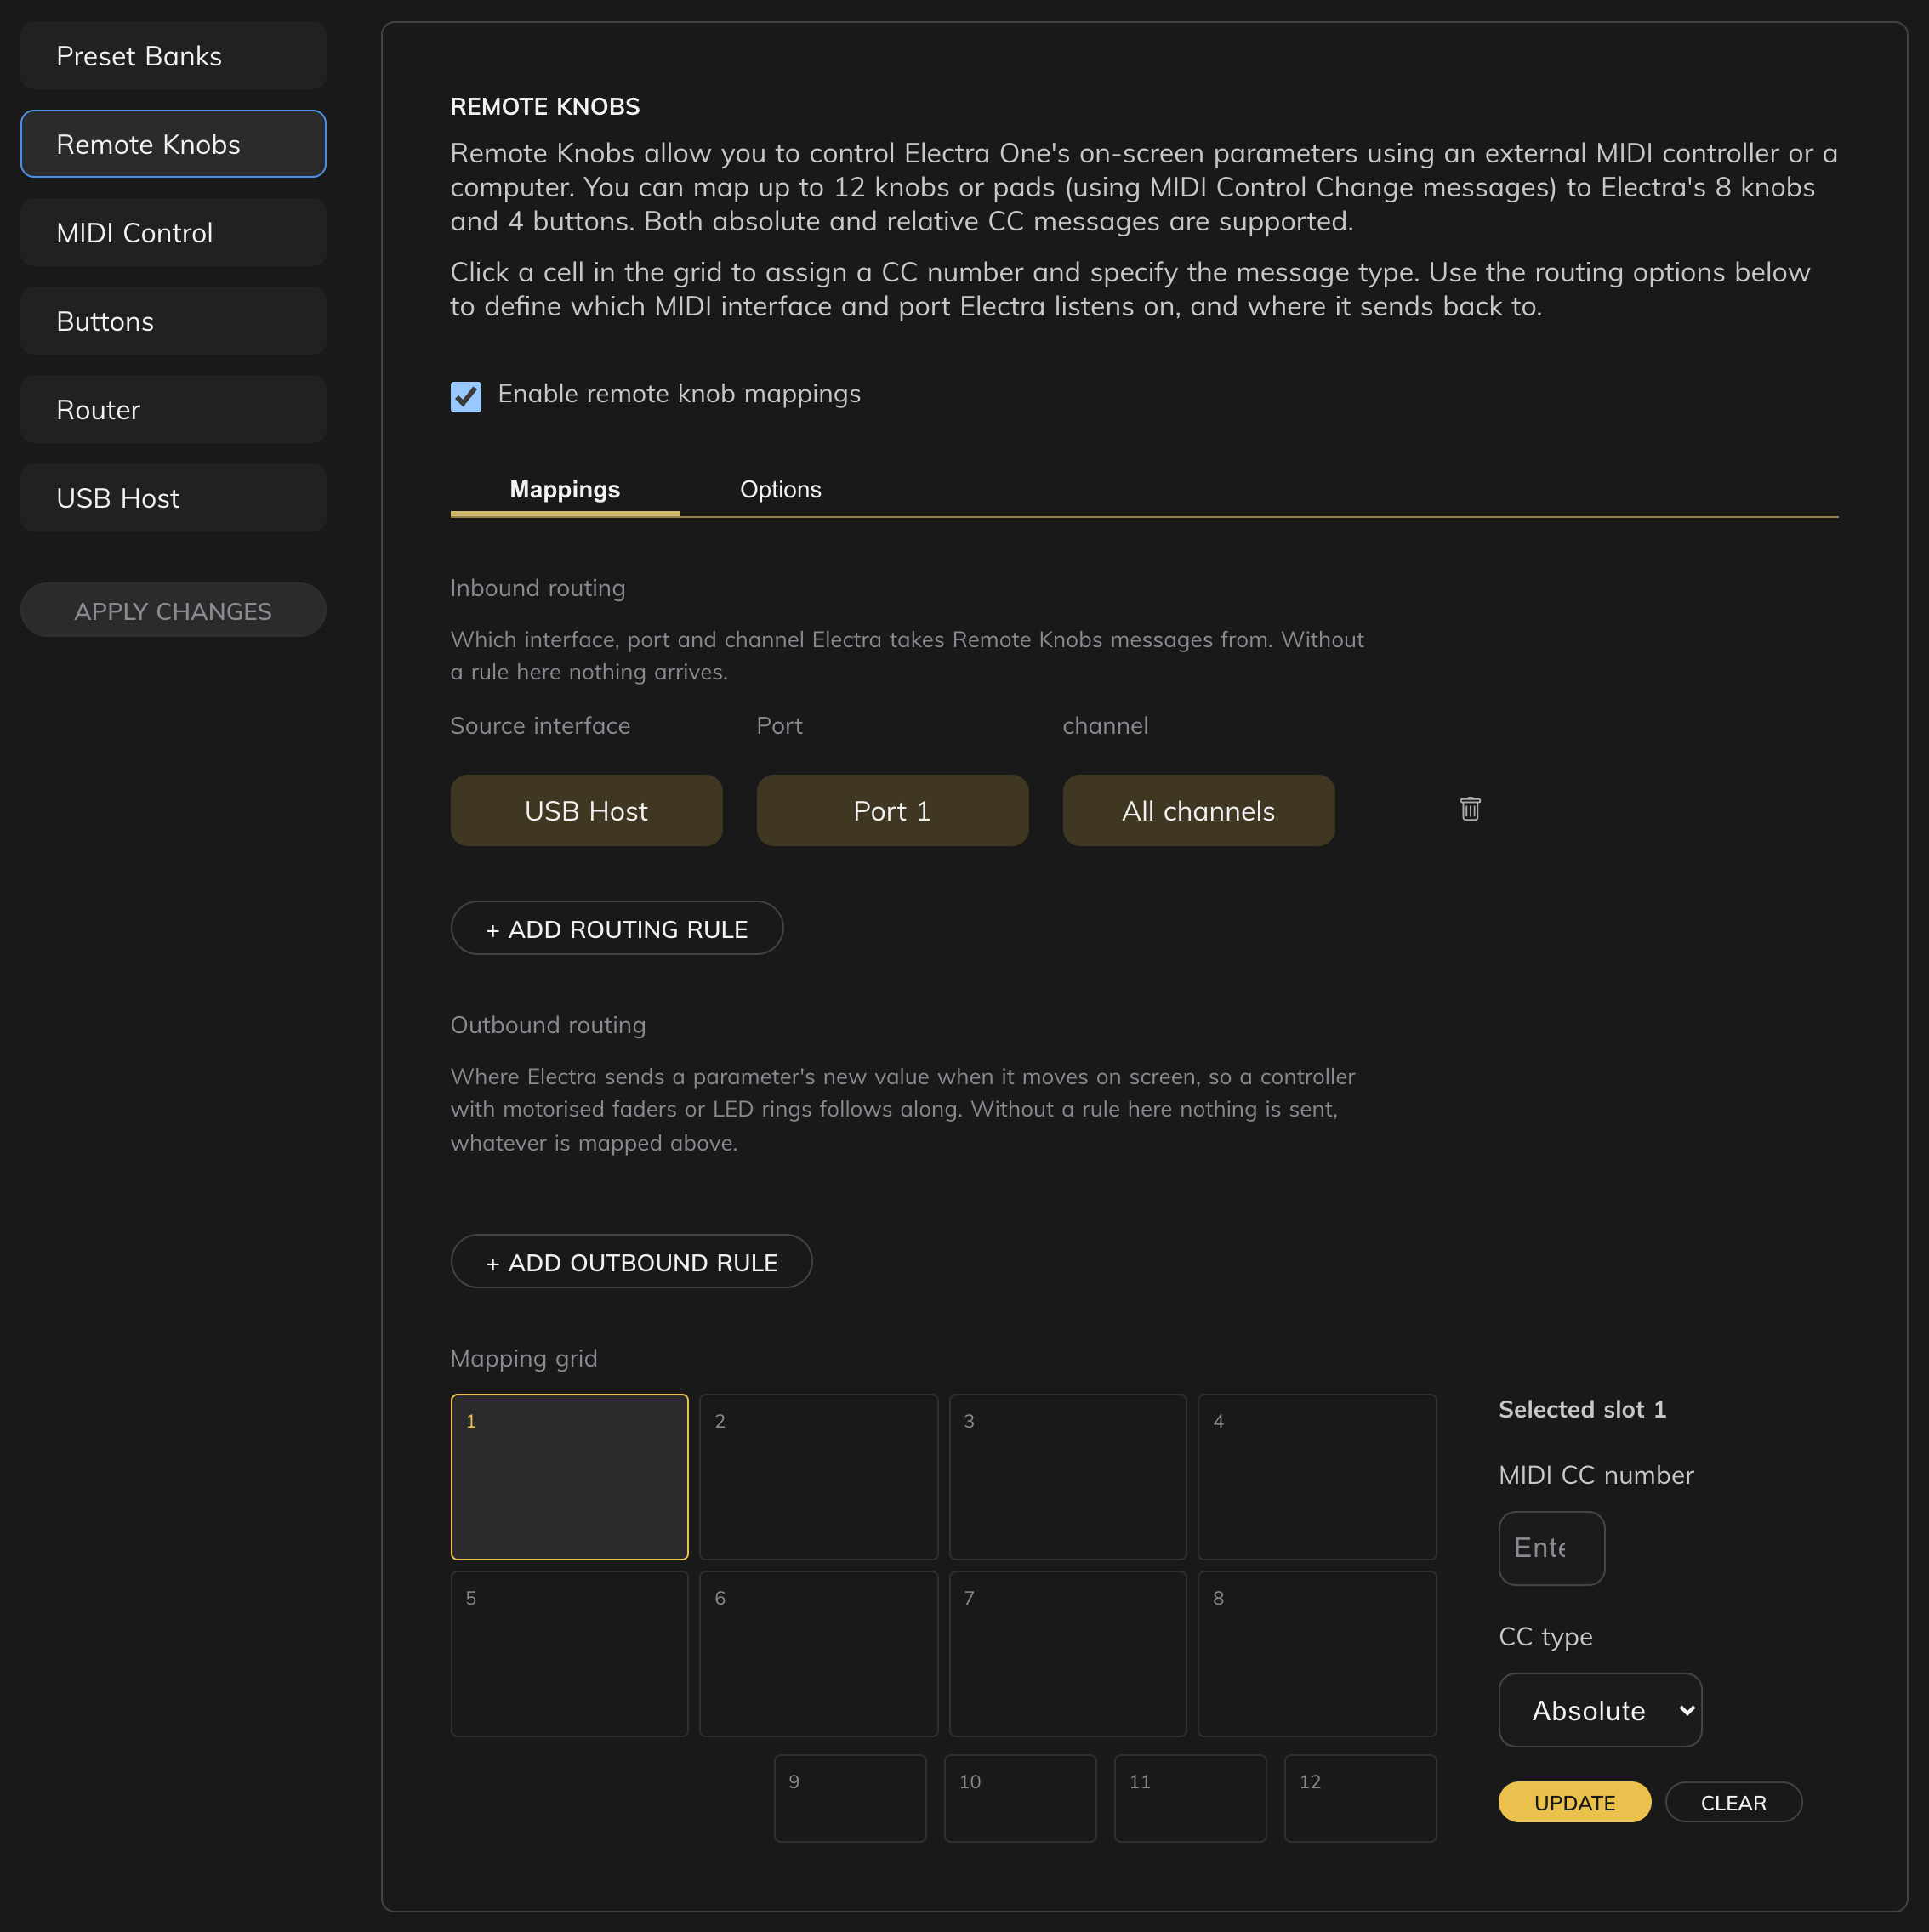
- Enable remote knob mappings switches the remote knobs set here on and off. A preset's own remote map works either way.
- Mappings tab:
- Inbound routing chooses the ports and channels the remote knobs listen to. + Add routing rule adds one.
- Outbound routing chooses where the values of the controls are sent back. + Add outbound rule adds one.
- Mapping grid: slots 1 to 8 are the knobs, arranged like them; slots 9 to 12, in the row under them, are
[BUTTON 1]to[BUTTON 4]. Click a slot, set its MIDI CC number and CC type (Absolute for faders and knobs, Relative for endless encoders), and click Update. Clear removes the mapping.
- Options tab:
- Takeover decides what happens when a remote fader and a control disagree: Jump, Pickup, Scale or Nudge. See Remote knobs.
- Send values on preset and snapshot load and Send values on page change keep a remote controller with motorised faders or LED rings in step with the Mini.
A knob slot drives the control that is at that position on the page you are looking at. Slots 9 to 12 drive the controls on the four buttons.
MIDI Control
MIDI Control runs a controller function when a MIDI message of your choice arrives: a footswitch that changes the page, the pads of a small controller that open windows, or a button in a DAW that loads a preset. See also MIDI Control.
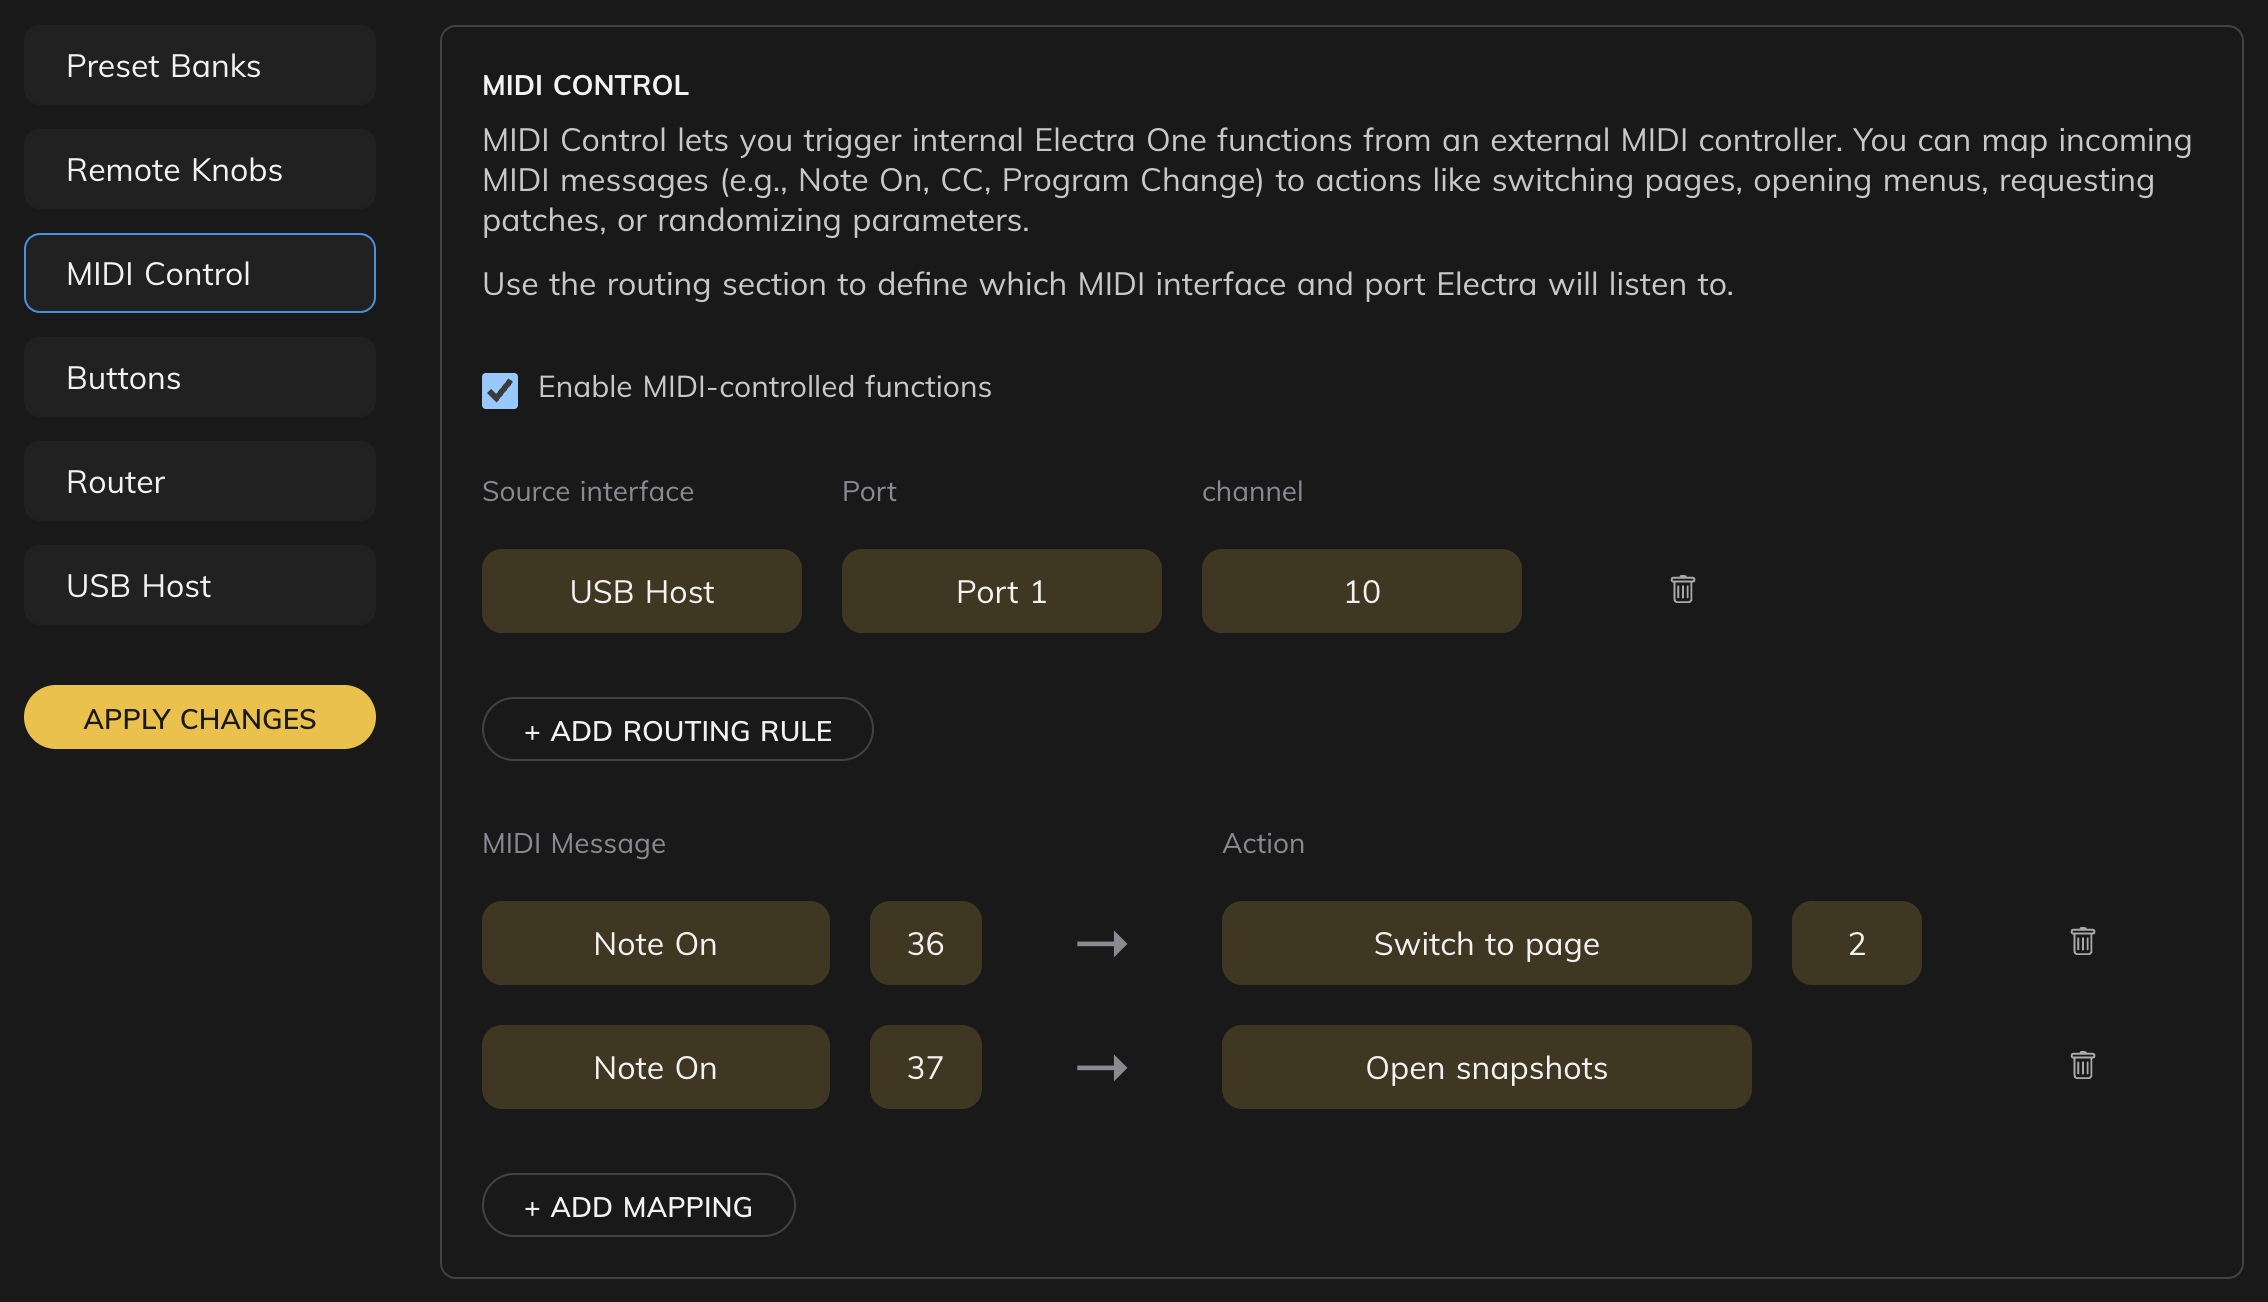
- Enable MIDI-controlled functions switches MIDI Control on and off.
- The routing rules choose the ports and channels MIDI Control listens to. Without a rule, nothing arrives.
- + Add Mapping adds a mapping: a MIDI Message (Note On, Note Off, Control Change or Program Change, with its number) and an Action.
Notes, Control Changes and Program Changes that match a mapping are used by MIDI Control and don't reach the preset, and neither does the Note Off of a key whose Note On runs an action. Everything else that arrives on a MIDI Control route reaches the preset as usual. A Control Change mapping runs its action for every value, so a footswitch that sends 127 when pressed and 0 when released runs it twice.
The actions for the Mini:
| Action | What it does |
|---|---|
| Open pages | opens the menu with page selection |
| Open presets | opens preset selection |
| Open snapshots, Open captures | opens the Snapshots or Captures window |
| Open functions | opens the Preset Menu |
| Open system | opens the Settings window |
| Close window | closes the window that is open |
| Next page, Previous page | shows the next or previous page that has controls |
| Switch to page | shows the page with the number you enter, 1 to 16, if it has controls |
| Next preset, Previous preset | loads the preset in the next or previous slot |
| Switch to preset | loads the preset with the number you enter: 1 to 8 are bank 1, 9 to 16 bank 2, and so on up to 40 |
| Toggle sensitivity | switches low knob sensitivity on or off |
| Request patch | sends the preset's patch request |
| Open detail, Close detail | opens the detail window of the control whose knob is touched at that moment, or closes it |
| Set default value | sets the selected value of the touched control to its default value |
| Next handle, Previous handle | selects the next or previous value of the touched multi-value control |
| Set default values | sets every control to its default value |
| Randomize values | gives every control a random value |
The Mini also reacts to messages on its CTRL port without any mapping: Program Changes switch presets, or snapshots after a Bank Select, Control Changes morph snapshots, and notes start captures and transpose them. See The CTRL port.
Buttons
The Buttons section sets what [BUTTON 1] to [BUTTON 4] do in the Controller context and the Control context.
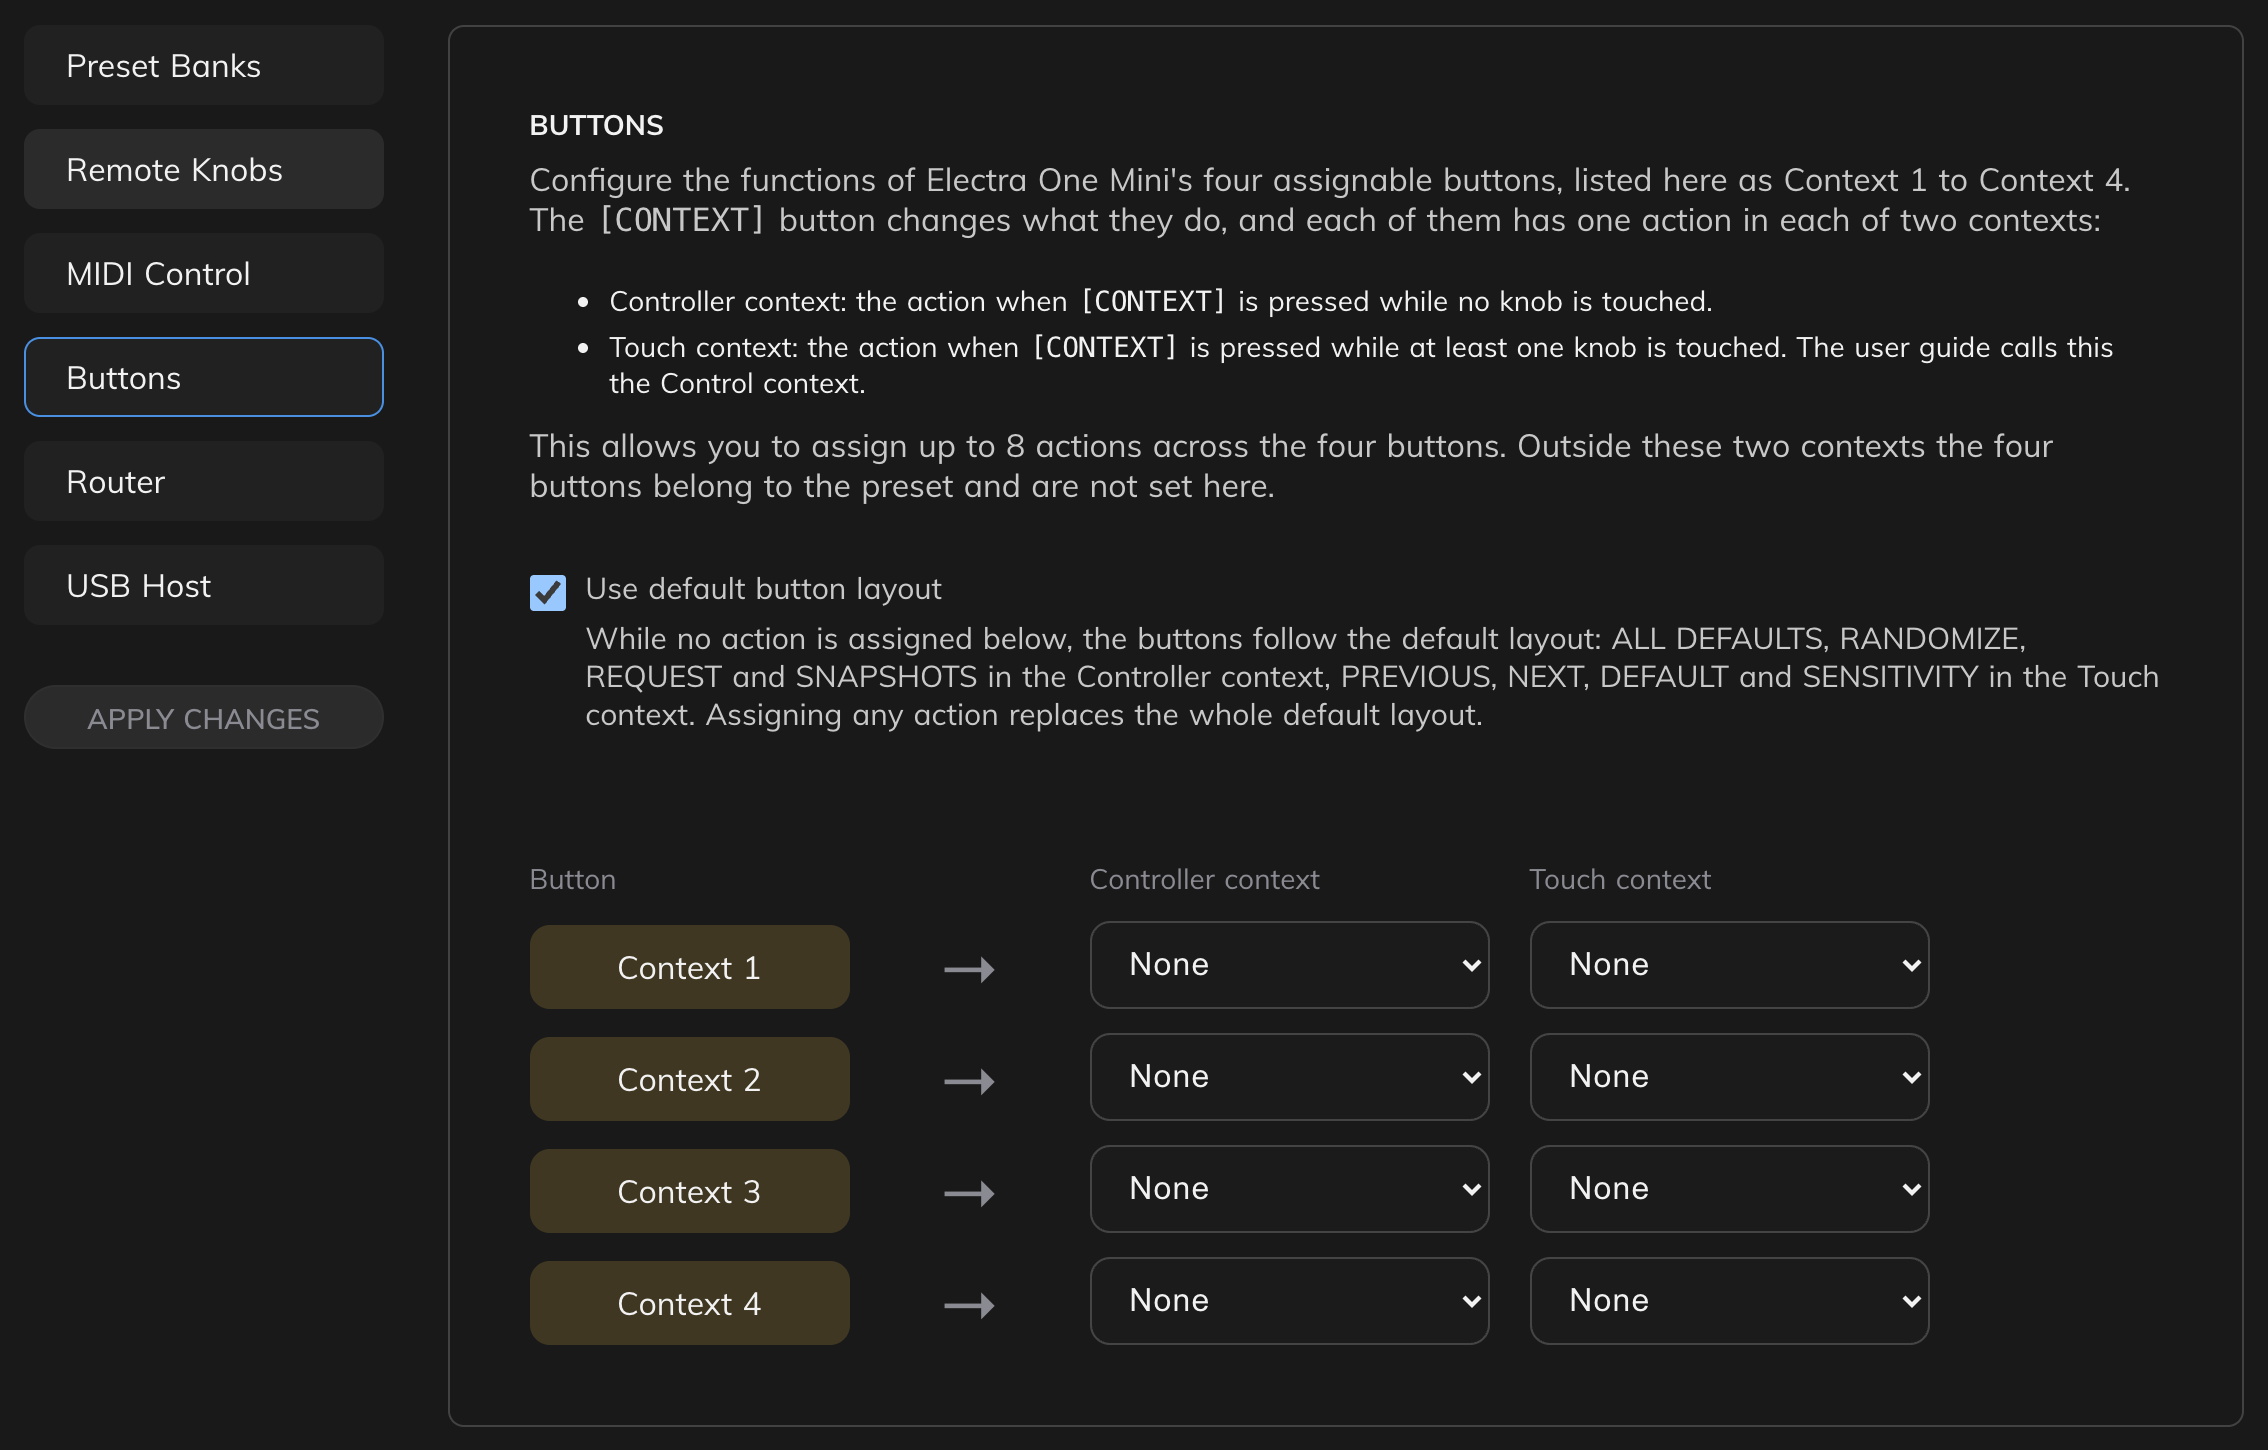
- Use default button layout: while no action is assigned, the buttons use the default layout:
ALL DEFAULTS,RANDOMIZE,REQUESTandSNAPSHOTSin the Controller context,PREVIOUS,NEXT,DEFAULTandSENSITIVITYin the Control context. Switch it off to have no actions at all. - Context 1 to Context 4 are
[BUTTON 1]to[BUTTON 4]. - Controller context is the action when
[CONTEXT]is pressed without touching a knob. - Touch context is the action when
[CONTEXT]is pressed while a knob is touched. This manual calls it the Control context.
Choosing any action replaces the whole default layout: the buttons you leave at None do nothing. The actions you can choose are listed in Choosing the actions.
On the page, without a context, the four buttons always belong to the preset's controls; they are set in the Preset Editor.
Router
The router passes MIDI messages between the Mini's interfaces: the USB Host port, the USB Device port (your computer) and the MIDI IO sockets. How it works is explained in Router.
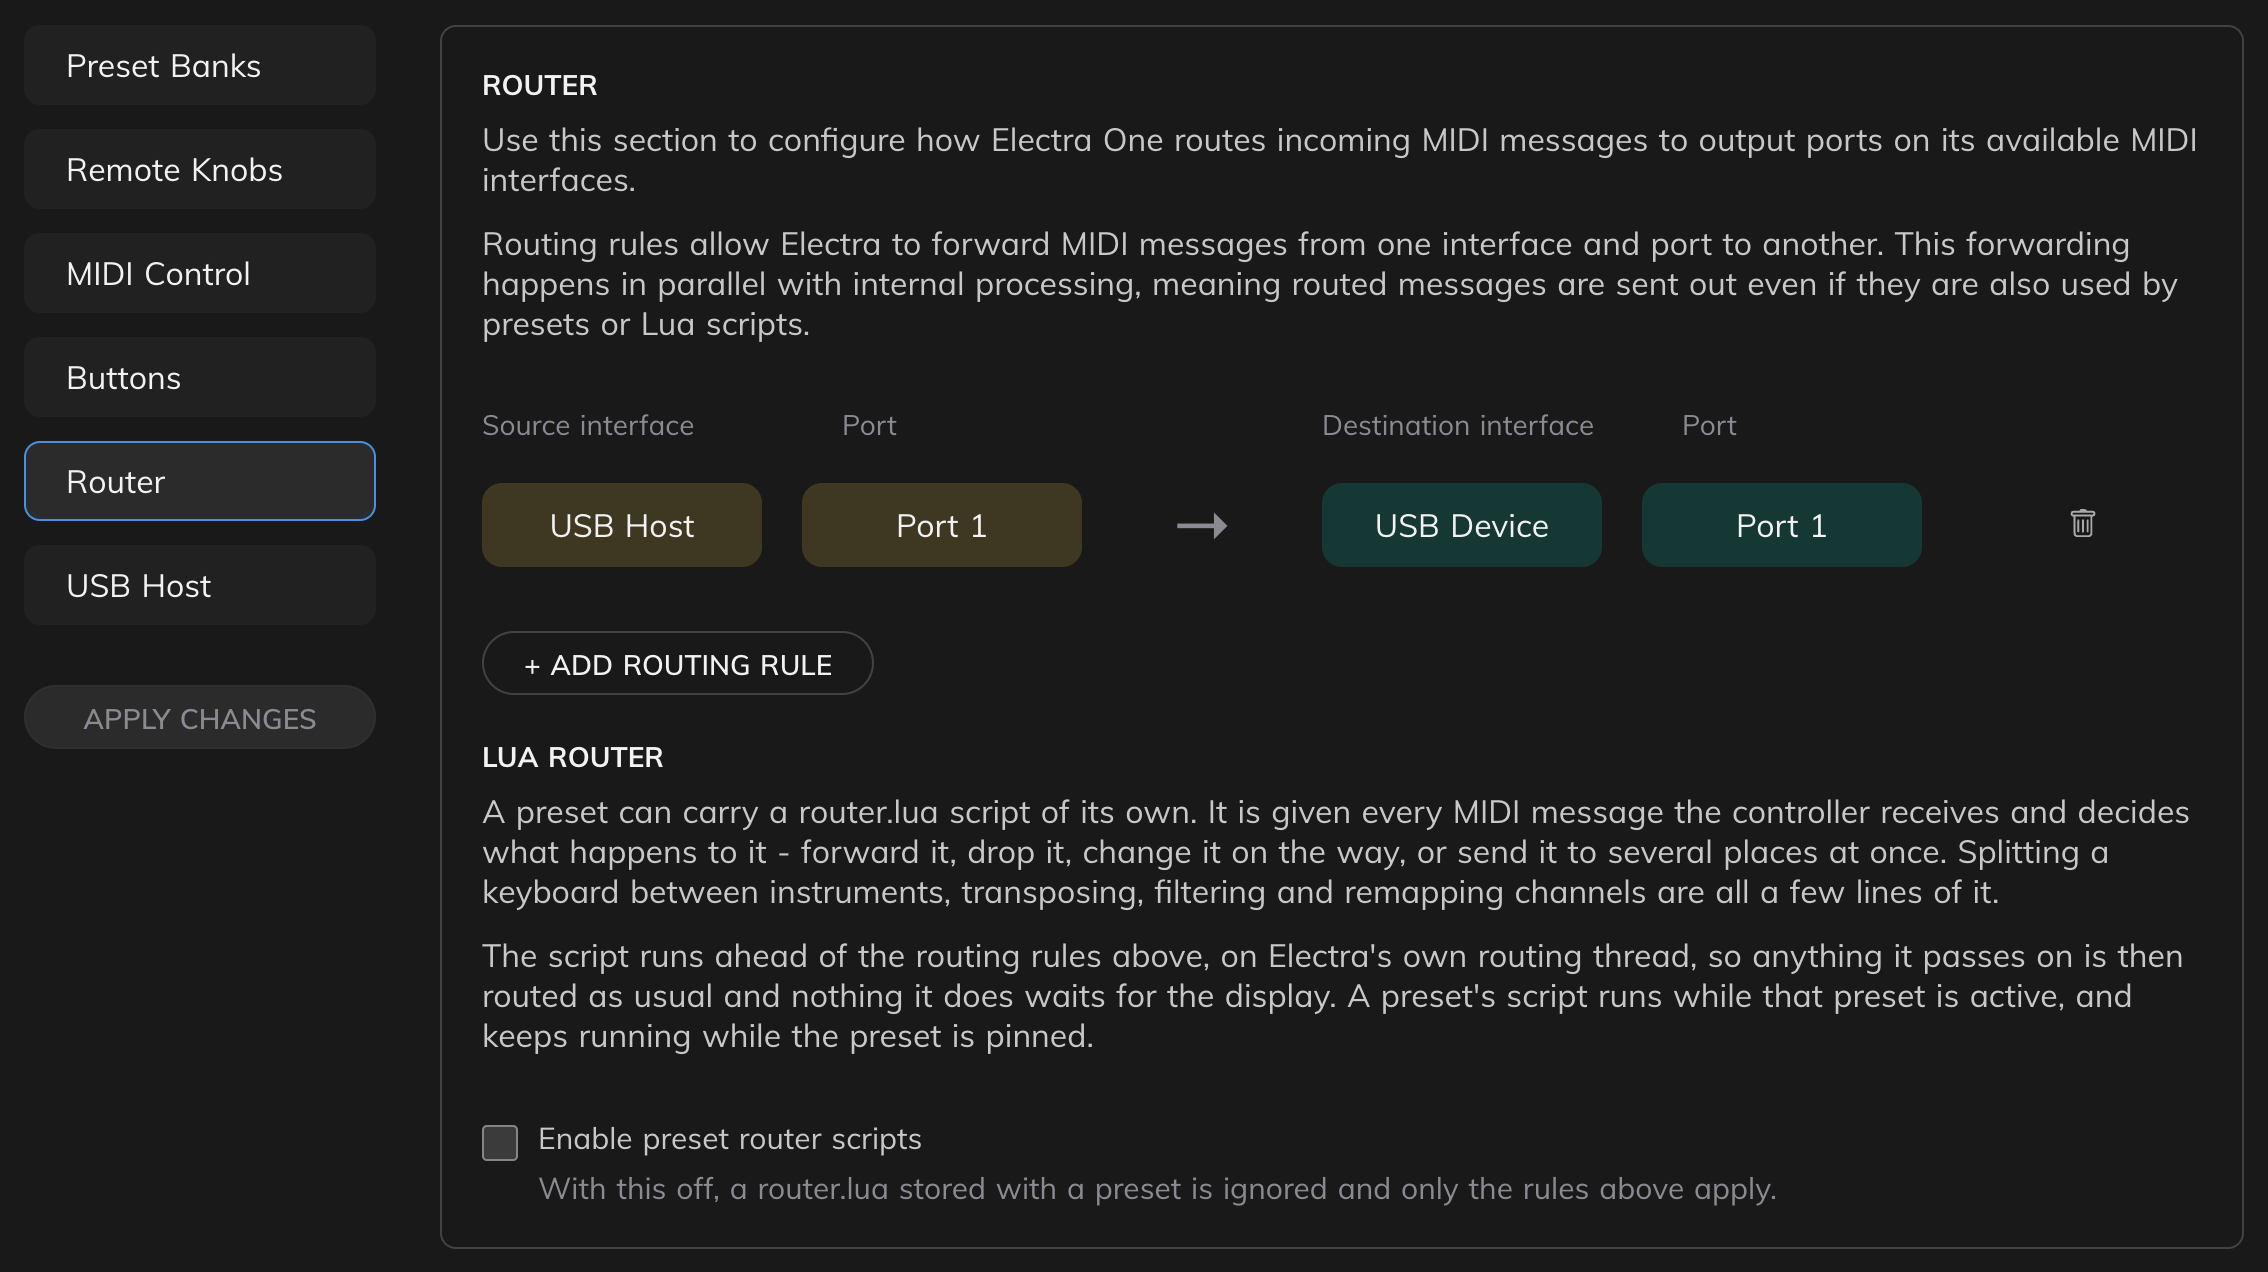
Each routing rule takes messages from a source interface and port, and passes them to a destination interface and port. + Add routing rule adds a rule.
The Mini has one pair of MIDI sockets, so a rule that sends to MIDI IO always uses Port 1; the destination port can't be changed.
Enable preset router scripts allows presets to run a router script that filters and changes the messages passing through the router.
USB Host
The USB Host section decides which of the Mini's ports a USB MIDI device on the <USB HOST> port uses. This lets presets and routes tell two devices apart.
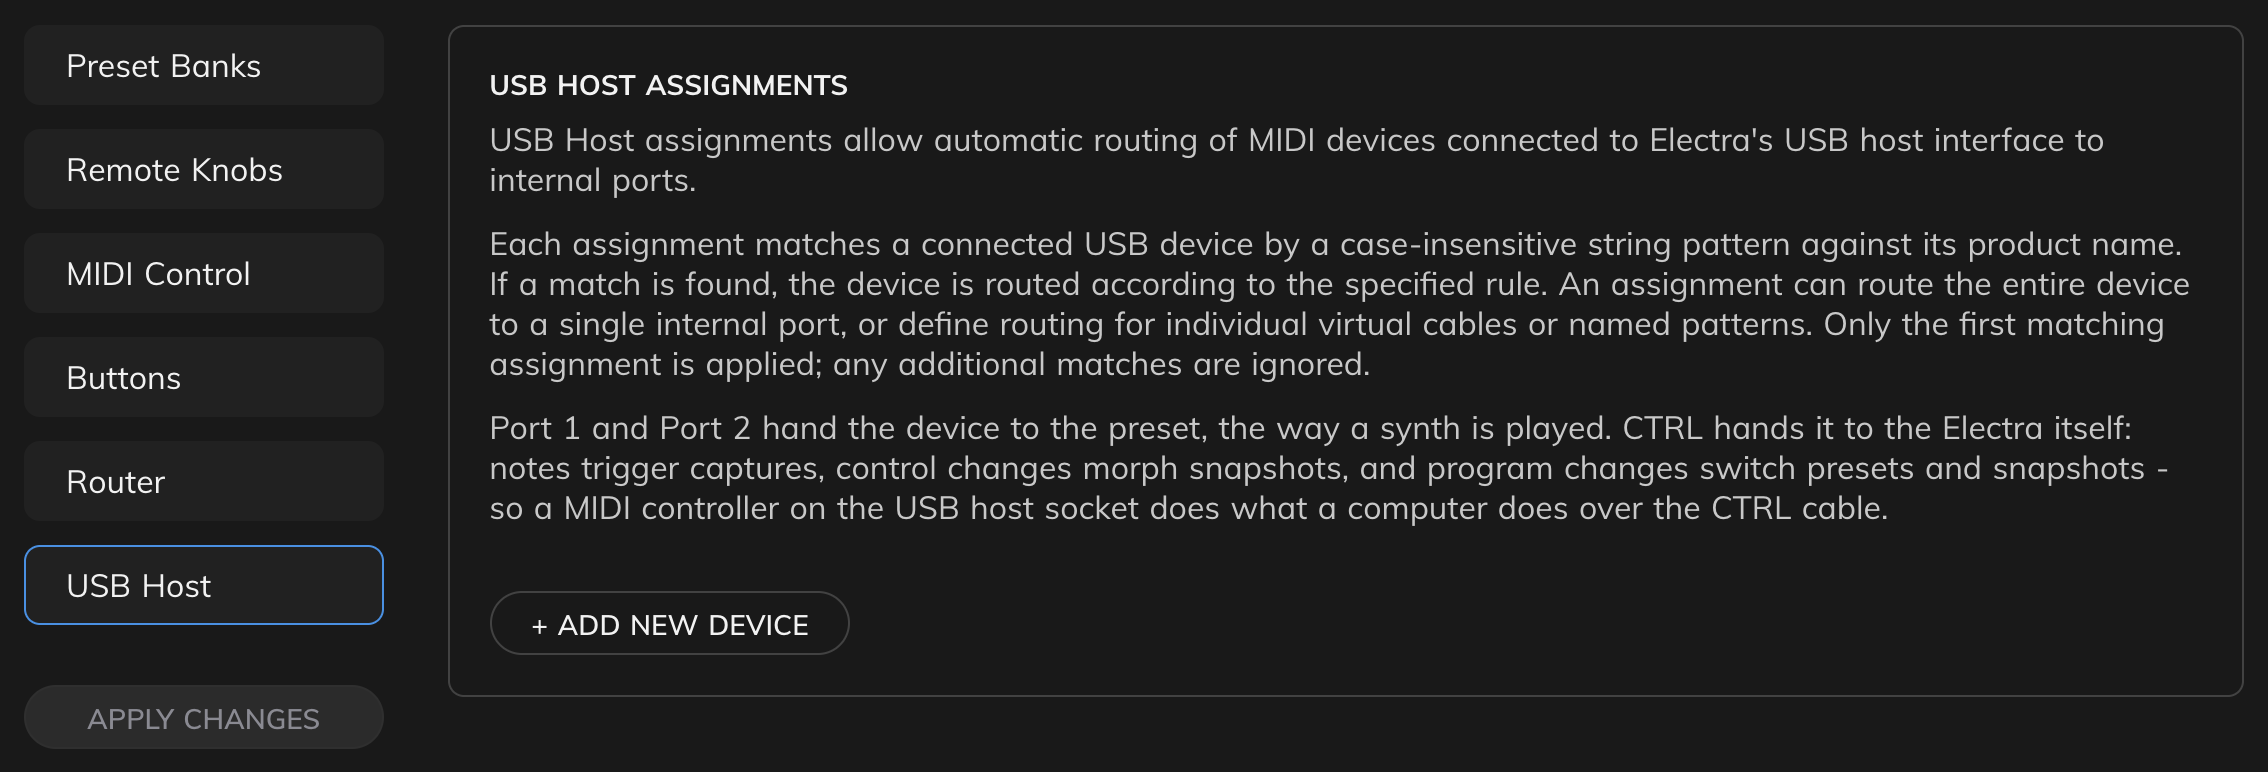
+ Add new device adds an assignment:
- The assignment matches a device whose product name, the name the status bar shows, contains the text you enter. The match ignores upper and lower case.
- It sends the whole device to one port, or sets a port for each of the device's virtual cables (counted from 0) or named ports. A cable that the assignment does not list is not used.
- Only the first assignment that matches a device is used.
- A device that no assignment matches uses Port 1.
- Assignments apply when the device is plugged in.
The ports mean:
- Port 1 and Port 2: the device's messages go to the preset, the way an instrument's messages do.
- CTRL: the device's messages go to the controller itself, as if they came from the computer's CTRL port. Notes start captures, Control Changes morph snapshots, and Program Changes switch presets and snapshots. See The CTRL port.
The Mk2 manual describes how devices are detected and assigned in more detail: USB Host.
System
Hold [MENU] for one second. The Settings window opens while you are still holding the button.
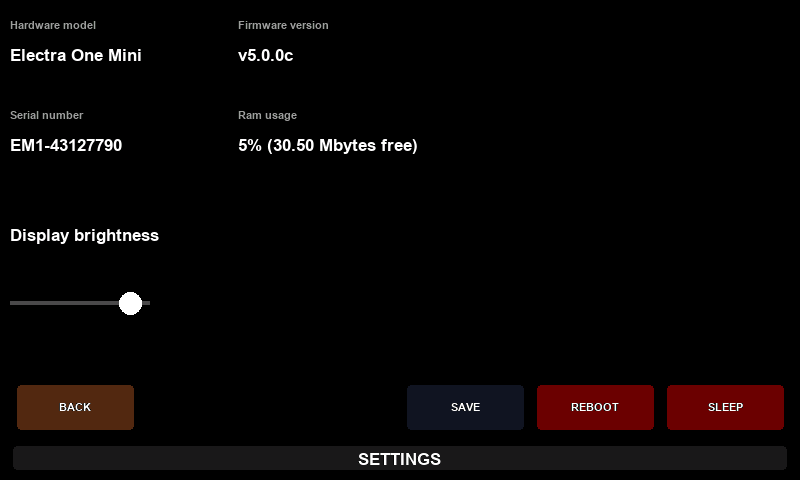
It shows:
| Item | What it shows |
|---|---|
| Hardware model | Electra One Mini |
| Serial number | the controller's serial number, starting with EM1 |
| Firmware version | the version of the firmware the controller runs |
| Ram usage | how much memory is used, and how many megabytes are free |
| Display brightness | a slider for the brightness of the display |
The buttons, from the left:
| Button | Label | What it does |
|---|---|---|
[MENU] | BACK | closes the window |
[CONTEXT], [BUTTON 1] | – | close the window |
[BUTTON 2] | SAVE | saves the state of the controller |
[BUTTON 3] | REBOOT | restarts the controller |
[BUTTON 4] | SLEEP | puts the controller to sleep |
SAVE, REBOOT and SLEEP act when you let go of the button, and they don't ask for confirmation. Pressing a knob closes the window.
SLEEP is described in Power On & Sleep Mode.
Display Brightness
Turn KNOB 5 to change the brightness. The display follows as you turn. The brightness is saved when you close the window, press SAVE or press REBOOT.
Save
SAVE saves the controller's state at once, and the window stays open:
- the configuration and settings,
- the display brightness,
- which presets are pinned.
A pinned preset keeps running in the background after you switch to another preset. Pins are not saved automatically: pin the presets you want, press SAVE, and they are started and pinned again every time the controller starts.
The saved pins belong to the slots. If you store a different preset in a pinned slot, by sending one from the Electra One app or by deleting the preset in it, the slot is unpinned and removed from the list.
The Electra One app has the same function, Save state, in its Preset slots tab.
Reboot
REBOOT restarts the controller. Before it restarts, it closes the database, saves the brightness, and saves the values of the presets if the configuration keeps them across restarts (Restore preset values on start-up). It does not save pins: press SAVE first if you changed them.
After the restart, the preset you used last is loaded again. The controller remembers it every time you switch presets.
The configuration in the Electra One app
Everything except the System window is set in the Electra One app:
- Connect the Mini to your computer with a USB cable.
- Open the Electra One app at app.electra.one and sign in.
- Open the Controller page and choose the Configuration tab.
The app reads the configuration from the controller when the page opens. The sections are listed on the left.
When you change something, APPLY CHANGES becomes available. Click it to send the whole configuration to the controller. The new settings apply at once; the controller doesn't need to restart. USB Host assignments are the exception: they apply when the device is plugged in again.
The Configuration tab is available while a controller is connected.
The app arranges the Mini's configuration in six sections: Preset Banks, Remote Knobs, MIDI Control, Buttons, Router and USB Host. The Mk2's seventh section, User Interface, is not shown for the Mini.